


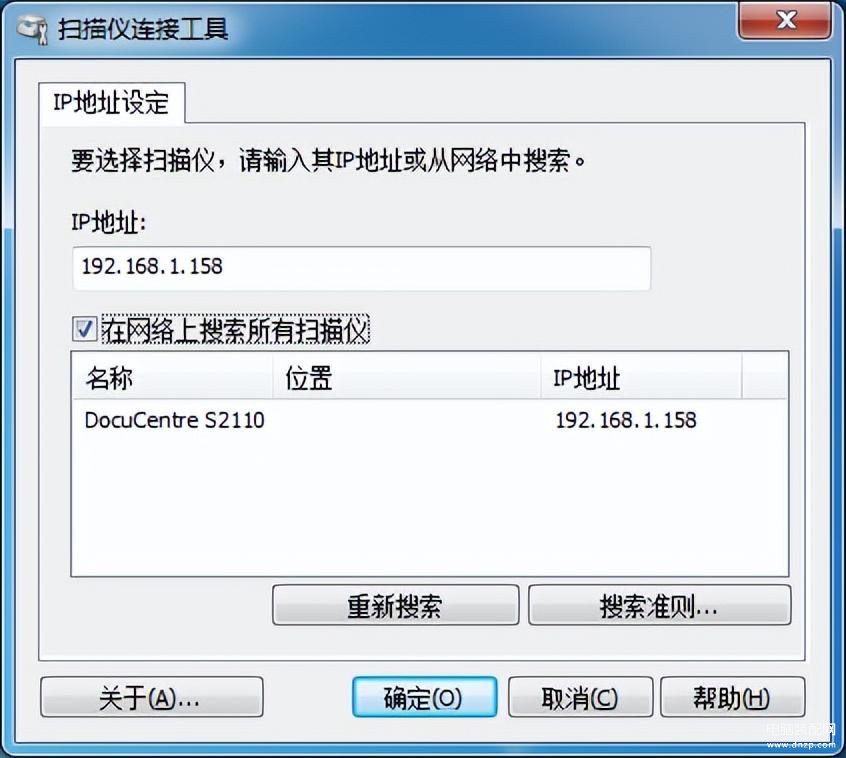
1、设置好复印机的IP地址
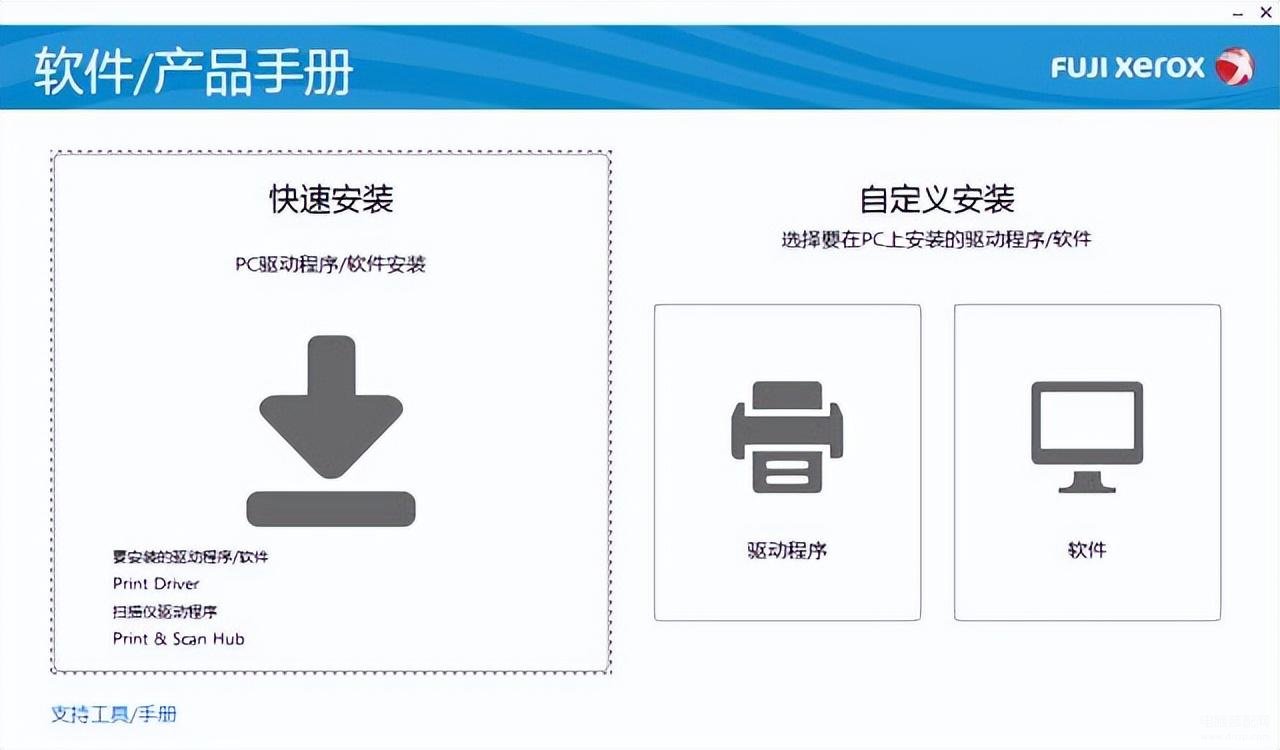
2、安装驱动光盘里的软件
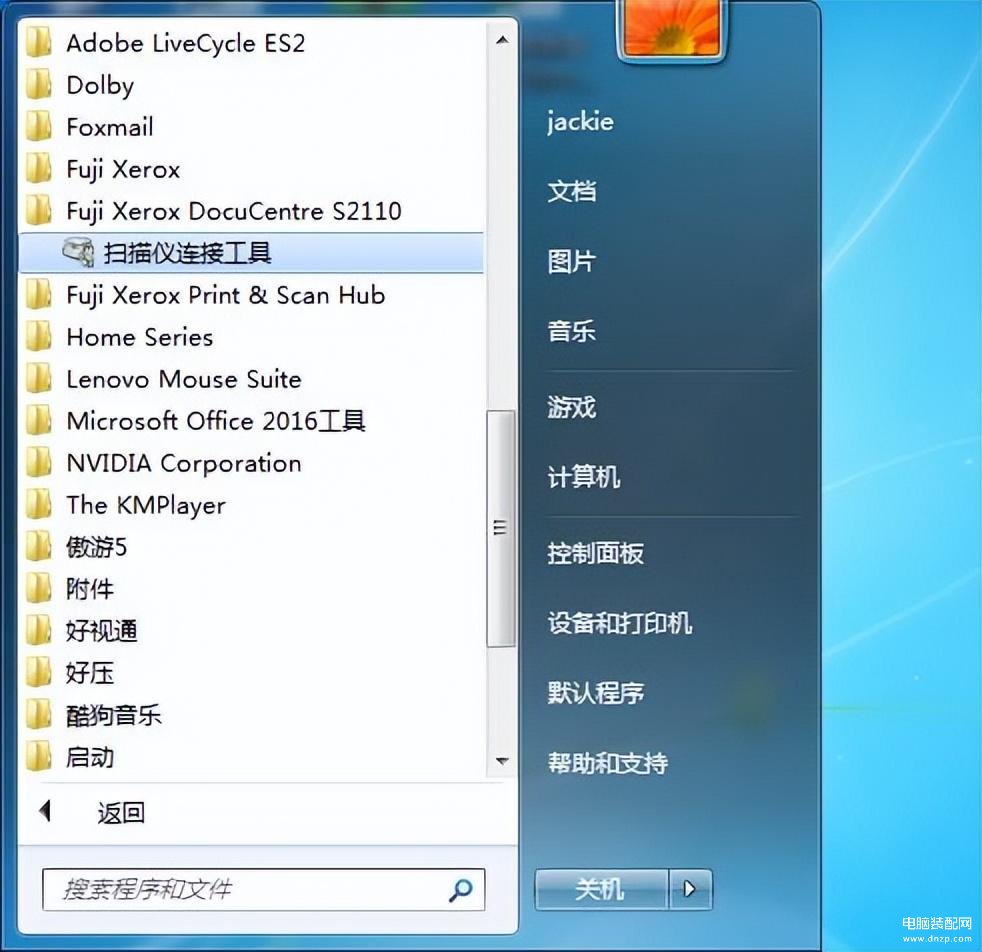
3、驱动安装完毕后,运行扫描仪联接程序
4、搜索扫描仪,选中后按确定。
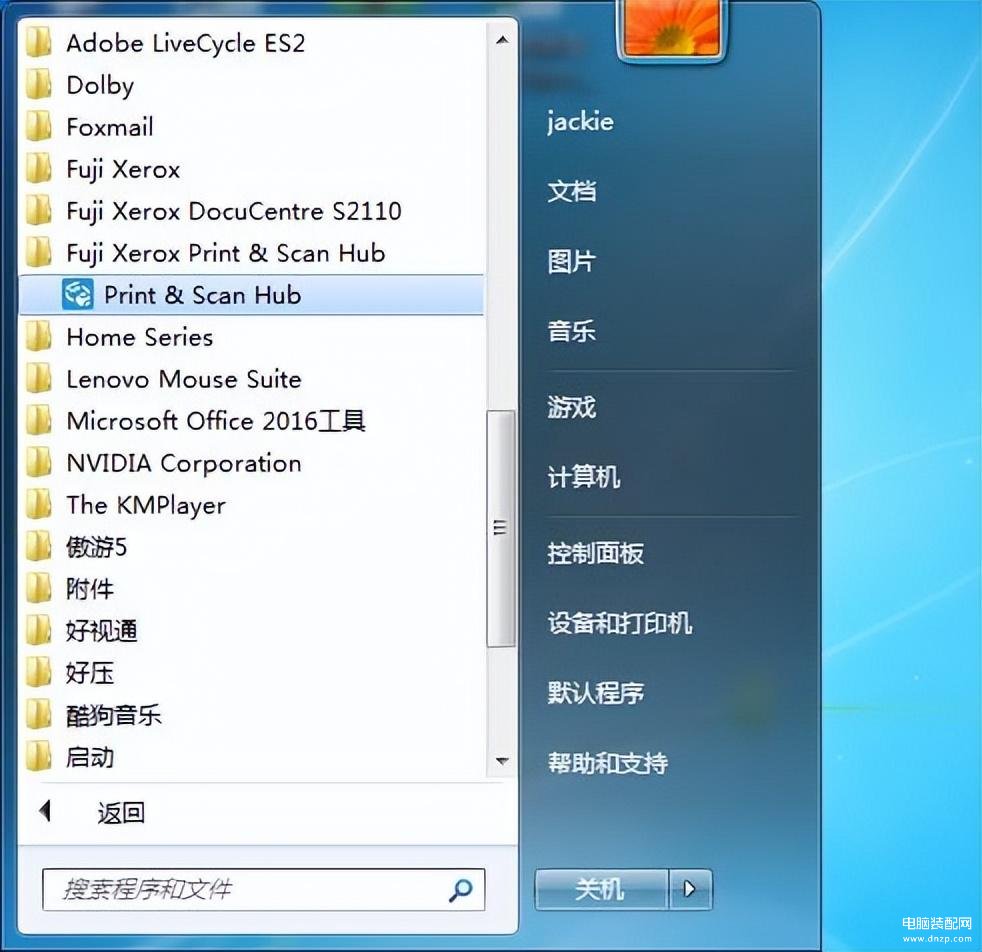
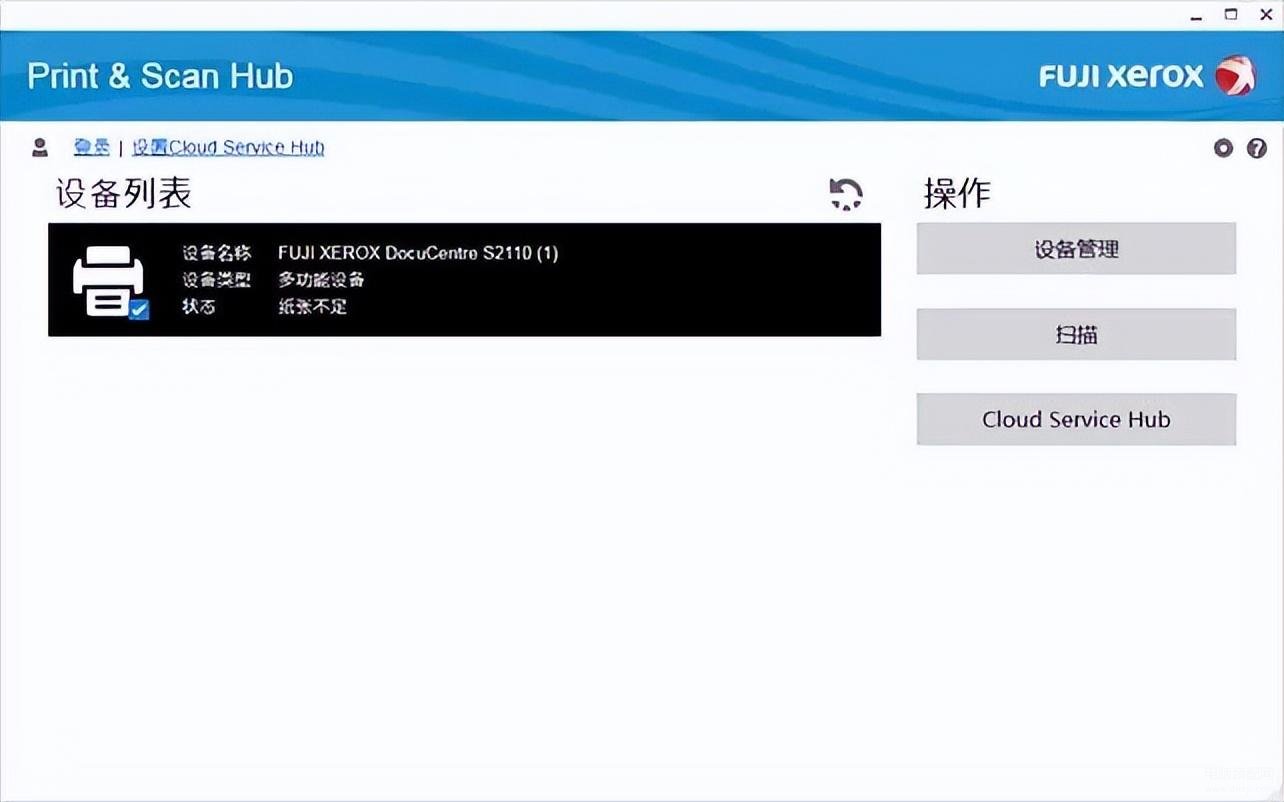
5、运行扫描和打印中心
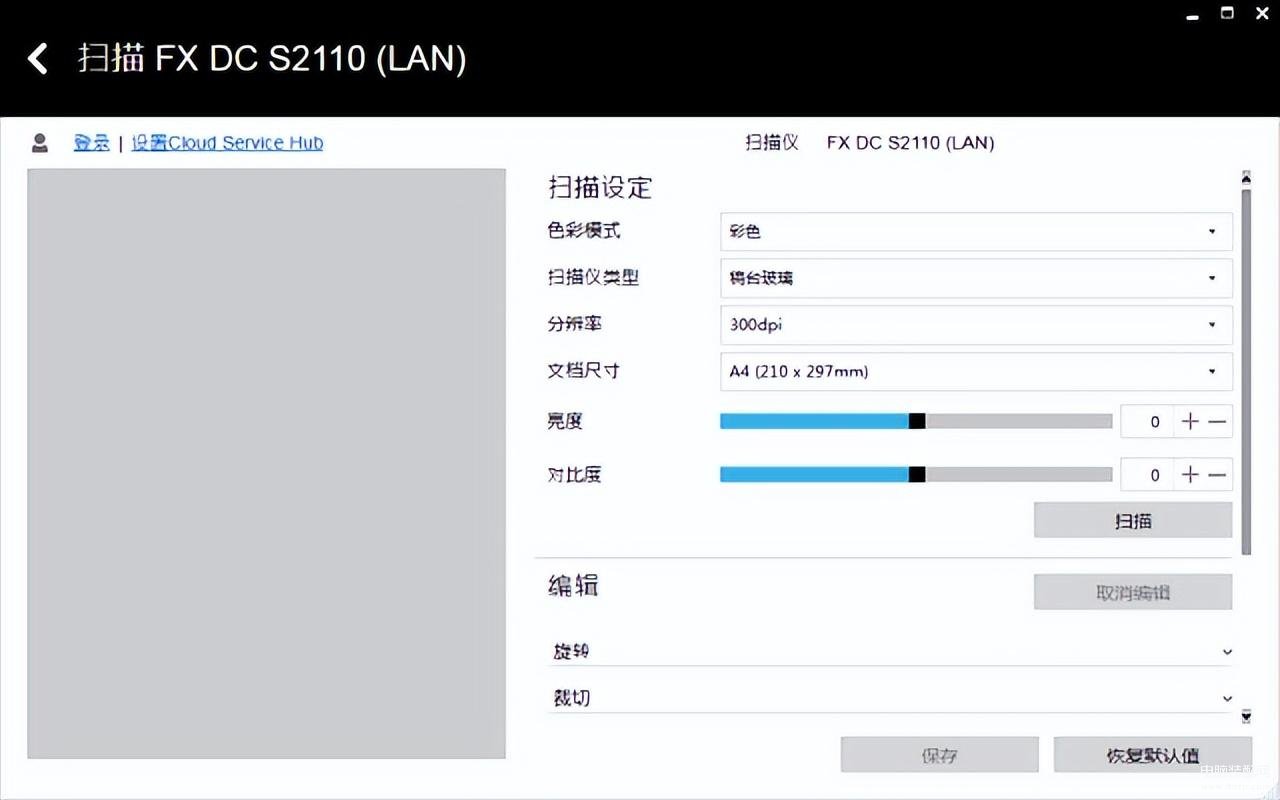
6、运行软件,选择扫描功能
7、放好原稿(原稿必须短边进纸),并选择扫描
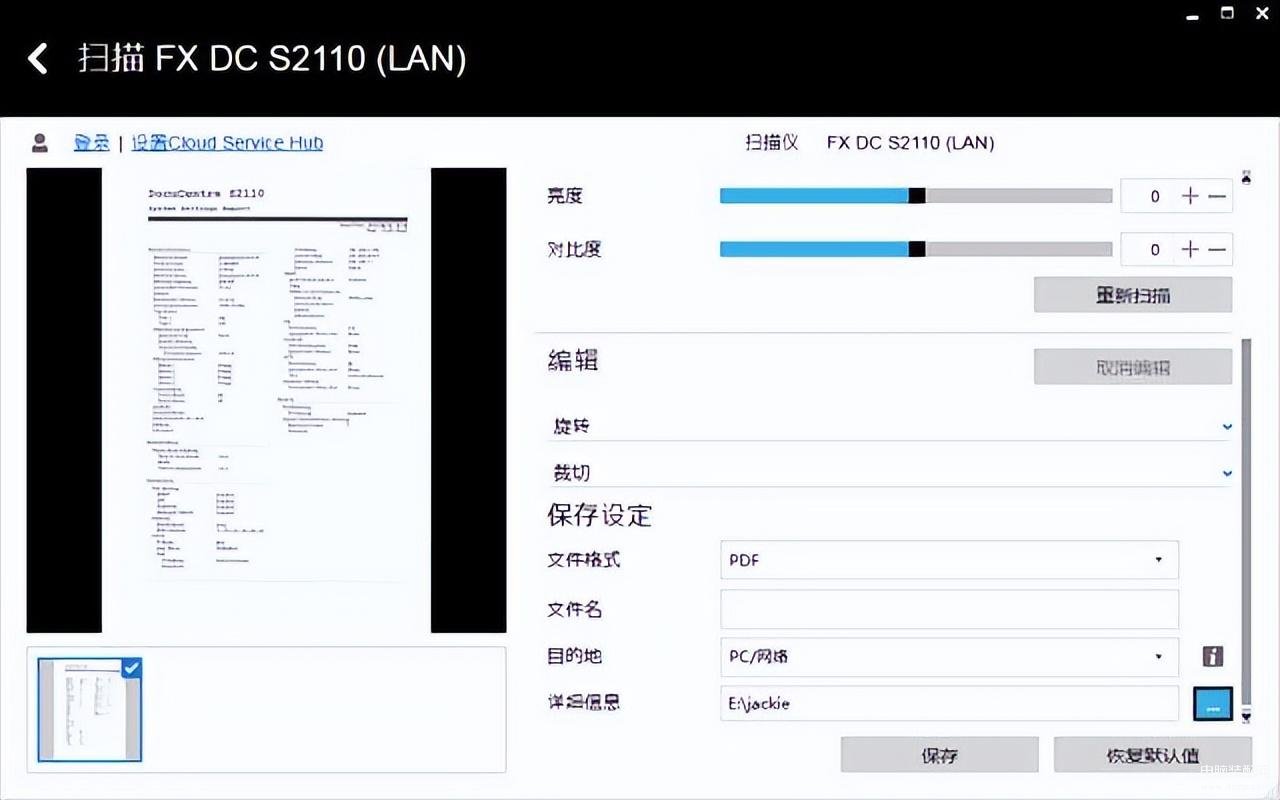
8、文件扫描完成后,选中文件并选择文件的各式和存储的位置,并保存即可。
1、设置好复印机的IP地址
2、安装驱动光盘里的软件
3、驱动安装完毕后,运行扫描仪联接程序
4、搜索扫描仪,选中后按确定。
5、运行扫描和打印中心
6、运行软件,选择扫描功能
7、放好原稿(原稿必须短边进纸),并选择扫描
8、文件扫描完成后,选中文件并选择文件的各式和存储的位置,并保存即可。
本文链接:https://www.dnzp.com/zn/202302/98638.html『转载请注明出处』