前言:
情况是这样的,前段时间一个小伙伴开的小卖铺店铺的显示器因为雷暴天气,光荣阵亡,关键是这个显示屏不仅能显示监控内容,还是他斗地主的“主场”,所以找到我寻求一款便宜又好的显示器。
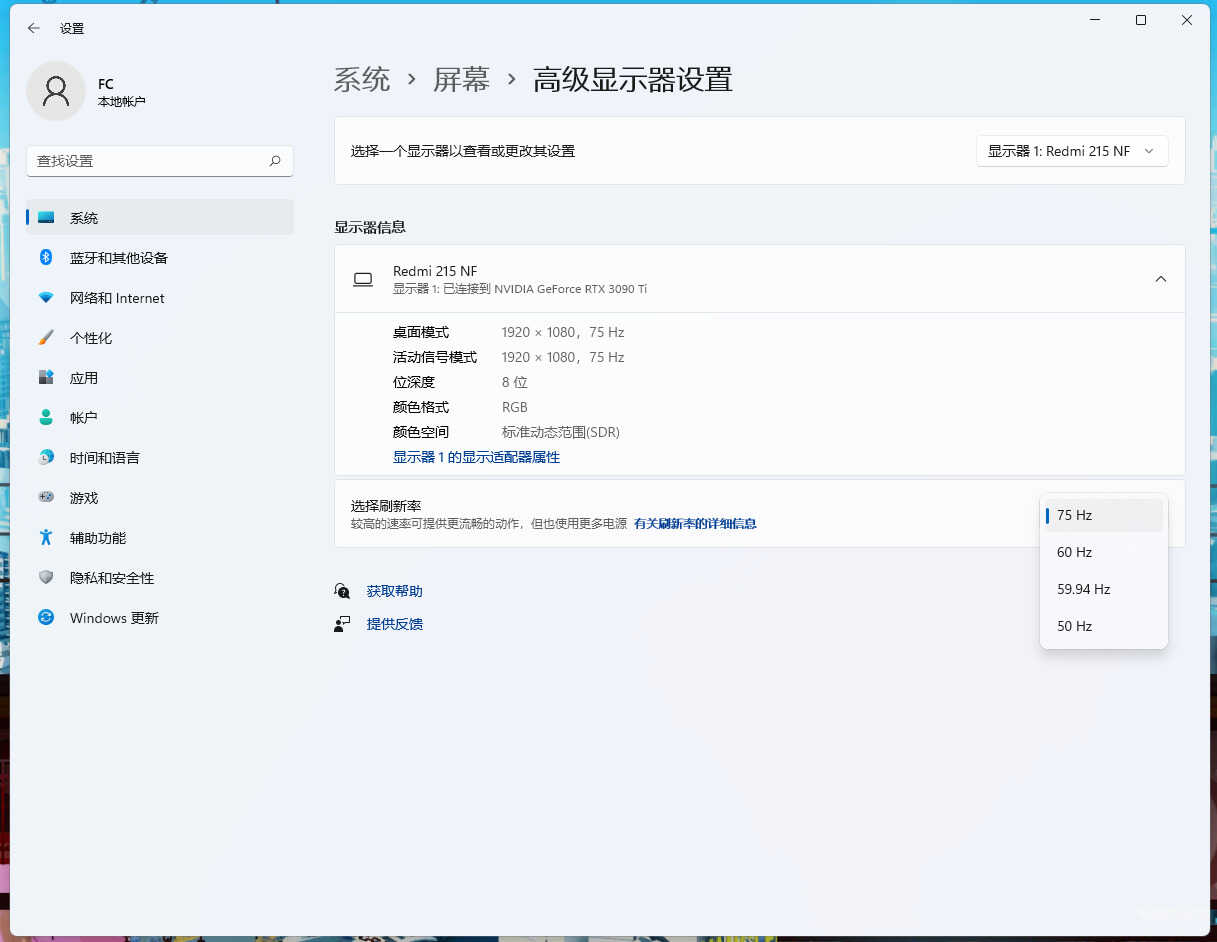
我也到某宝和某东转了一圈,发现某宝带双接口的21.5~22英寸的显示器大概在300左右;而某东则是酷开和红米的21.5英寸显示器性价比最高(都是VGA+HDMI双接口、屏幕刷新率为75Hz)。其中酷开的21.5显示器最低只要339,而红米显示器贵了30元,售价为369。但是,红米的显示器保修为三年,酷开的仅为一年,所以我毫不犹豫地入手了红米。刚好周末到货,我也上手体验了一番,看看369元入手的显示器究竟好不好用?
开箱:
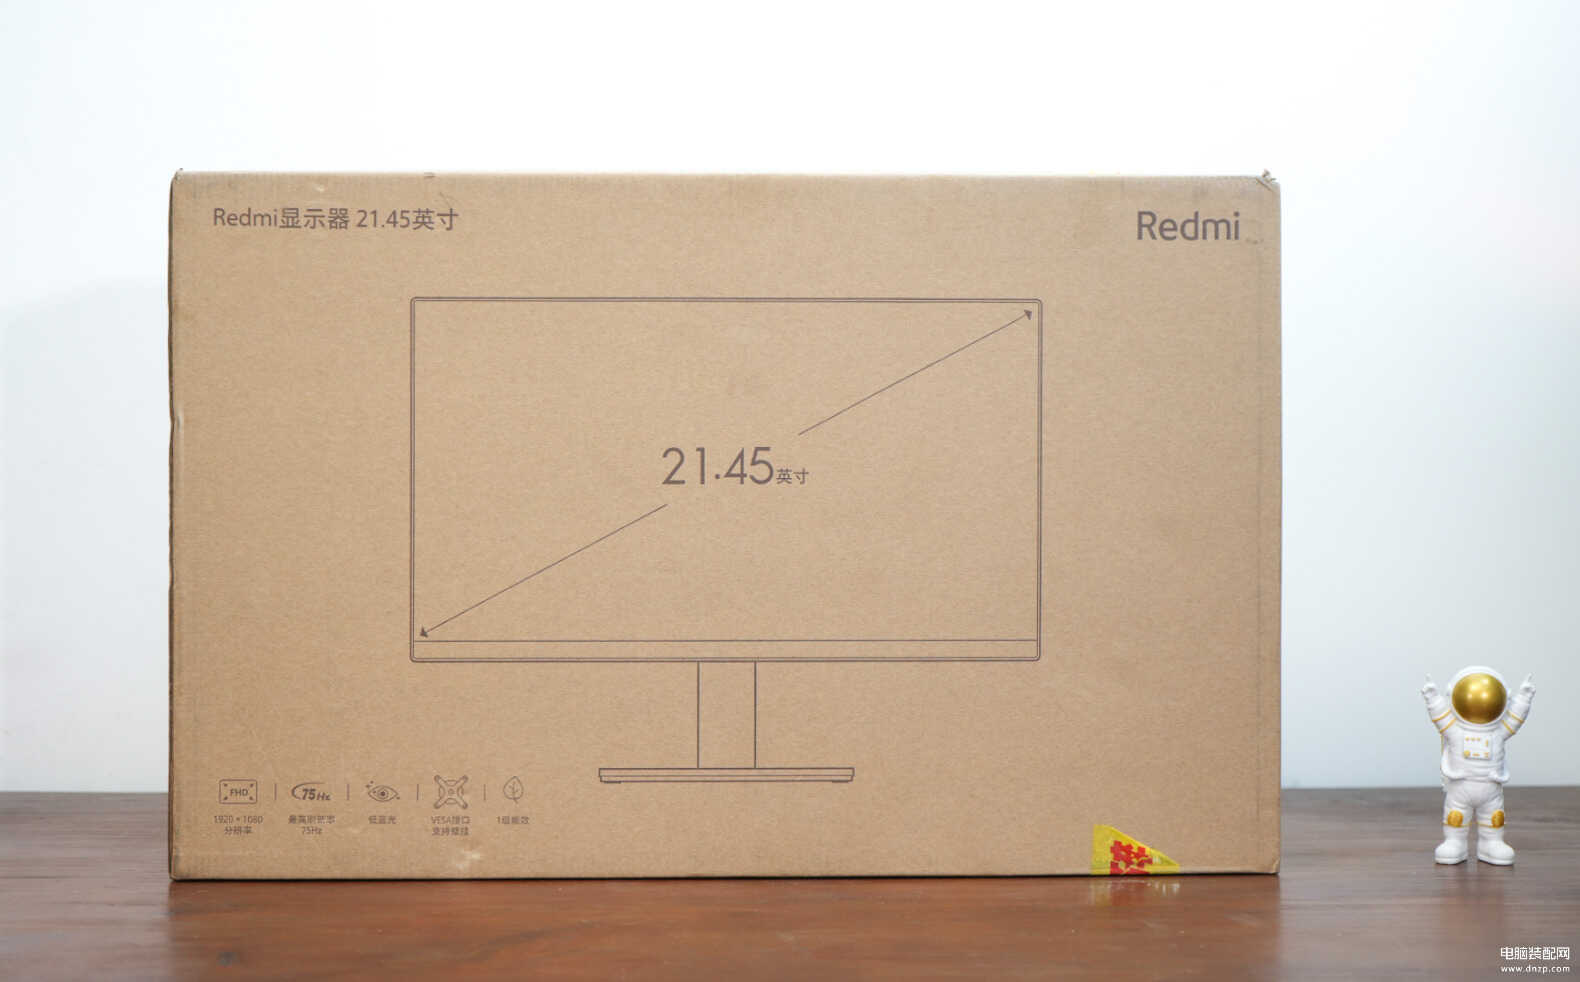
某东发货速度很快,可能是对自己的物流有信心,直接就是原厂包装发货,不过弄的外包装另一侧都是胶带就有点不美观。红米这款显示器的具体尺寸为21.45英寸,外包装的设计方面非常简约,产品的特性都被标明在左下角,如1080P的分辨率、75Hz屏幕刷新率、低蓝光模式、VESA接口、一级能耗。
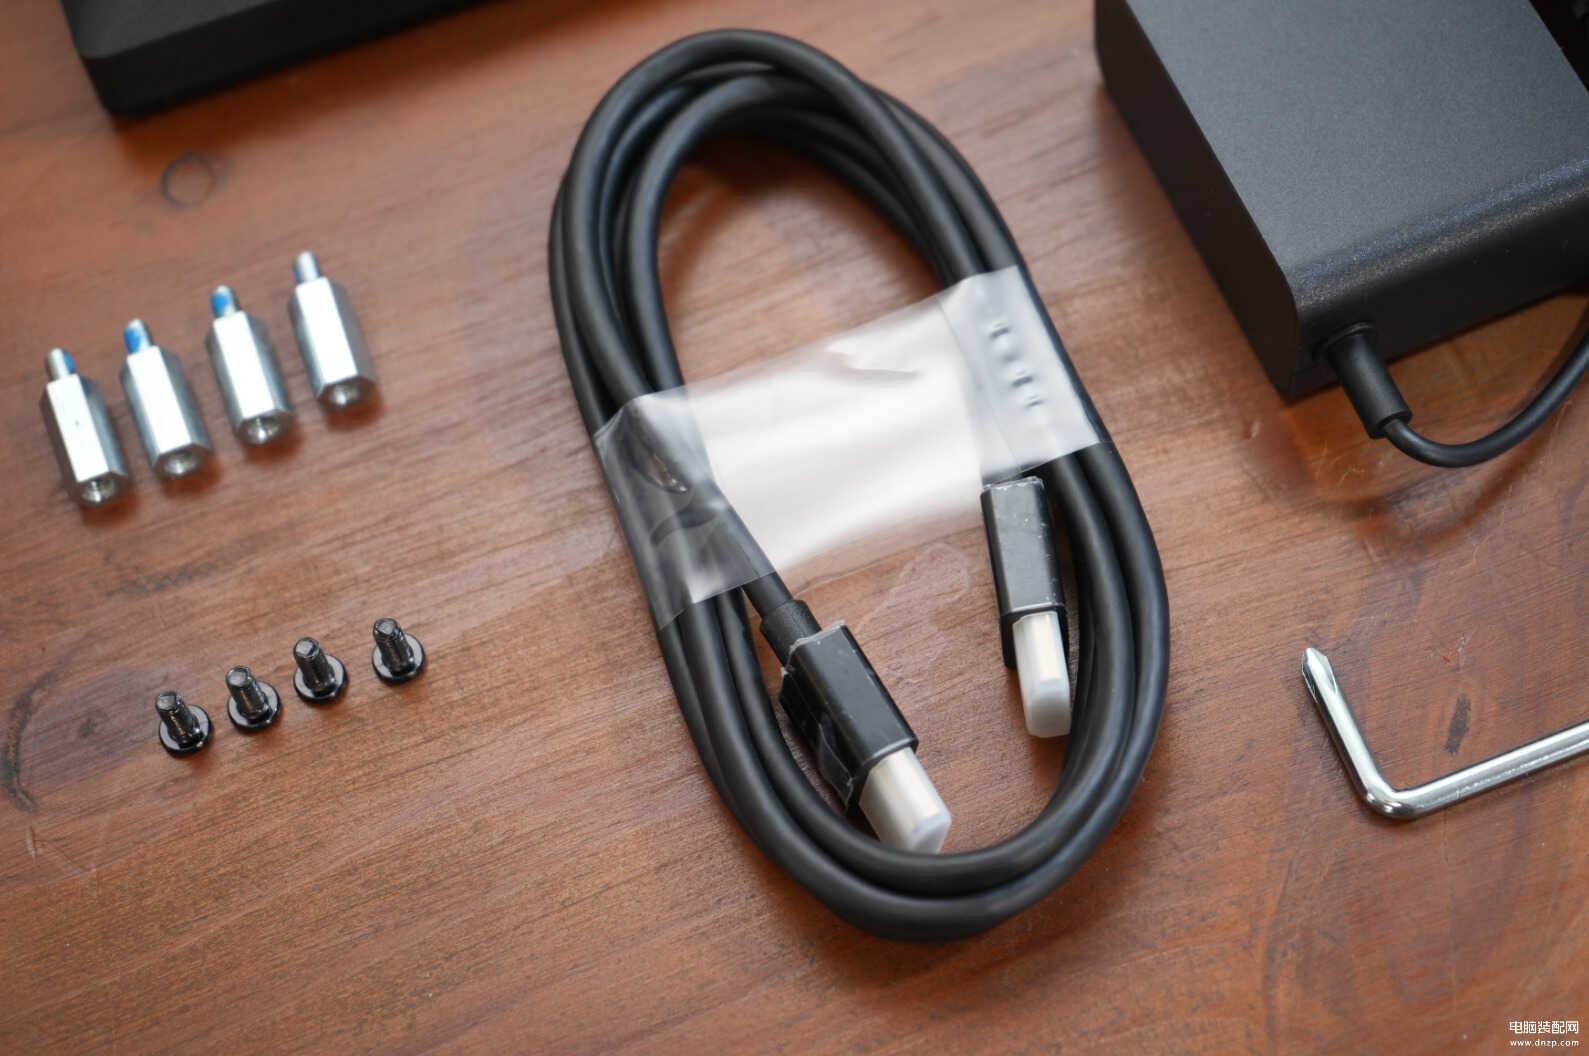
开箱配件还不少,包括显示器、支架、底座、HDMI、VESA螺丝、螺丝刀、电源适配器、说明书。
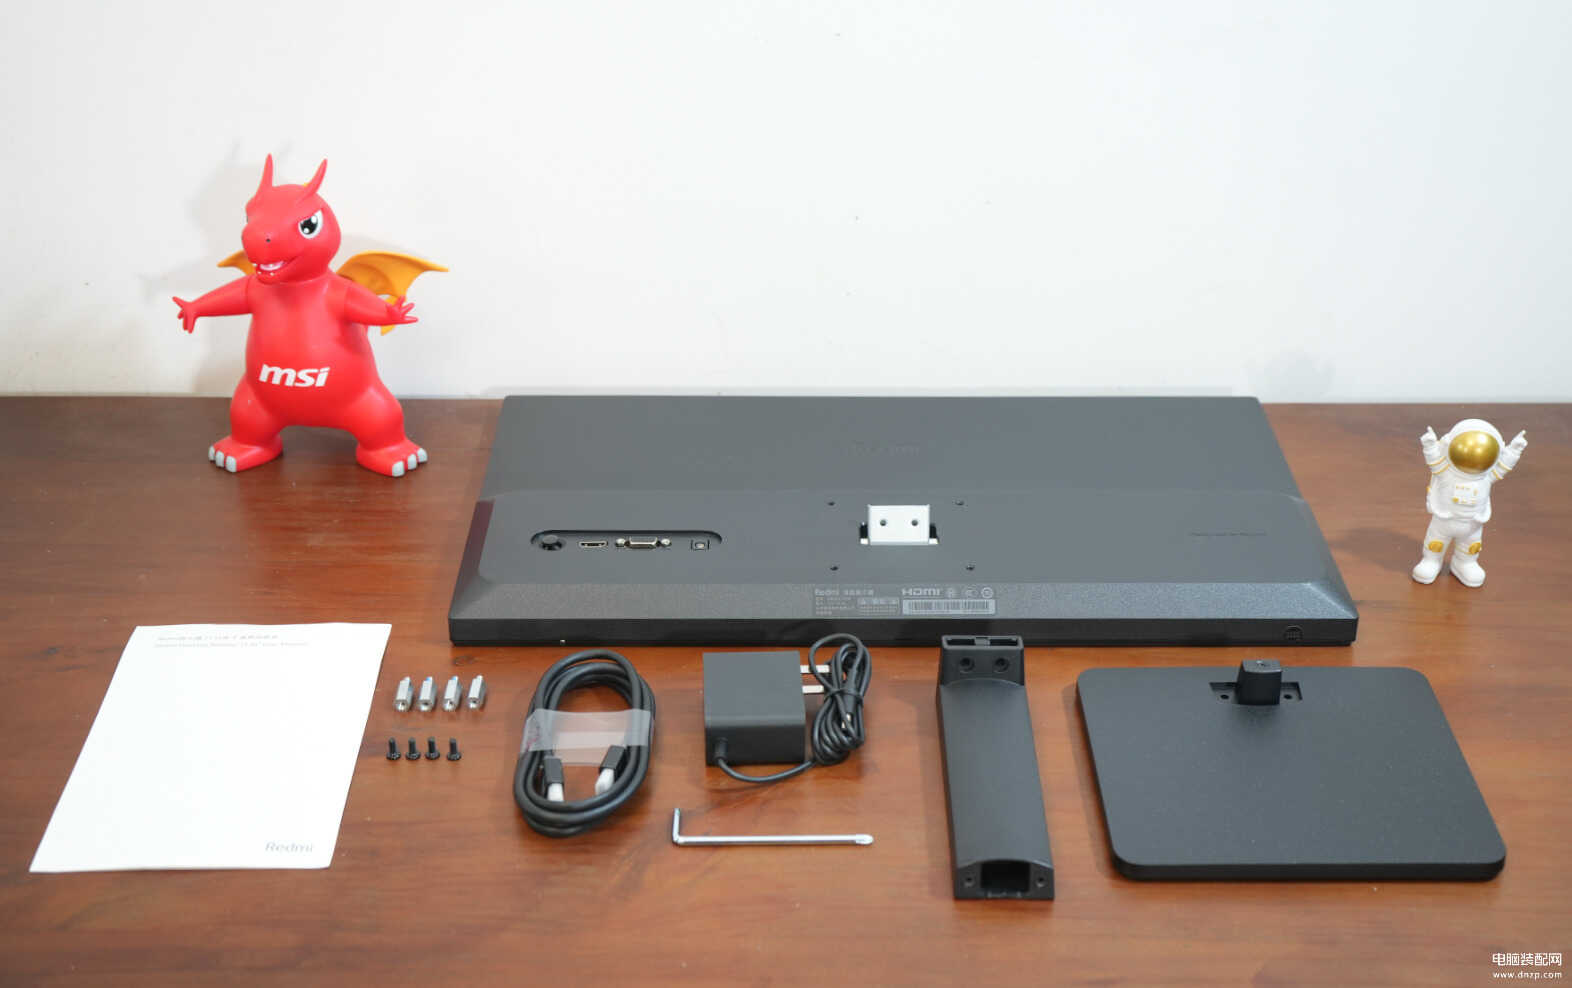
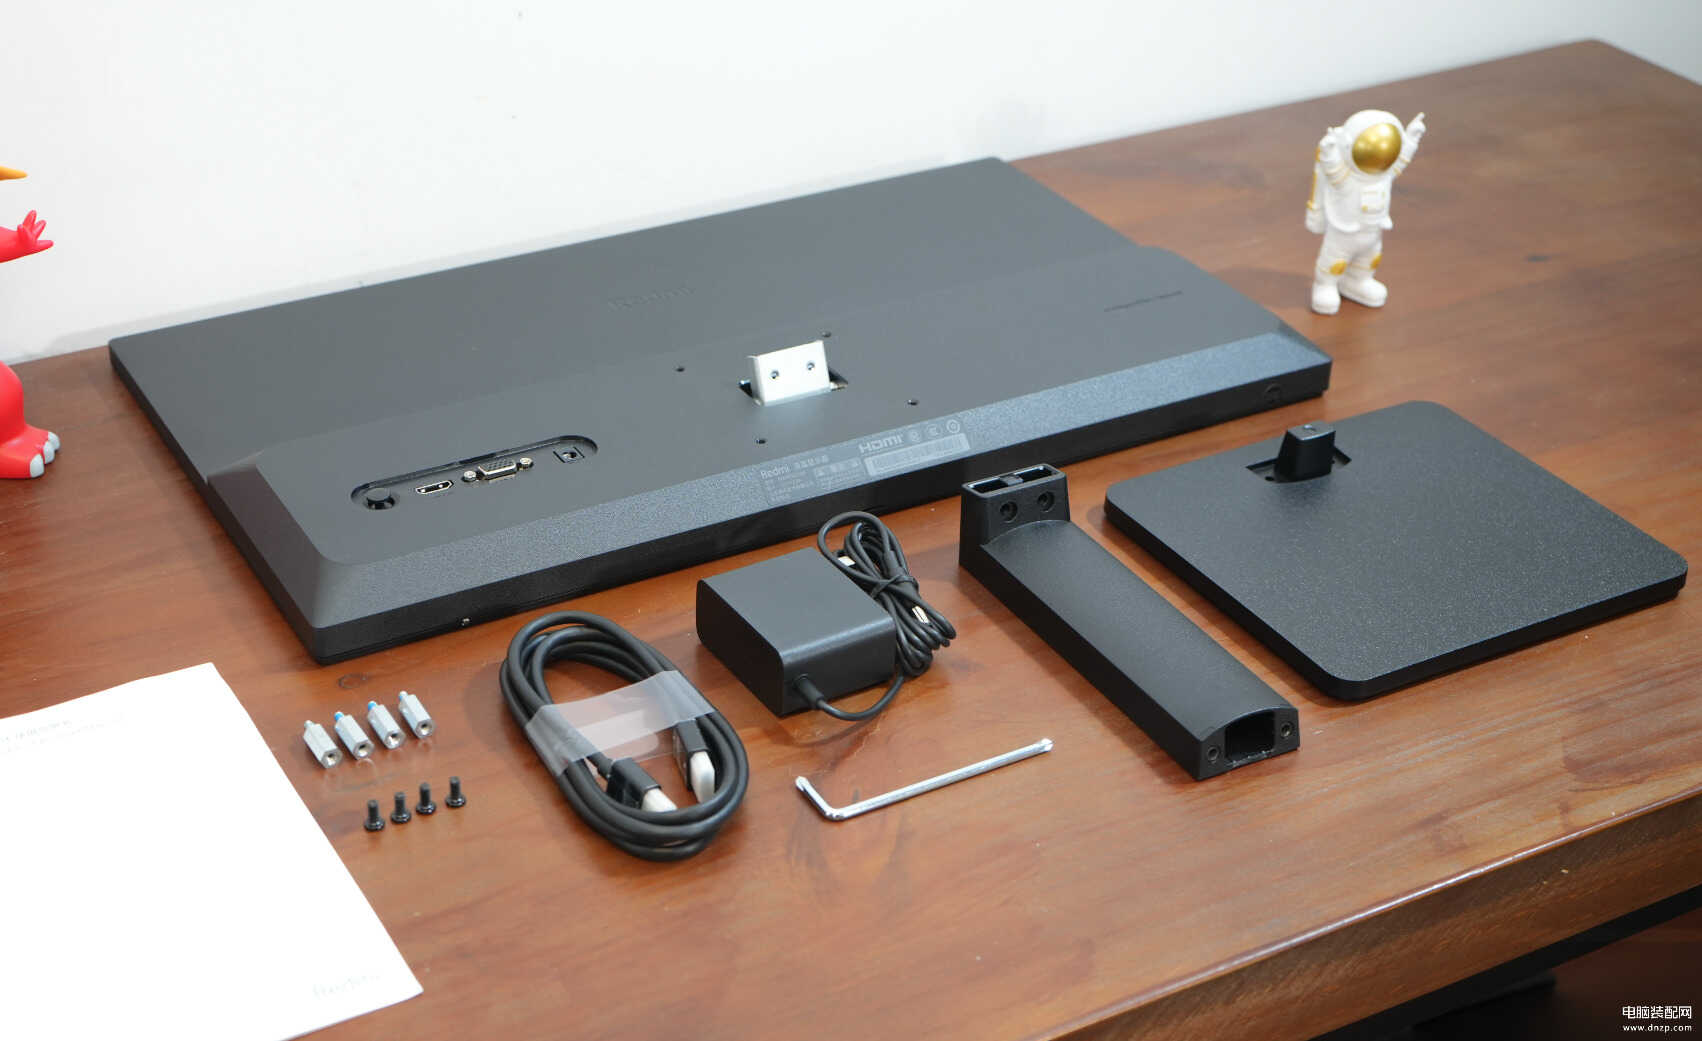
说实话作为一款369元的显示器,居然配送的是HDMI线的确有些惊喜;记得我单位采购的不少千元某想显示器都依然用的是VGA线。
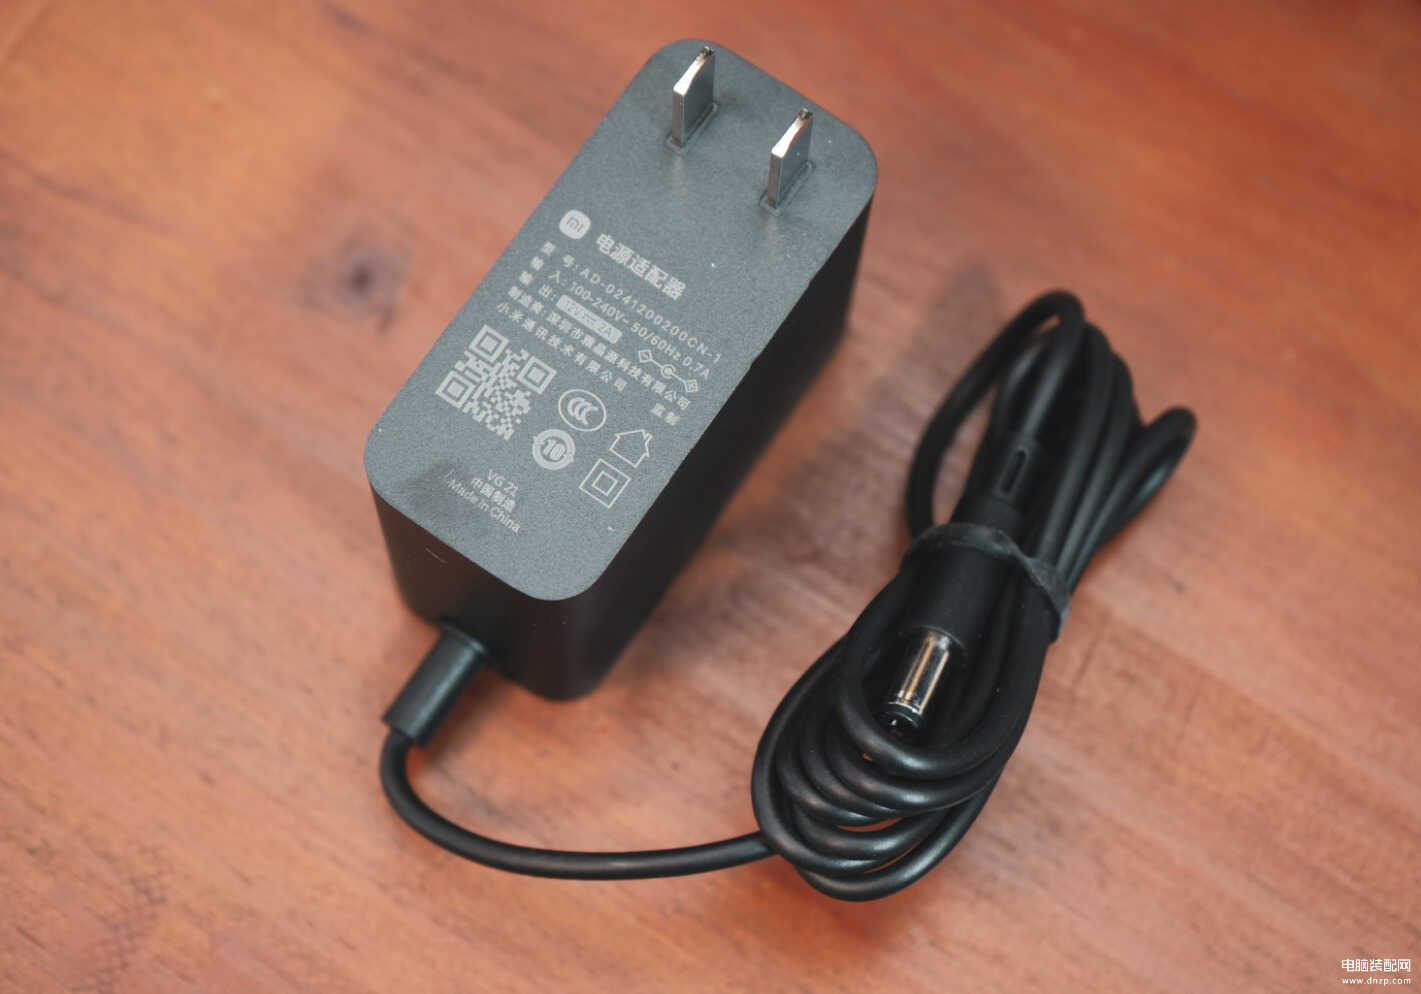
电源也比较小巧,规格为12V/2A,功率为24W。
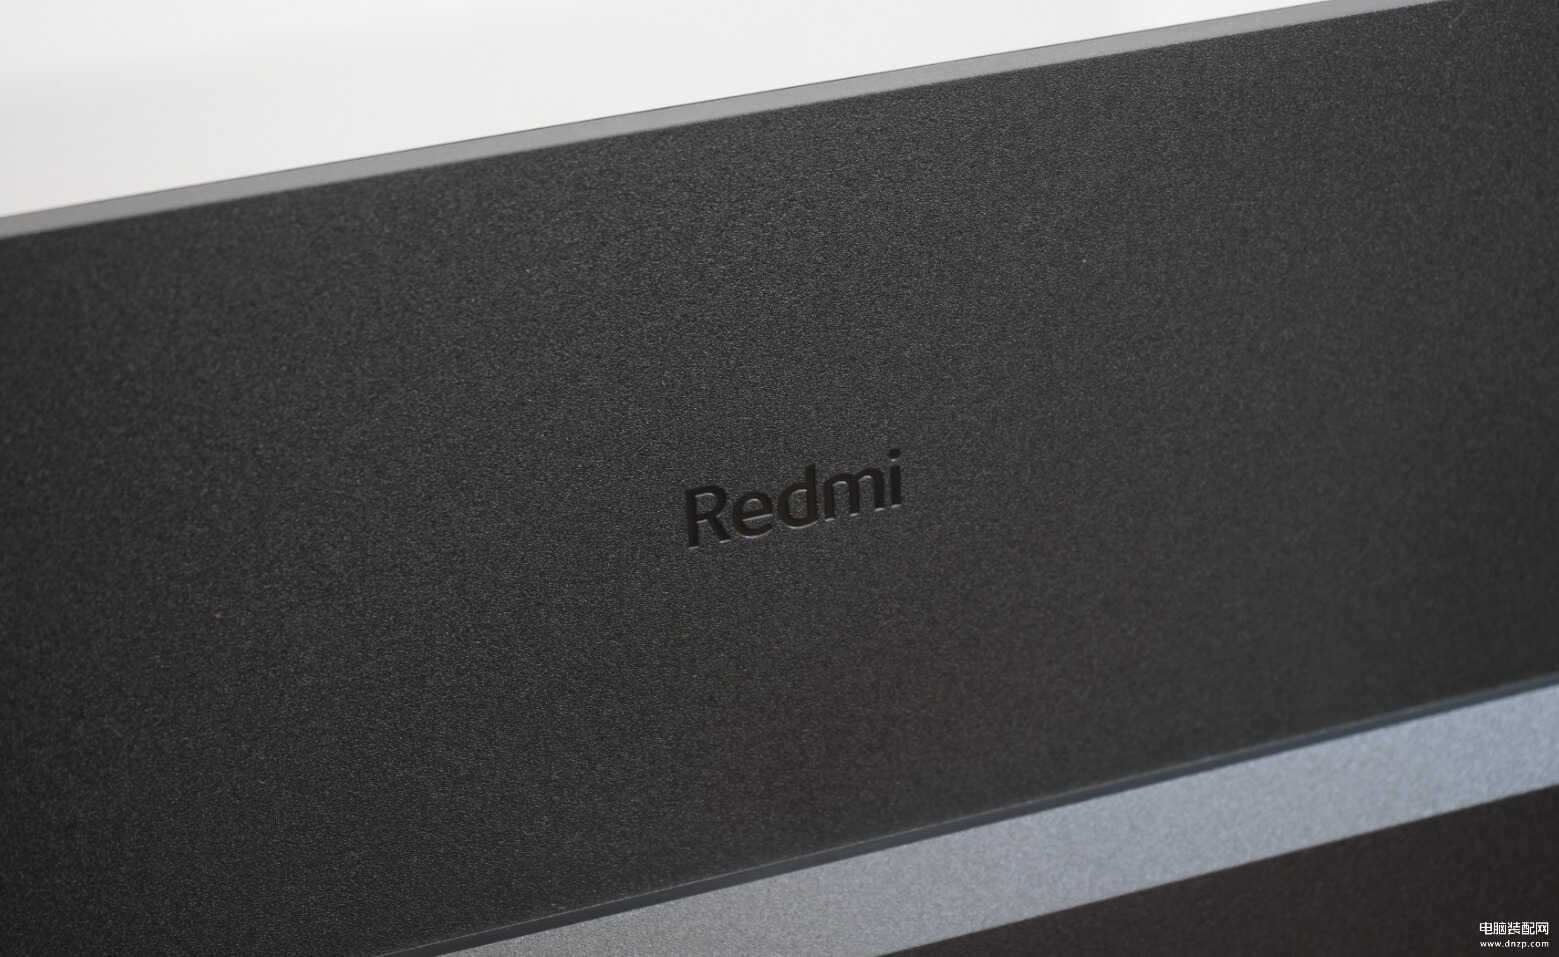
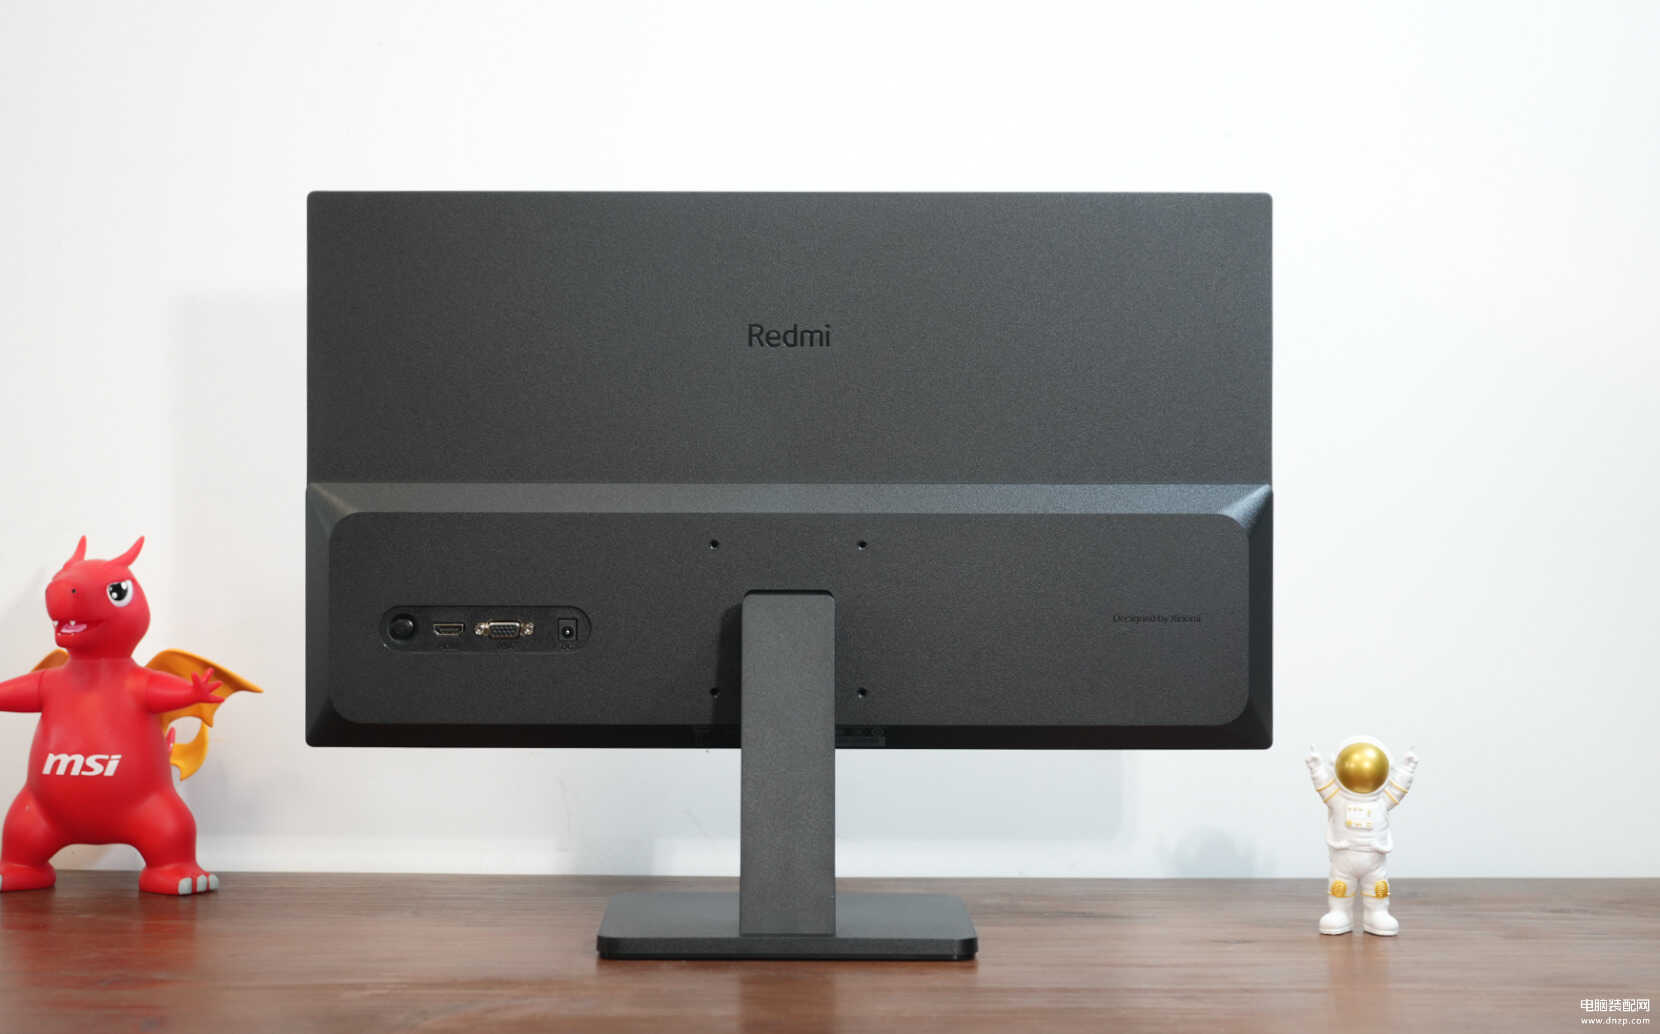
红米Redmi的logo在显示器后方。
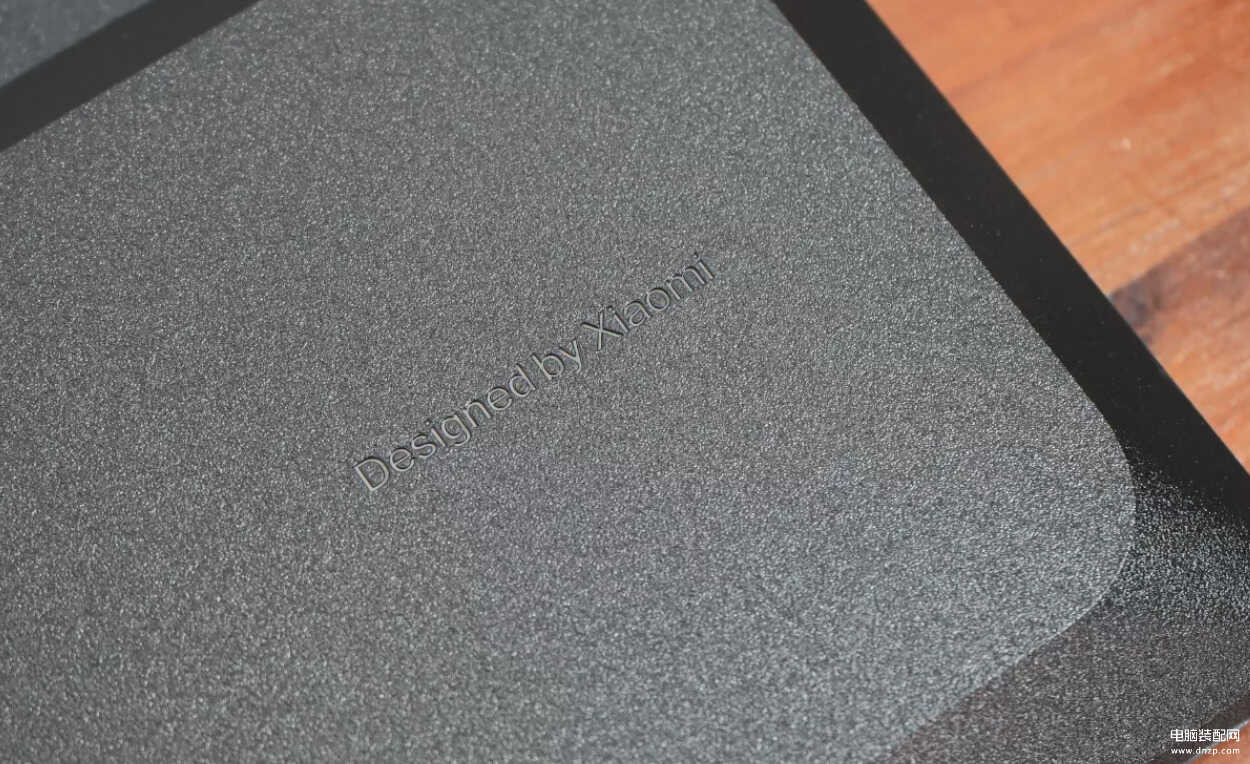
右下角还有Desigend by Xiaomi(小米设计)的标识。
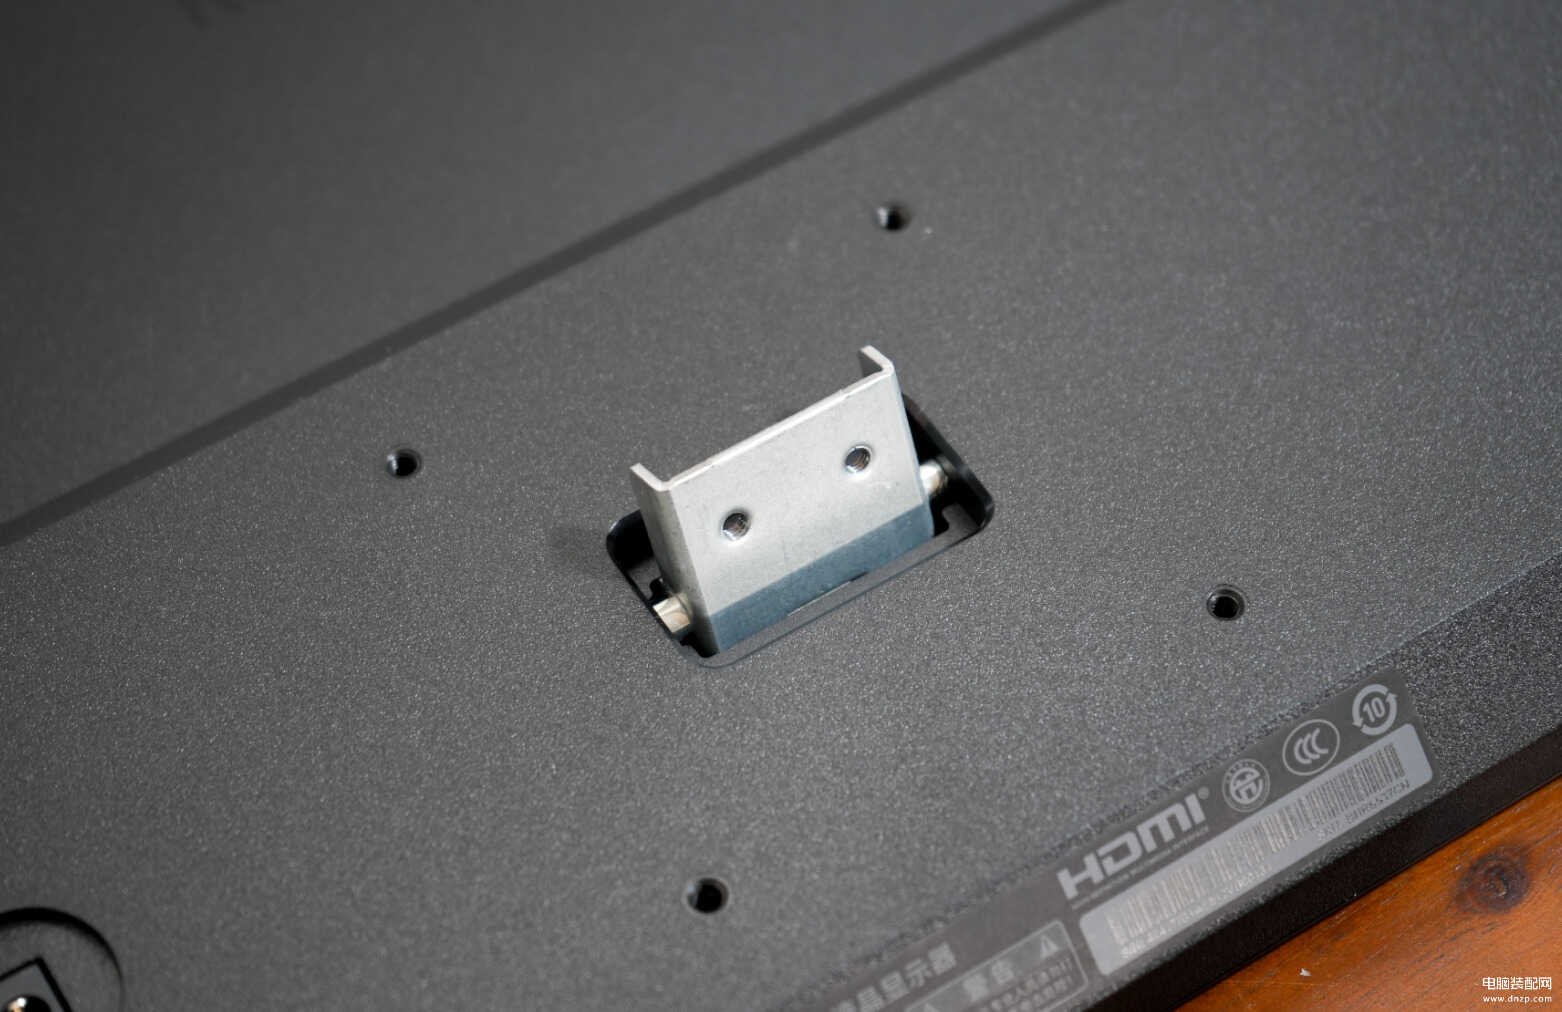
VESA壁挂孔的位置没有与很多显示器一样放在中间,而是放在了底部的支架周围。这主要是因为该显示器将电源板、驱动板都被放置在底部,所以整机最后的区域其实是在底部。
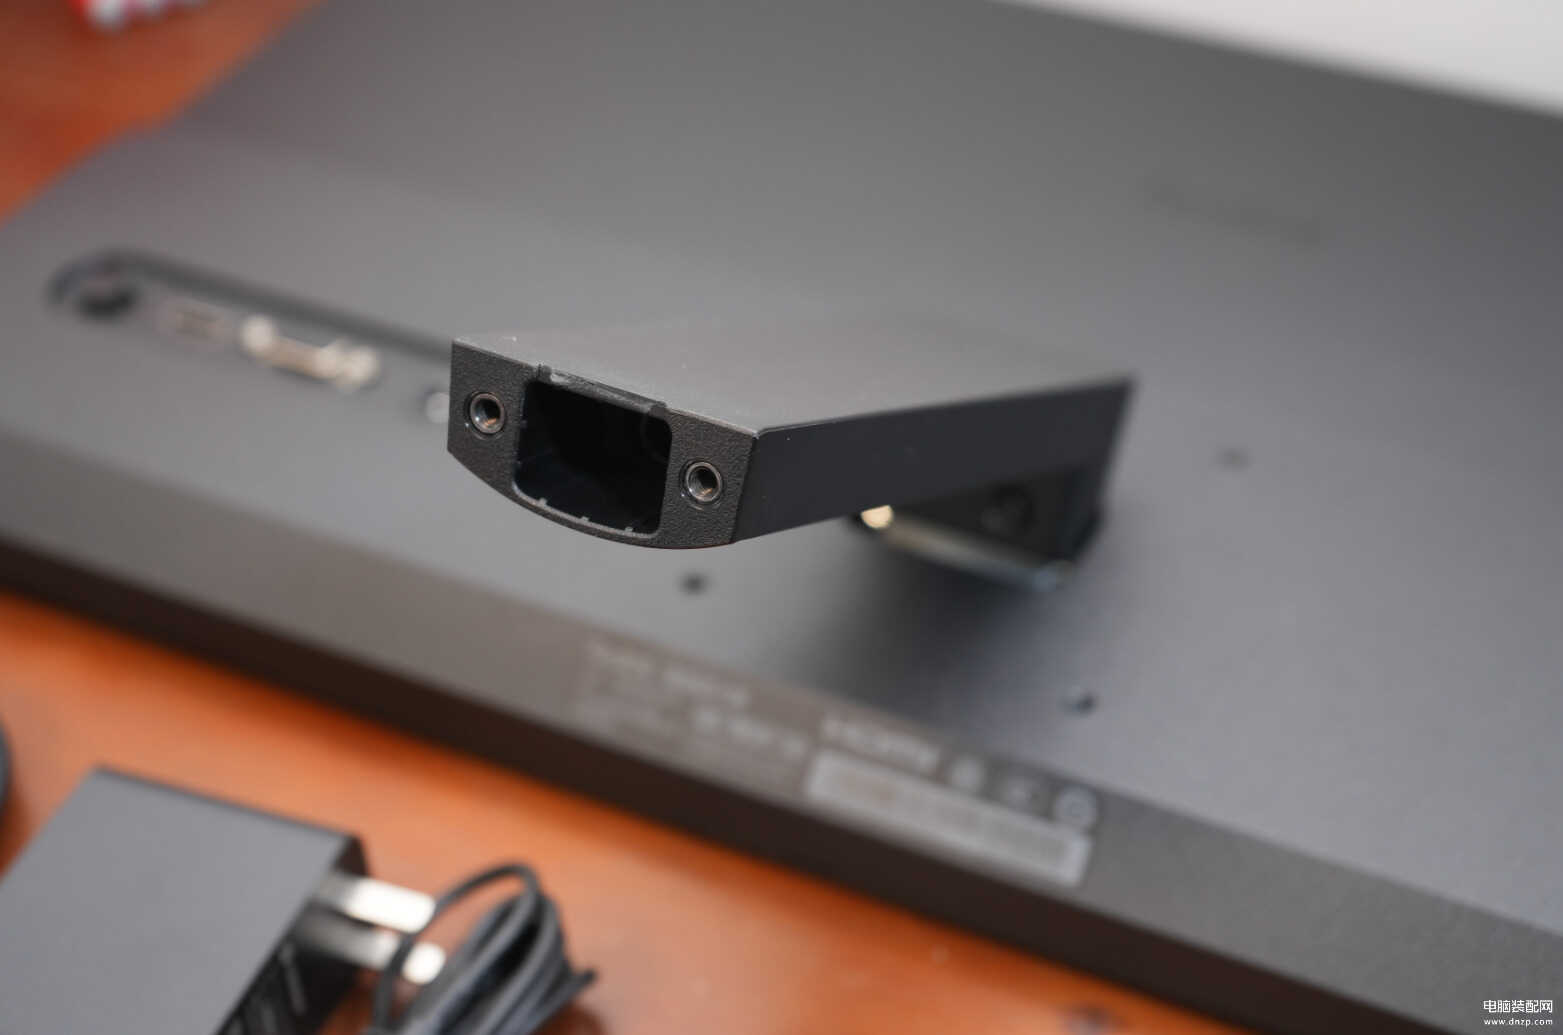
接口部分,分别是五维按键、HDMI、VGA以及DC电源。

安装:
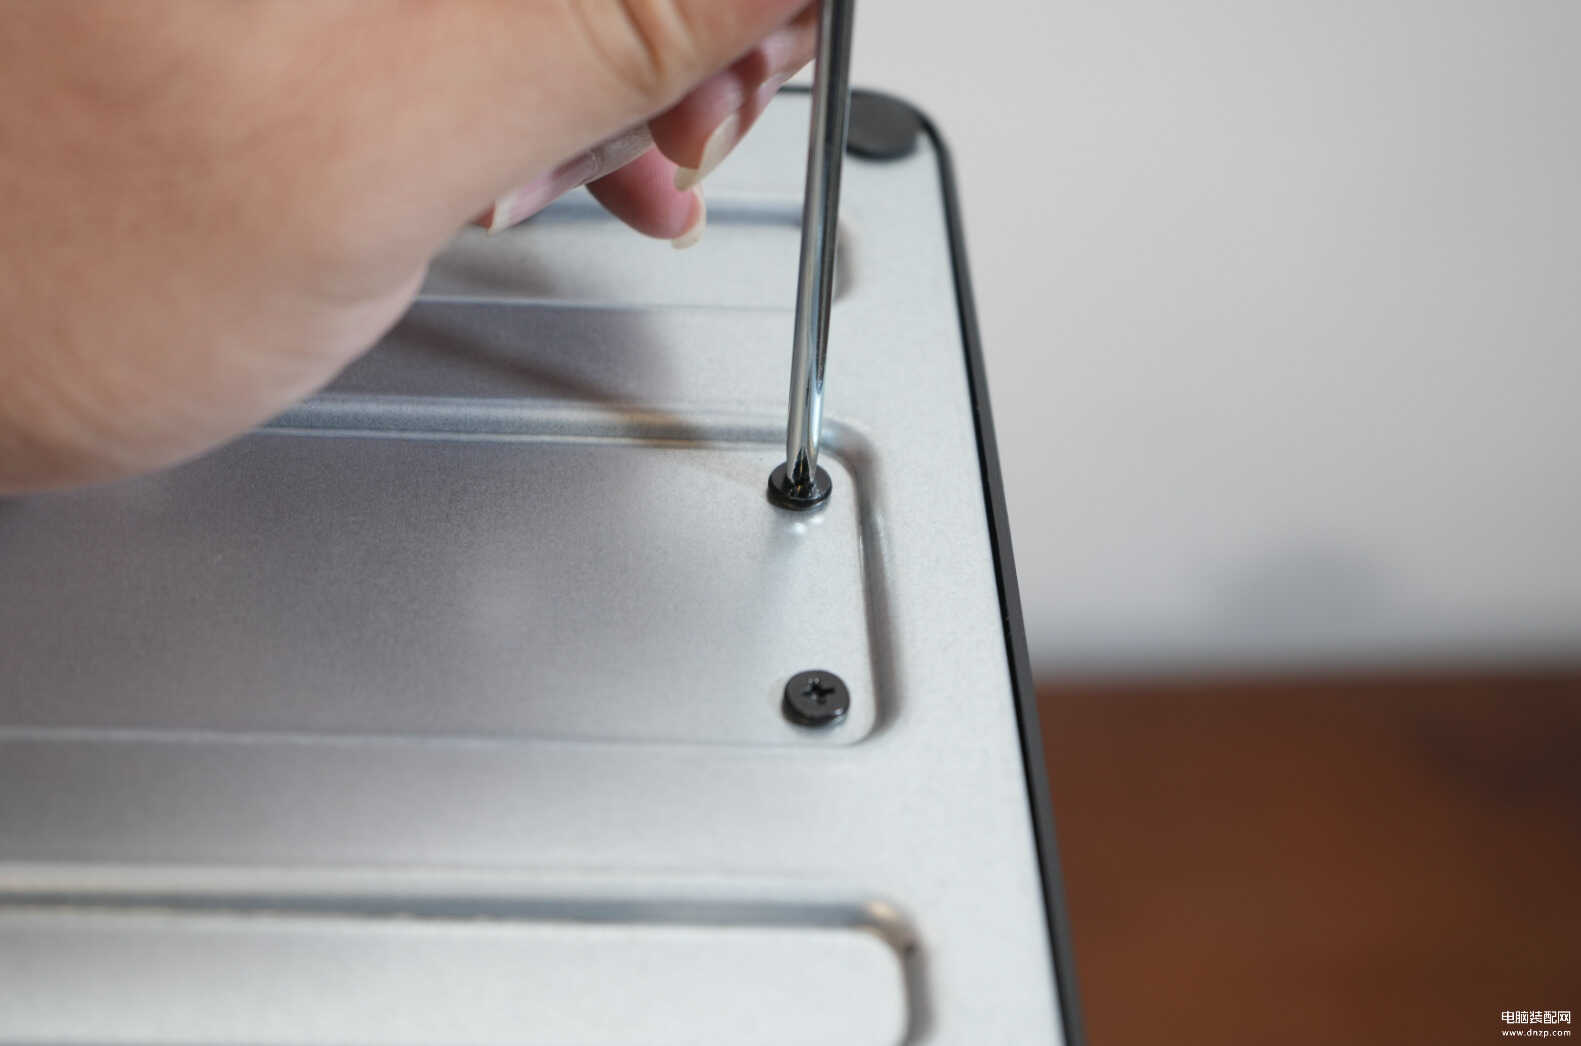
红米21.45英寸显示器的安装有些繁琐,要知道市面上一些显示器都使用了免拆工具设计。而红米这款显示器先是要安装支架,需要手动拧入支架与显示器的连接处的两颗螺丝。
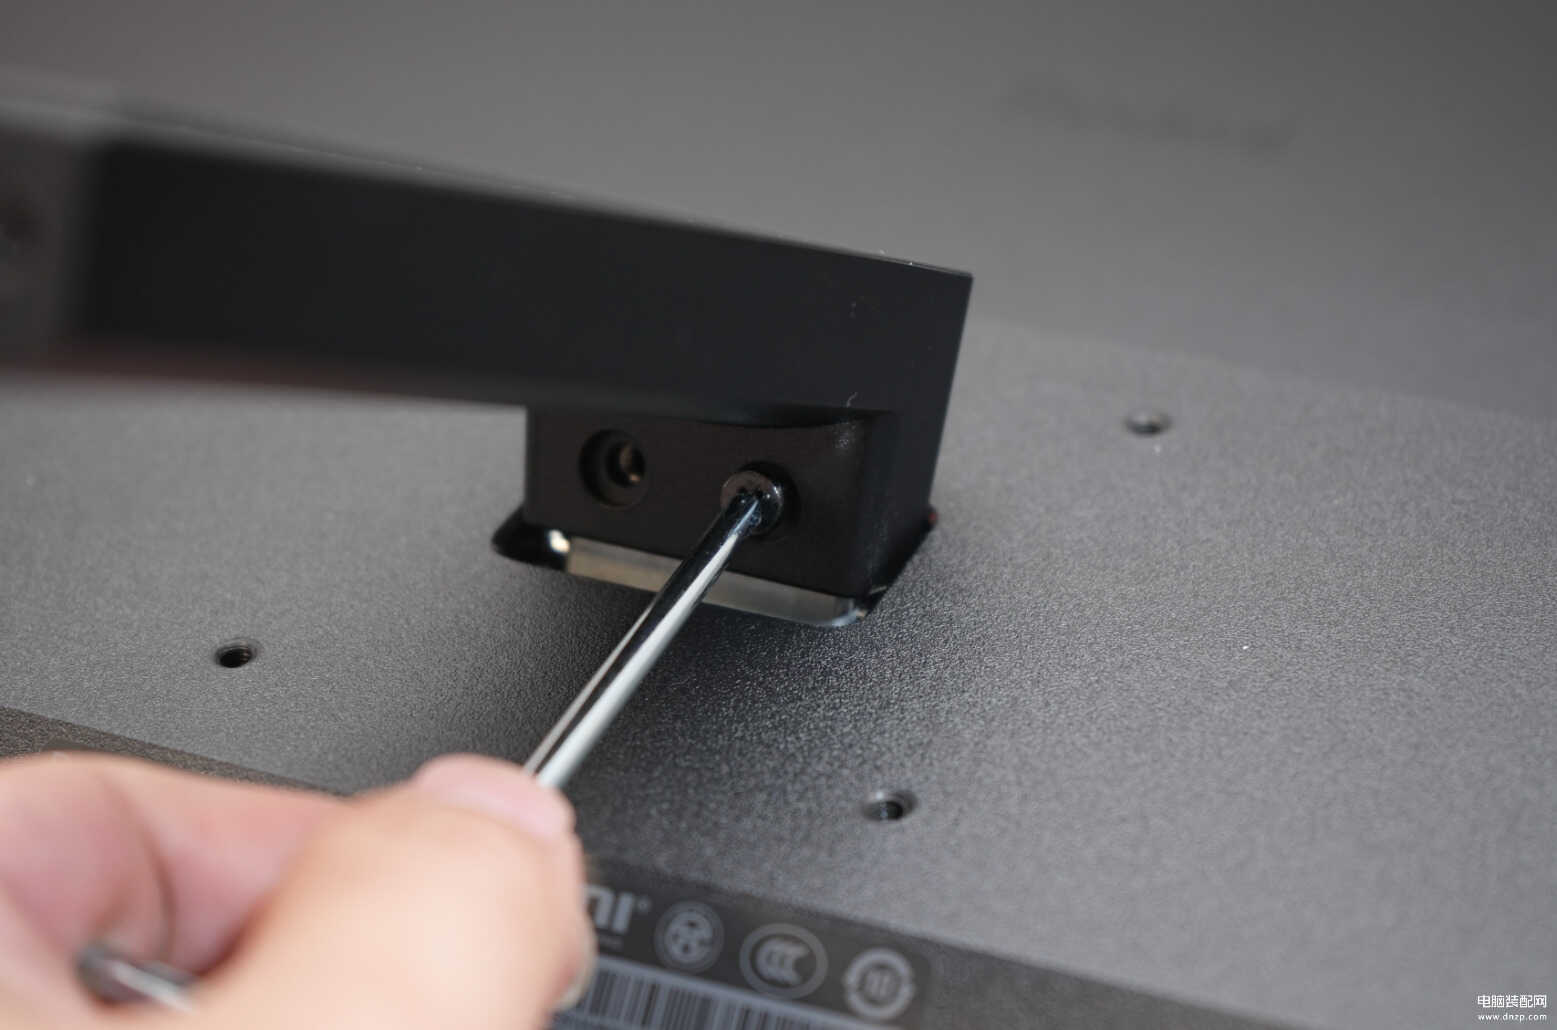
然后还要拧入支架与底盘两颗固定的螺丝。
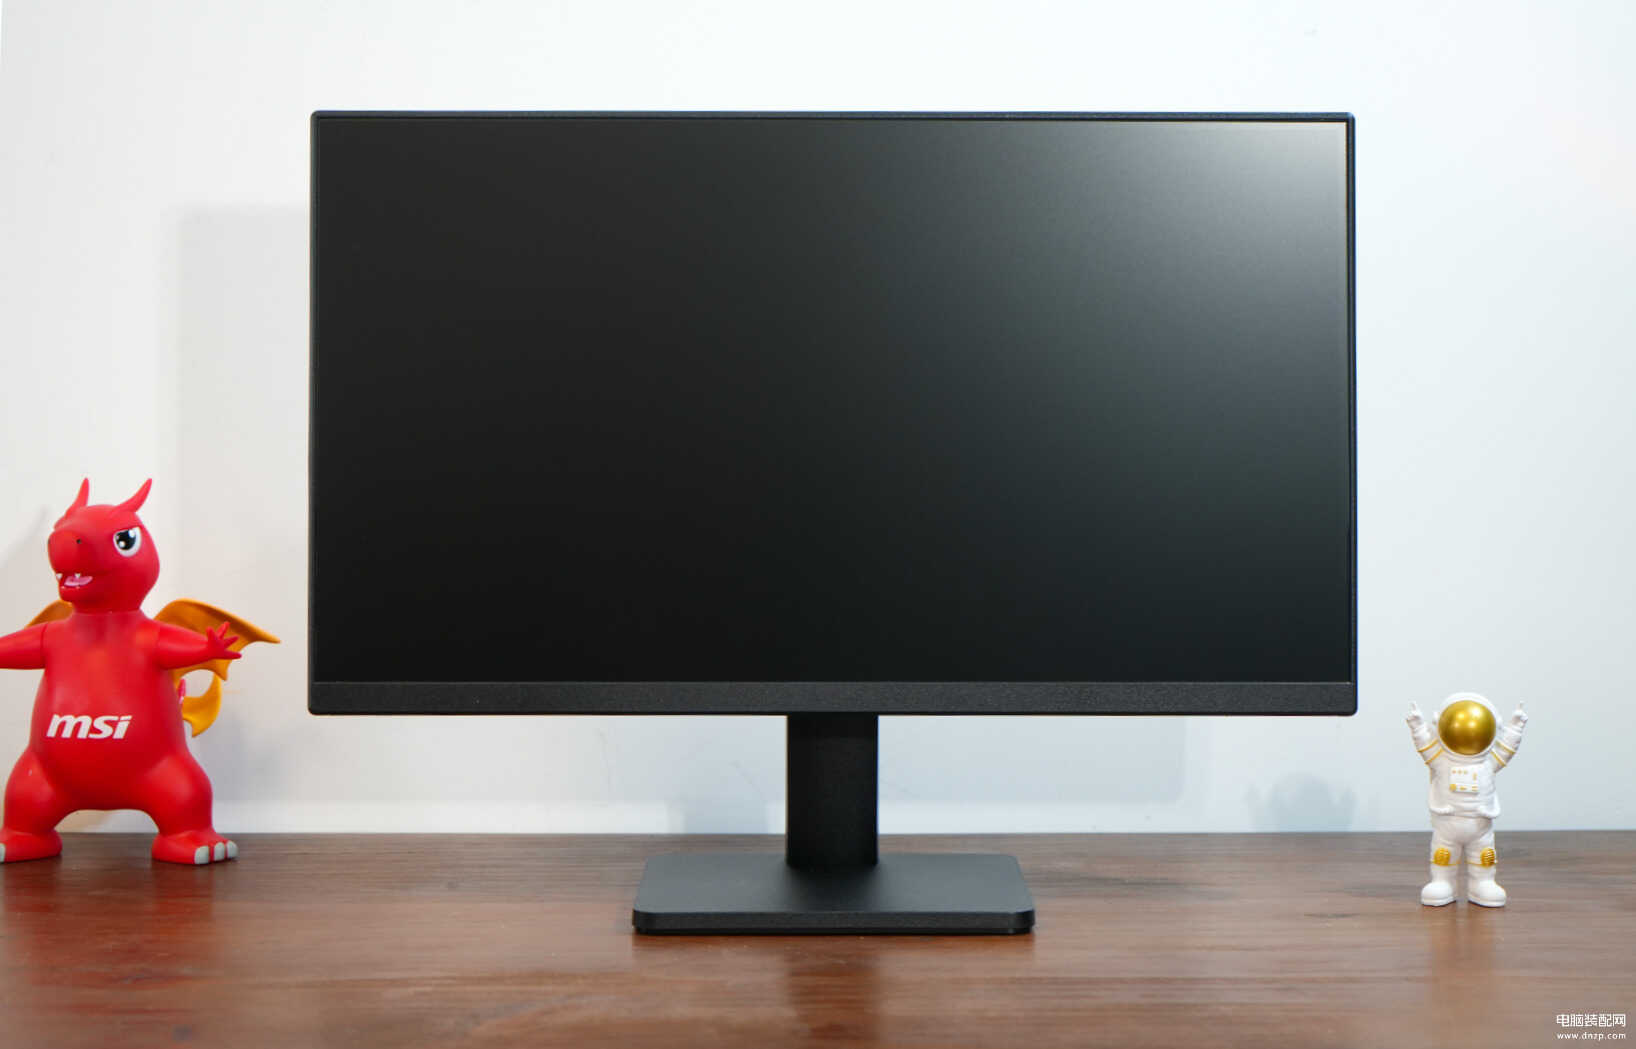
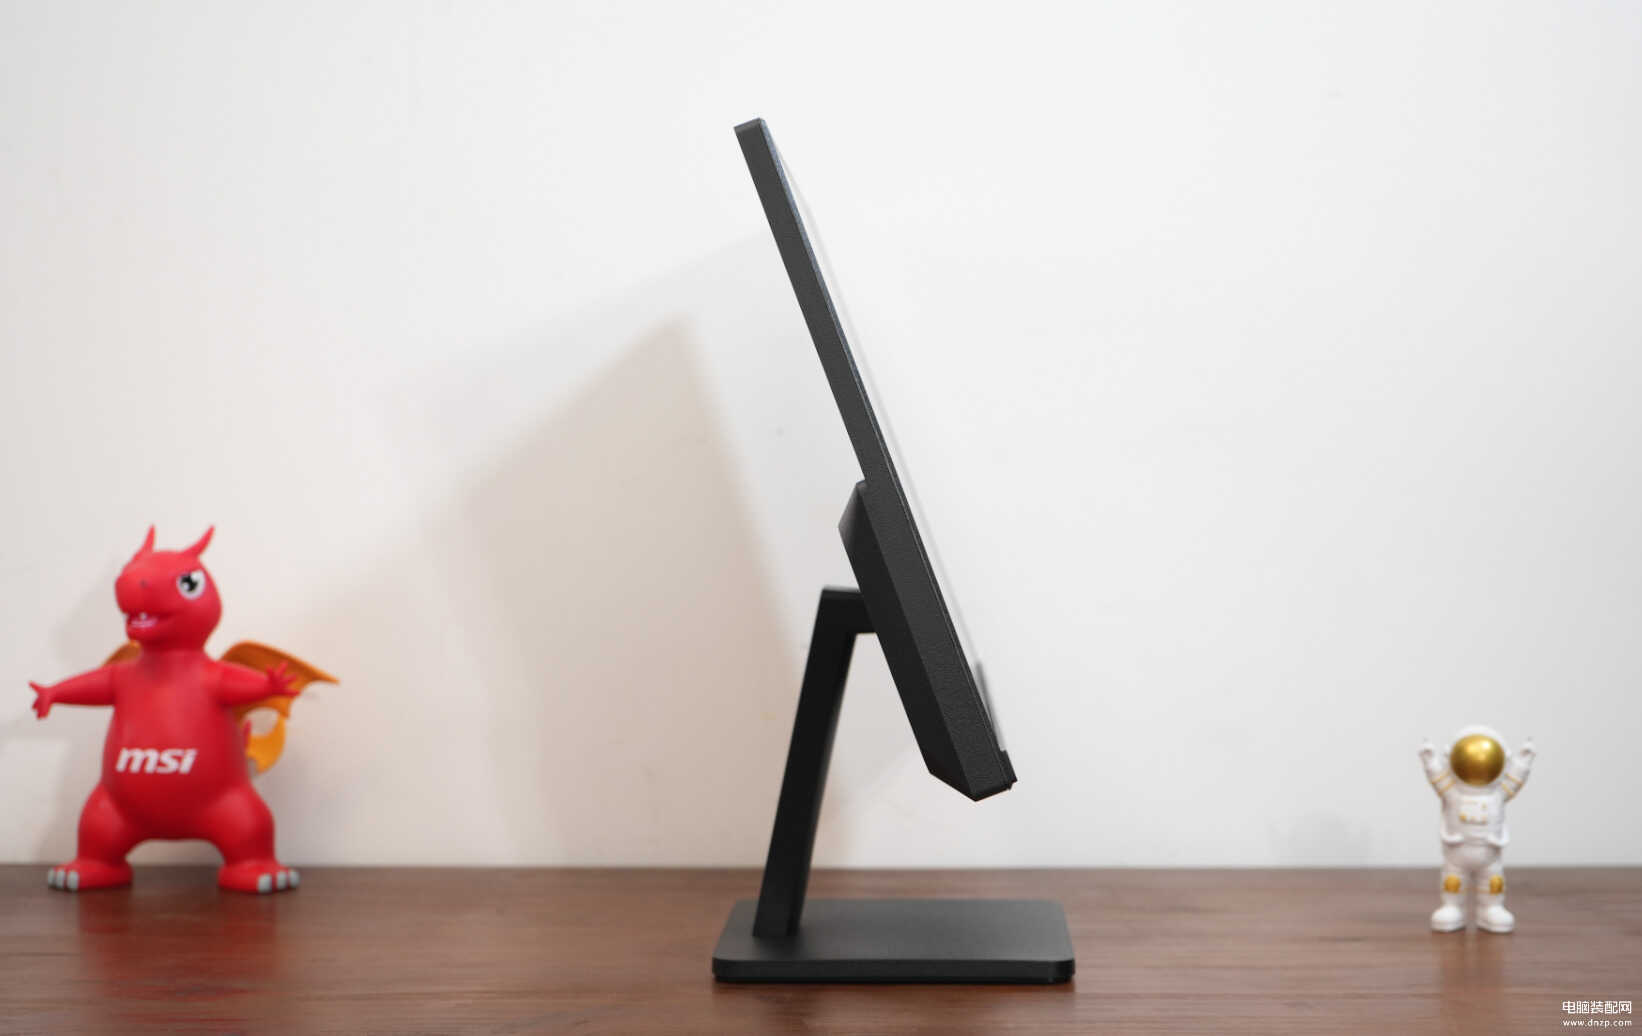
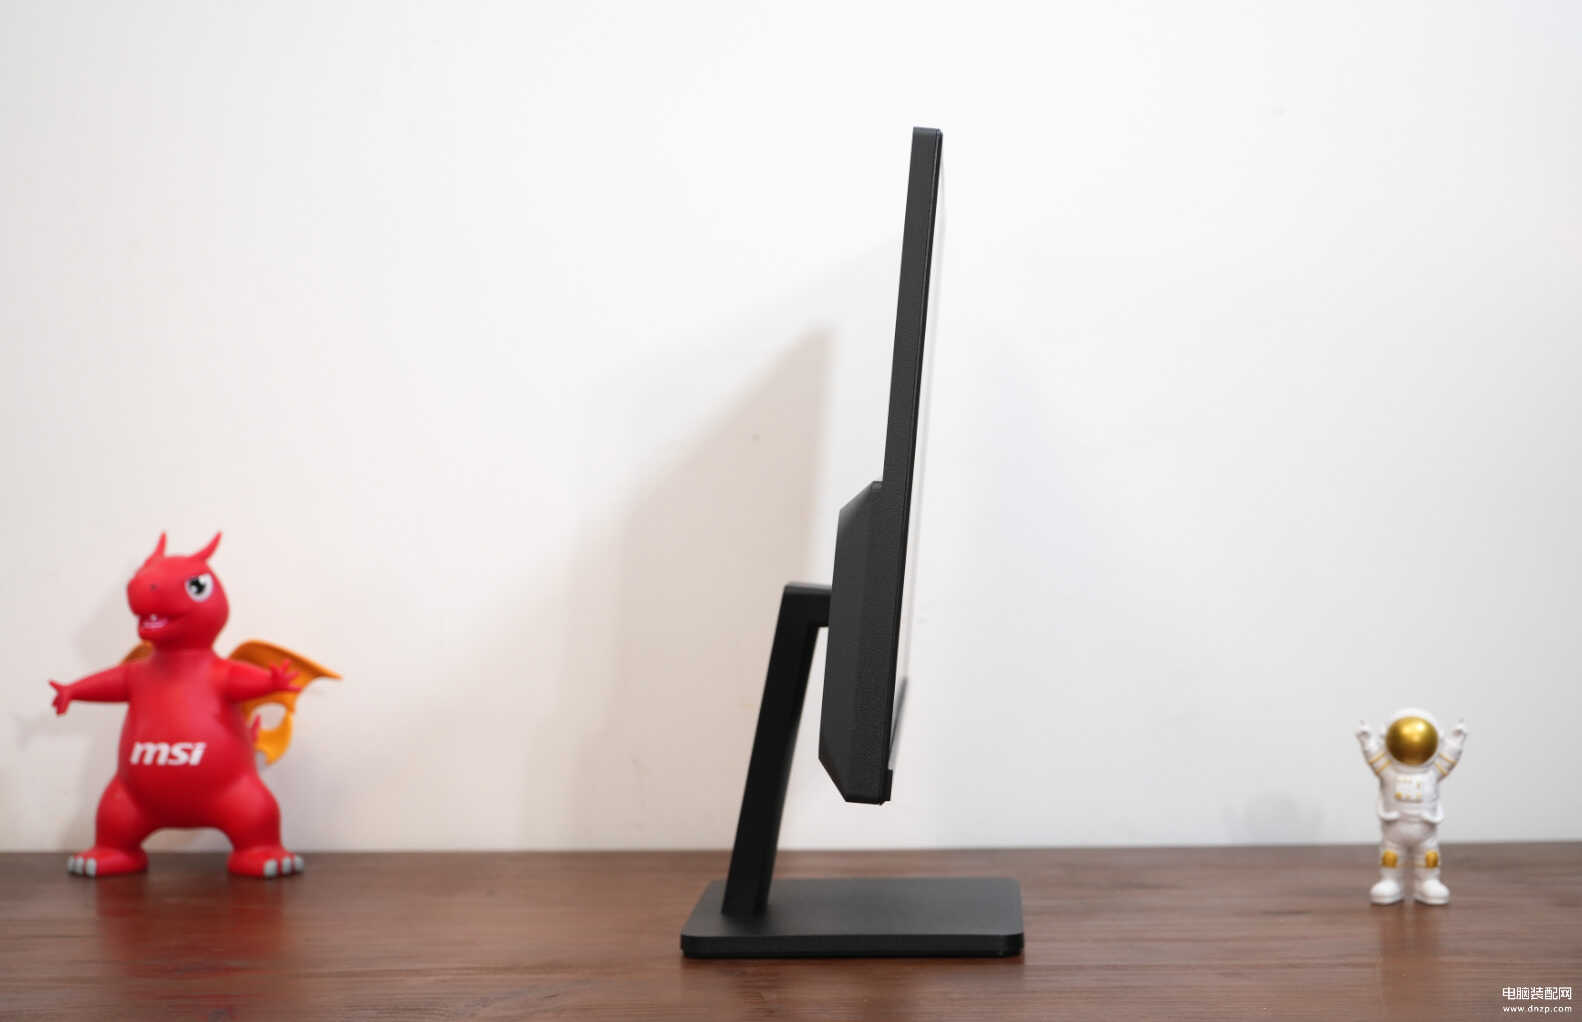
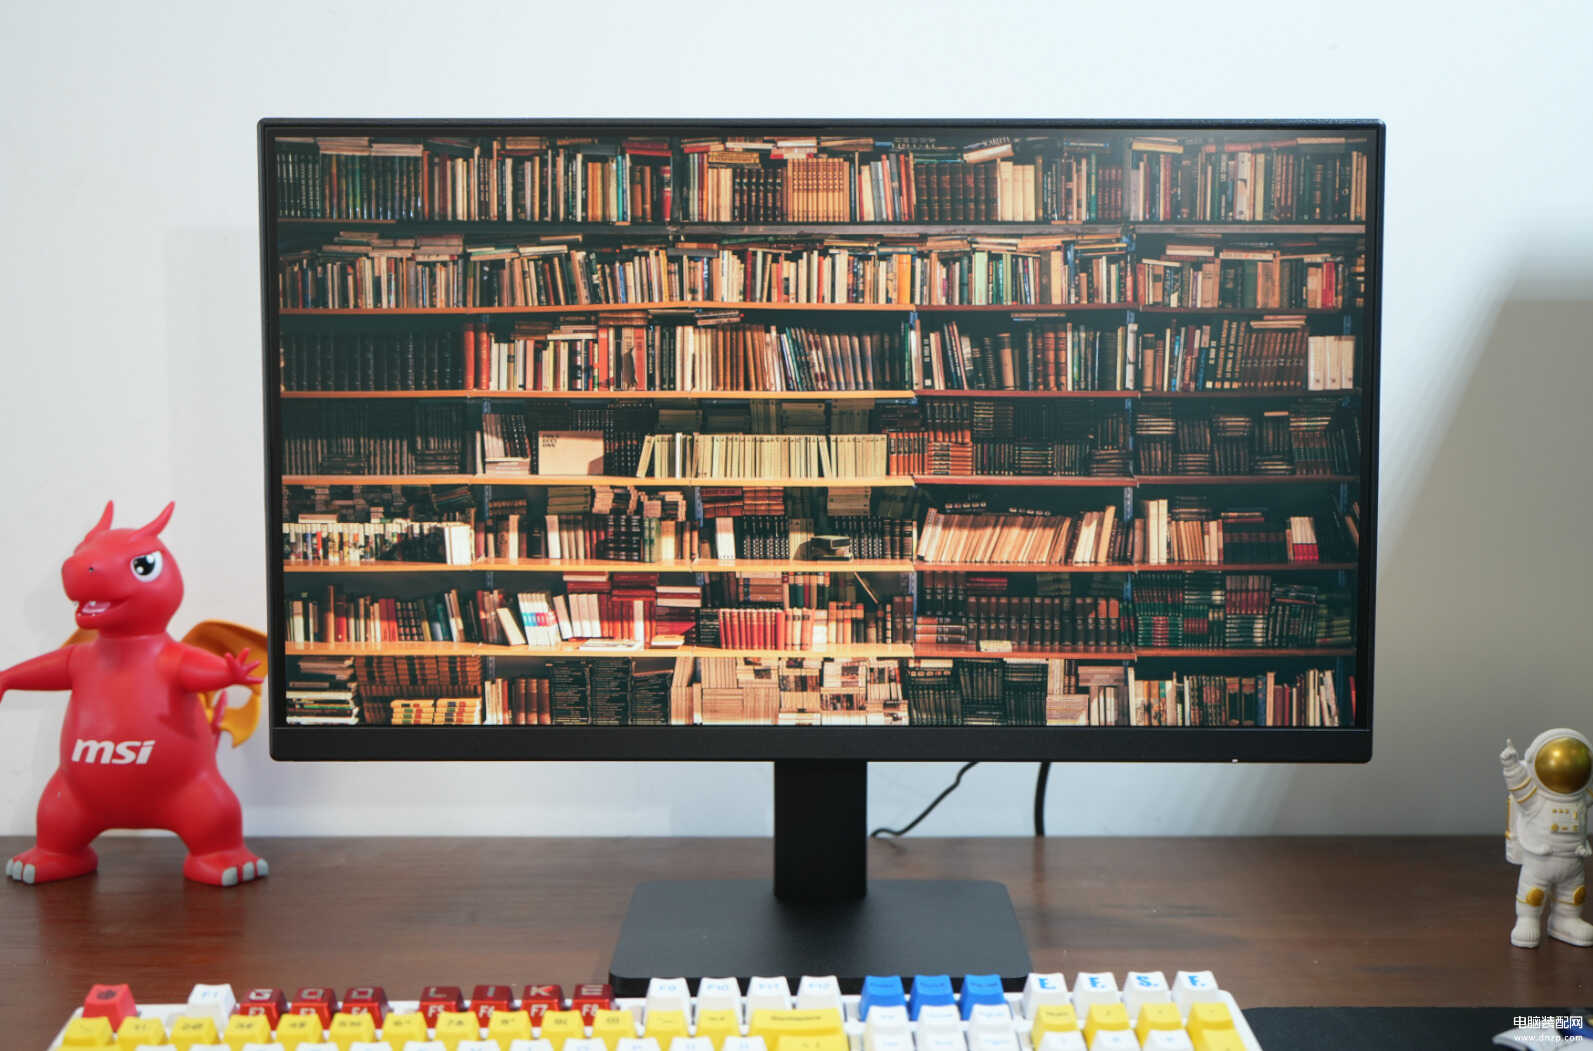
红米21.45英寸显示器安装完毕后的样子,从正面看三面窄边框的设计还比较有设计感。
背面的视觉效果也比较简约。
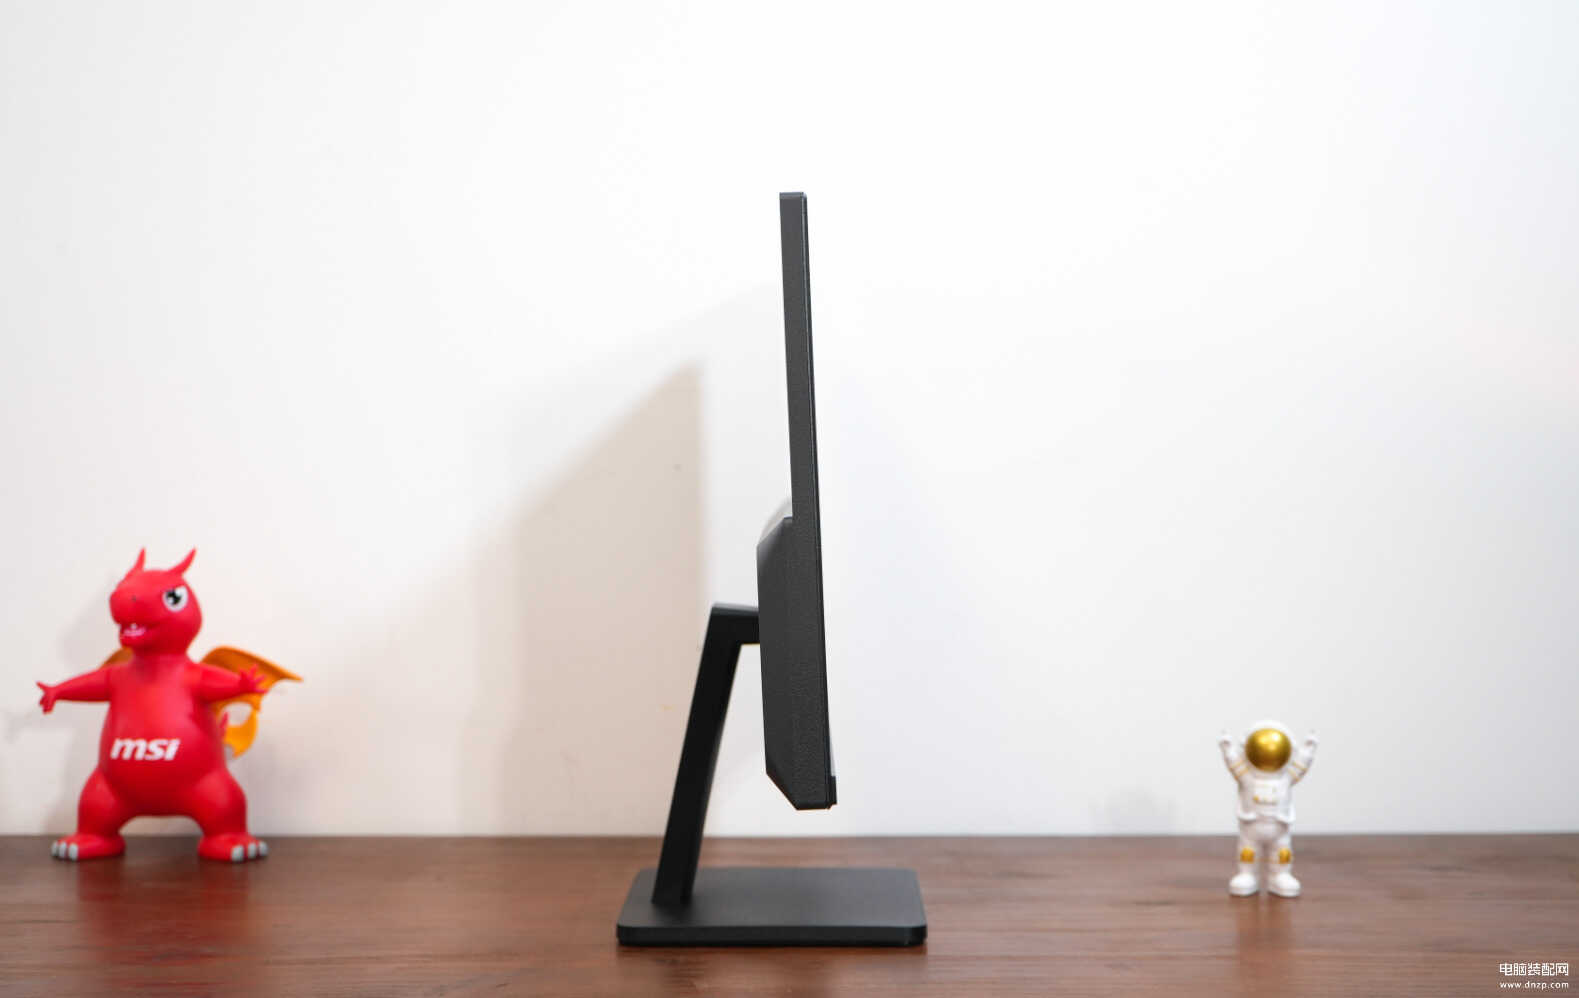
显示器并没有追求极致轻薄,下半部分会厚一些,不过边缘采用了过渡处理,整体视觉效果还是不错。
支架的俯仰角度大概是+30°到-5°。
使用体验:
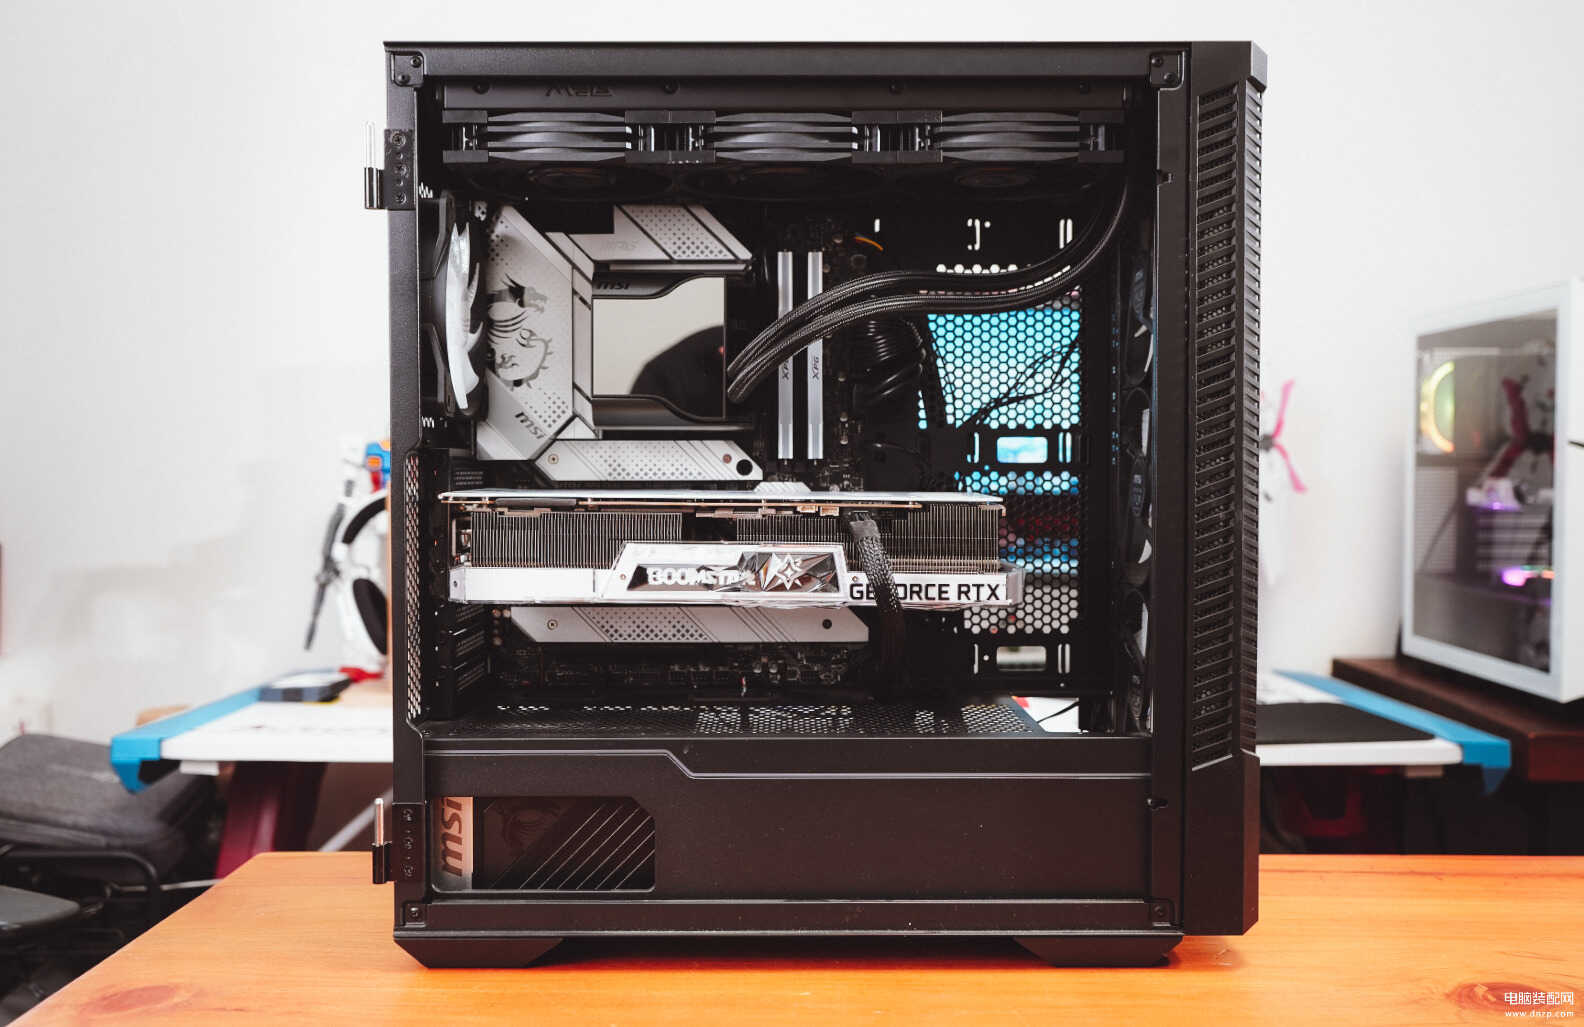
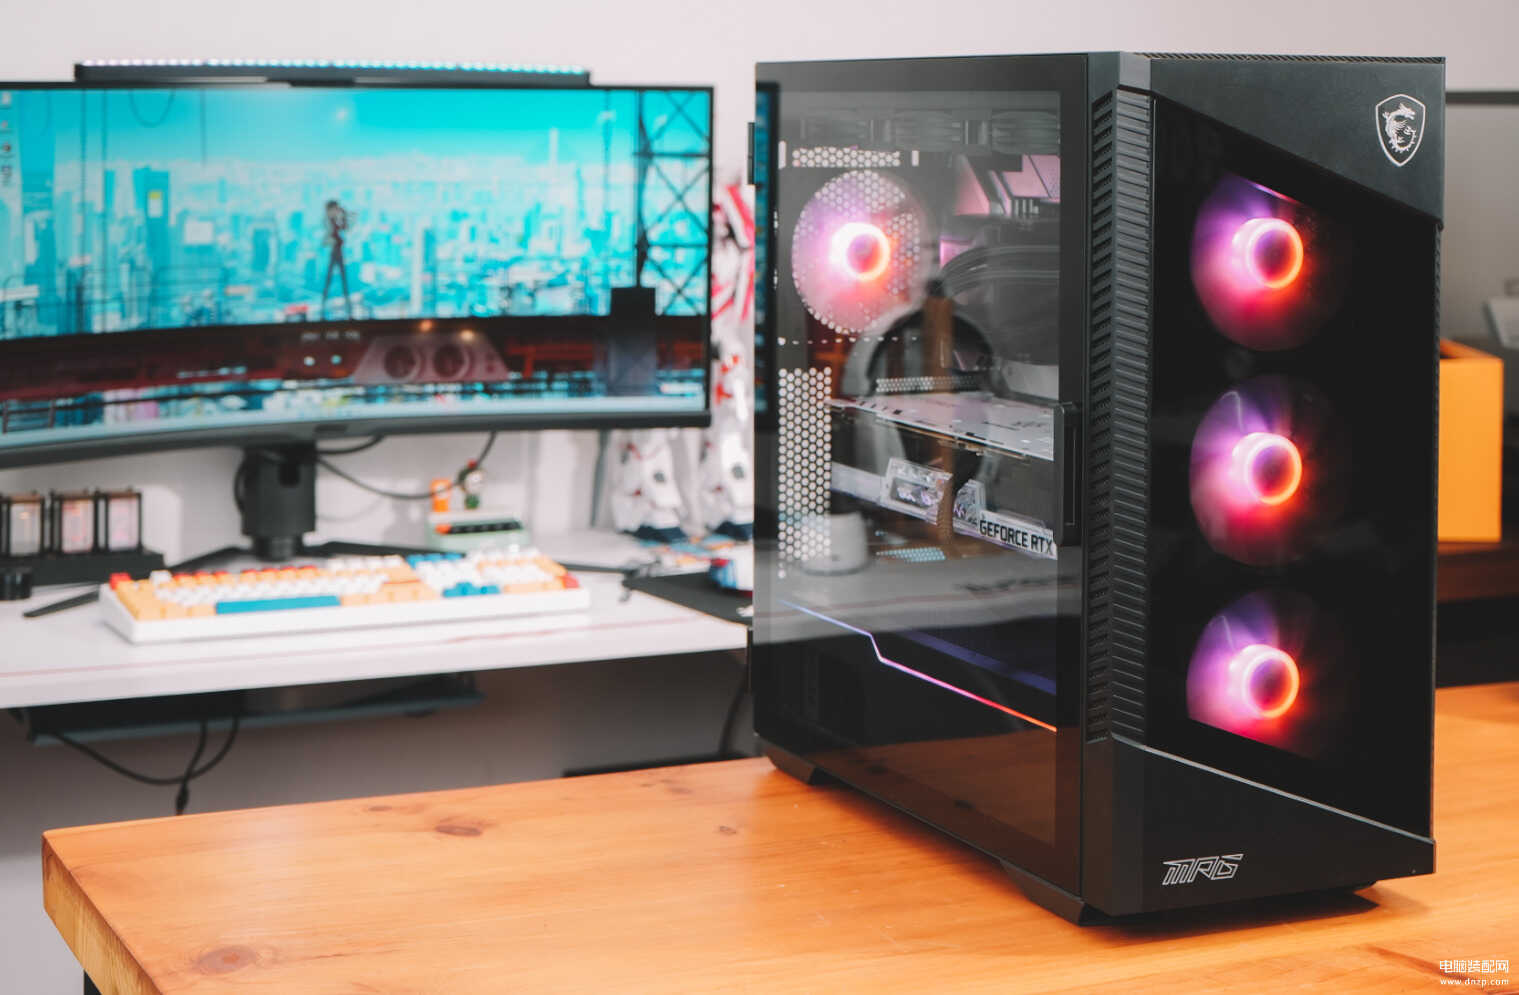
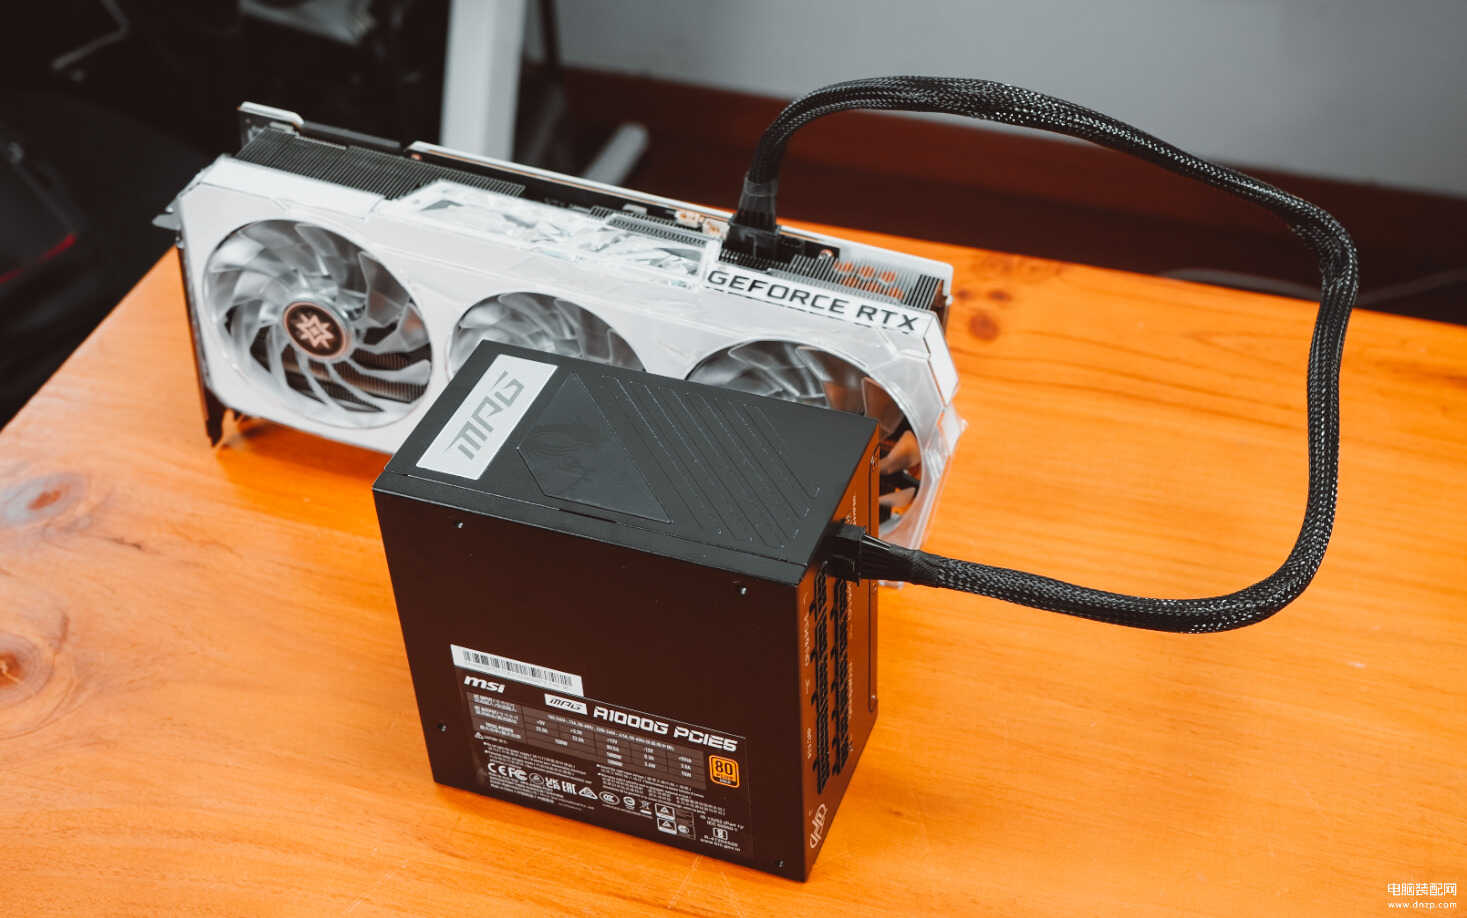
为了体验这台显示器,我将我新装的DIY电脑主机安排上,要知道这台主机的硬件可是很多人的梦幻配置,当然我的小伙伴也对这台主机垂涎欲滴。
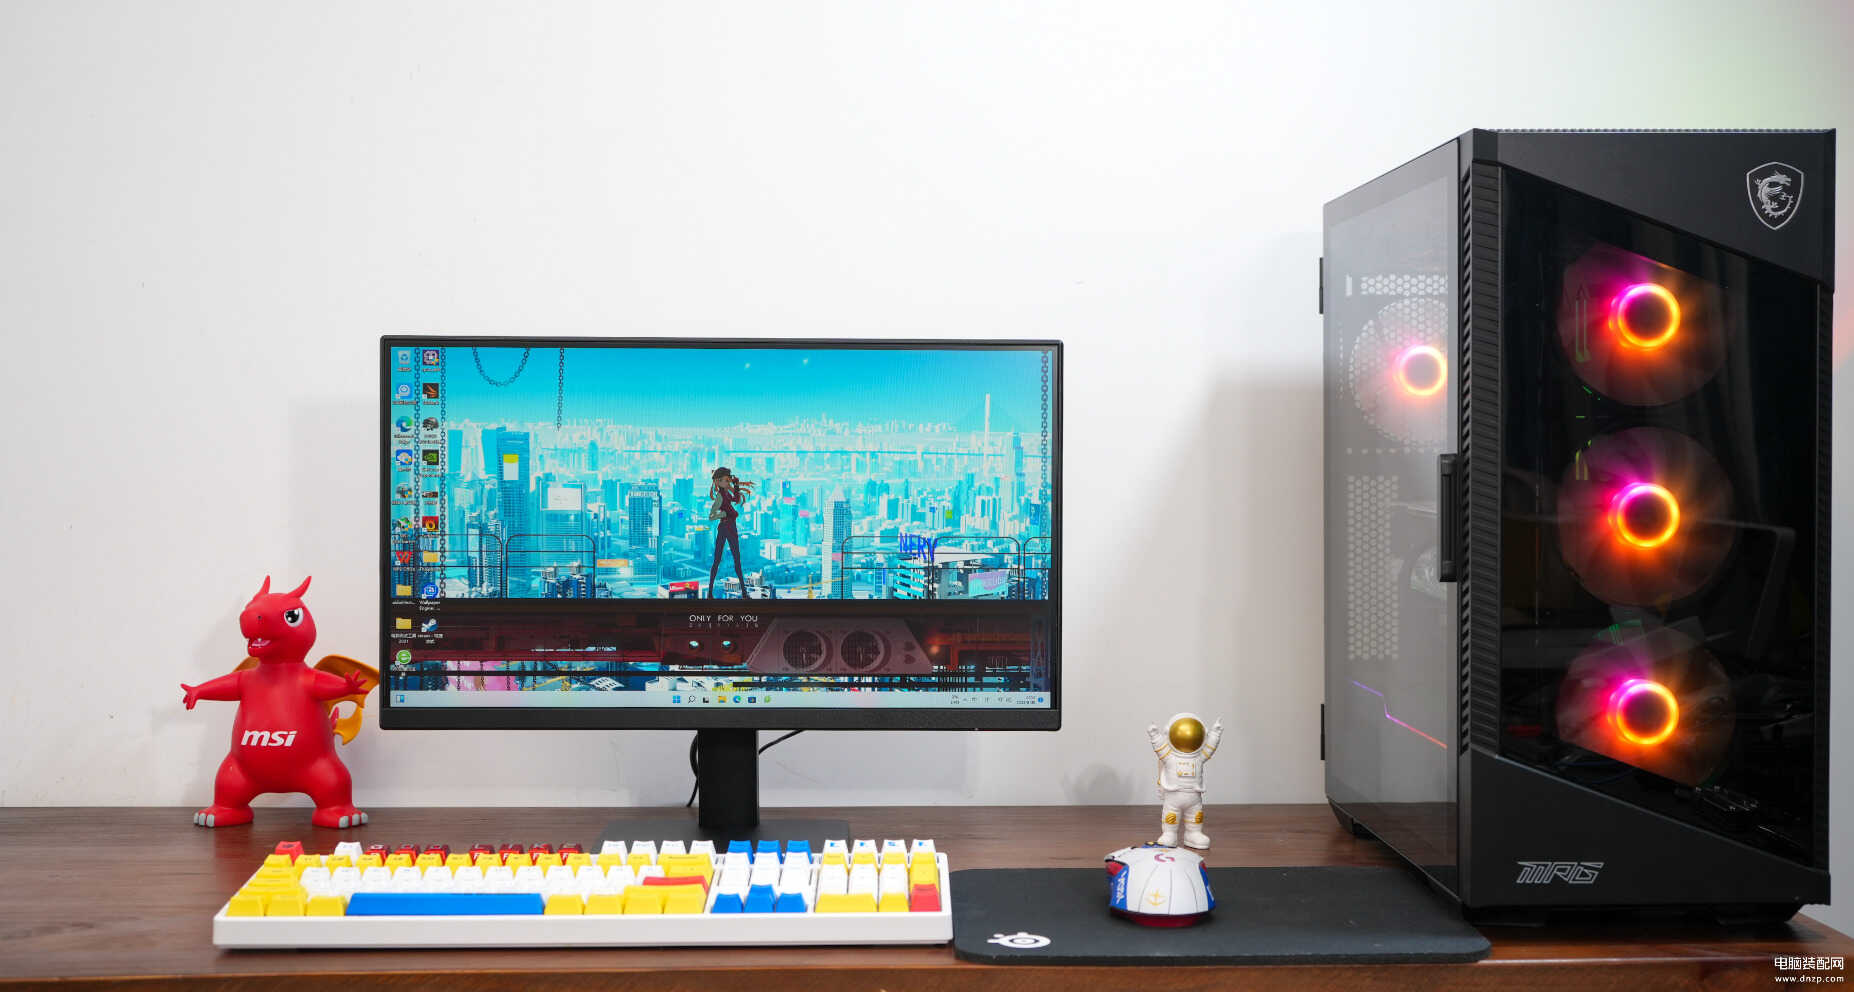
简单说说这台电脑的硬件,基本上也就是微星的全家桶。
CPU:intel i7-12700K
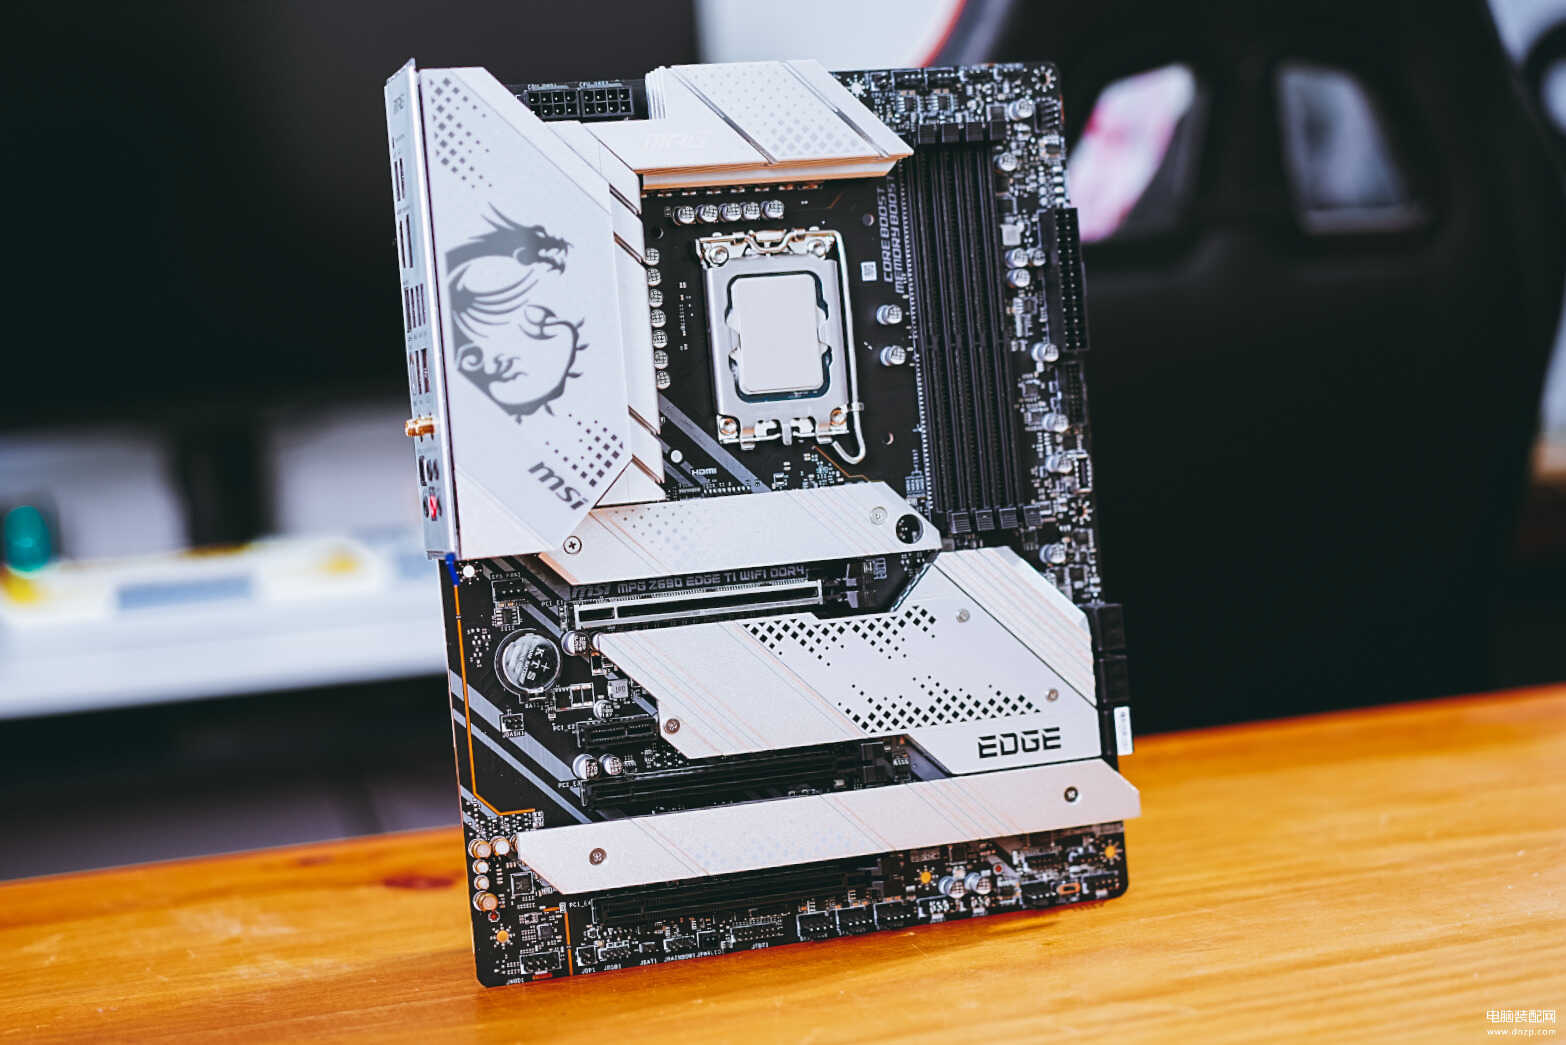
主板:微星MPG Z690 EDGE TI WIFI DDR4
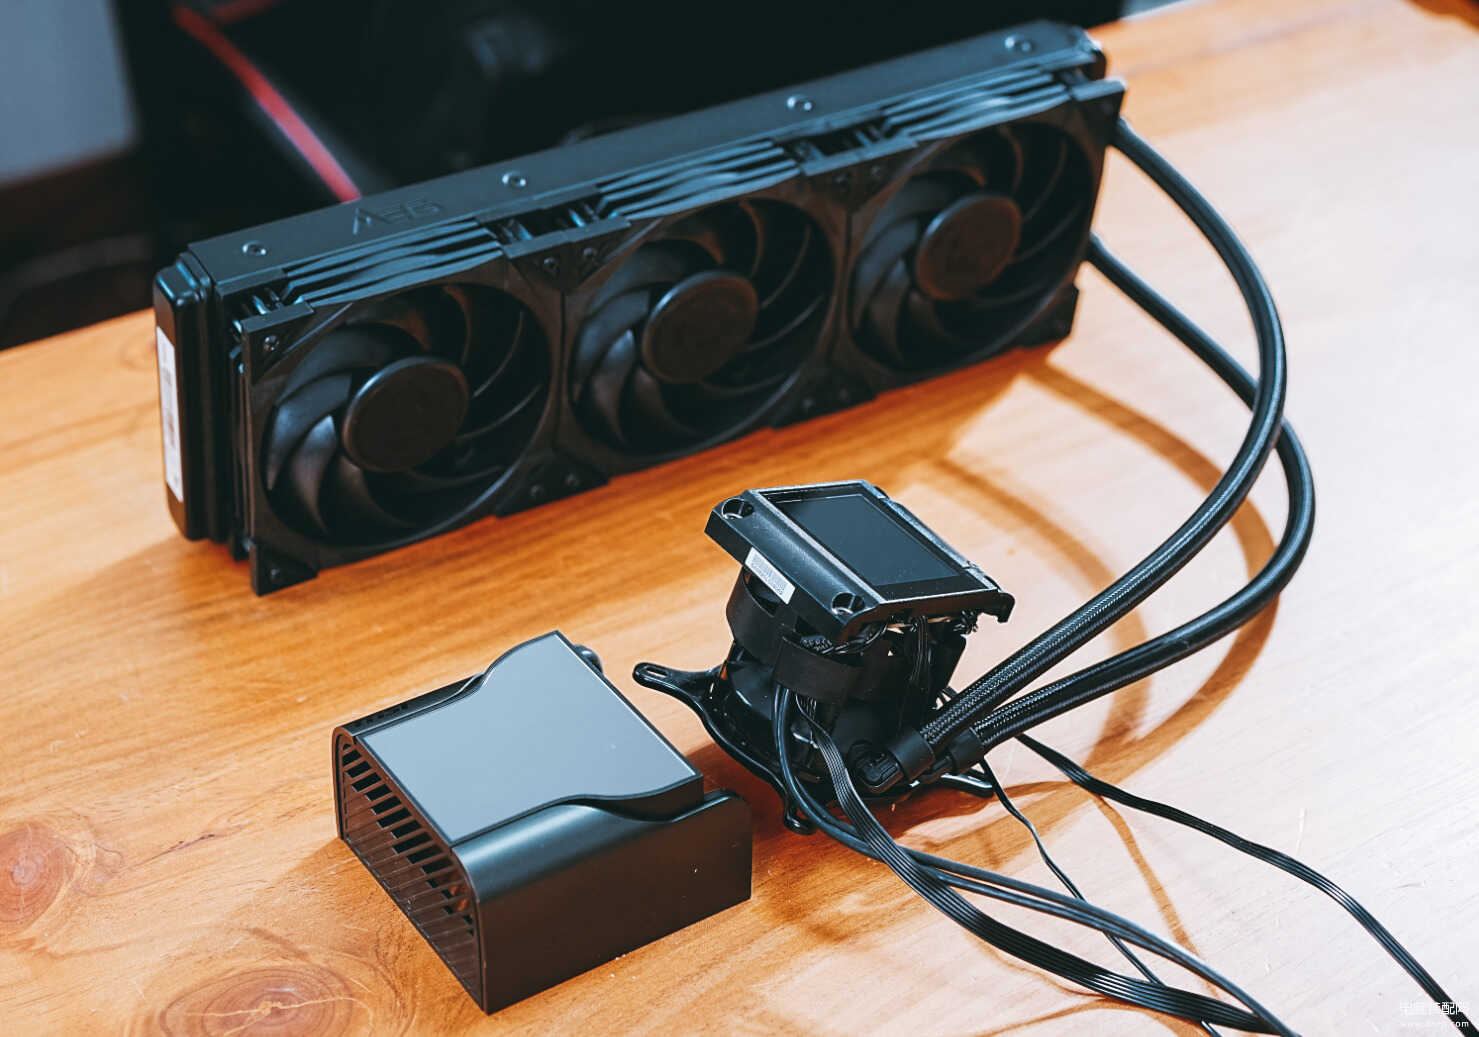
散热器:微星MEG战神S360
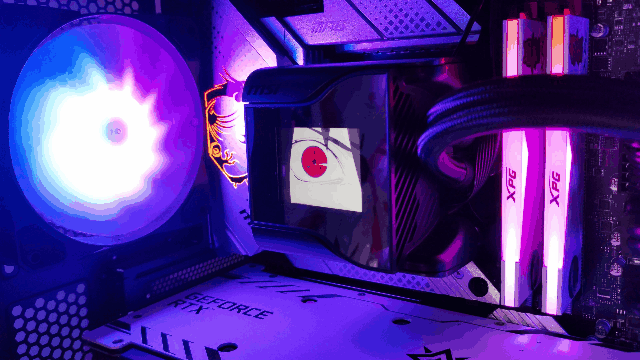
内存:XPG龙耀D50 白色 16GB 3600MHz*2
硬盘:aigo P7000 1TB
显卡:影驰RTX3090Ti星曜OC
电源:微星MPG A1000G PCIE 5.0
机箱:微星MPG VELOX 100R机箱
i7-12700K与微星MPG Z690 EDGE TI WIFI DDR4的组合非常不错,主要是该主板颜值做工都不错,且供电模组强劲,我一直都是超频P核5.0GHz,E核4.0GHz使用。其次是该主板还是使用的DDR4内存,也可以说是目前微星使用DDR4内存的最强Z690主板。
散热方面为了压住超频后的i7-12700K,我用的是微星的旗舰水冷——MEG战神S360。该水冷除了性能强劲外,还在水冷头上带有一块2.4英寸的IPS屏幕以及一个60mm的下压式风扇,前者可以让水冷头的效果更个性化,后者可以强化CPU供电模式的散热。
微星MPG A1000G PCIE 5.0电源更是要好好介绍一下,该电源是安装intel ATX 3.0标准打造的电源,最大的特点就是搭载了12VHPWR接口,能为最新的PCIE 5.0设备供电,单根12VHPWR供电线的功率为600W,只要一根线就可以轻松满足RTX3090Ti以及未来RTX40系显卡供电需求。

按小伙伴的原话表示:用这台主机来评测这台红米显示器,应该是这台显示器的“祖坟”冒青烟了。当然,玩笑归玩笑,实际体验下来这台红米21.45英寸显示器是真的有点惊喜。
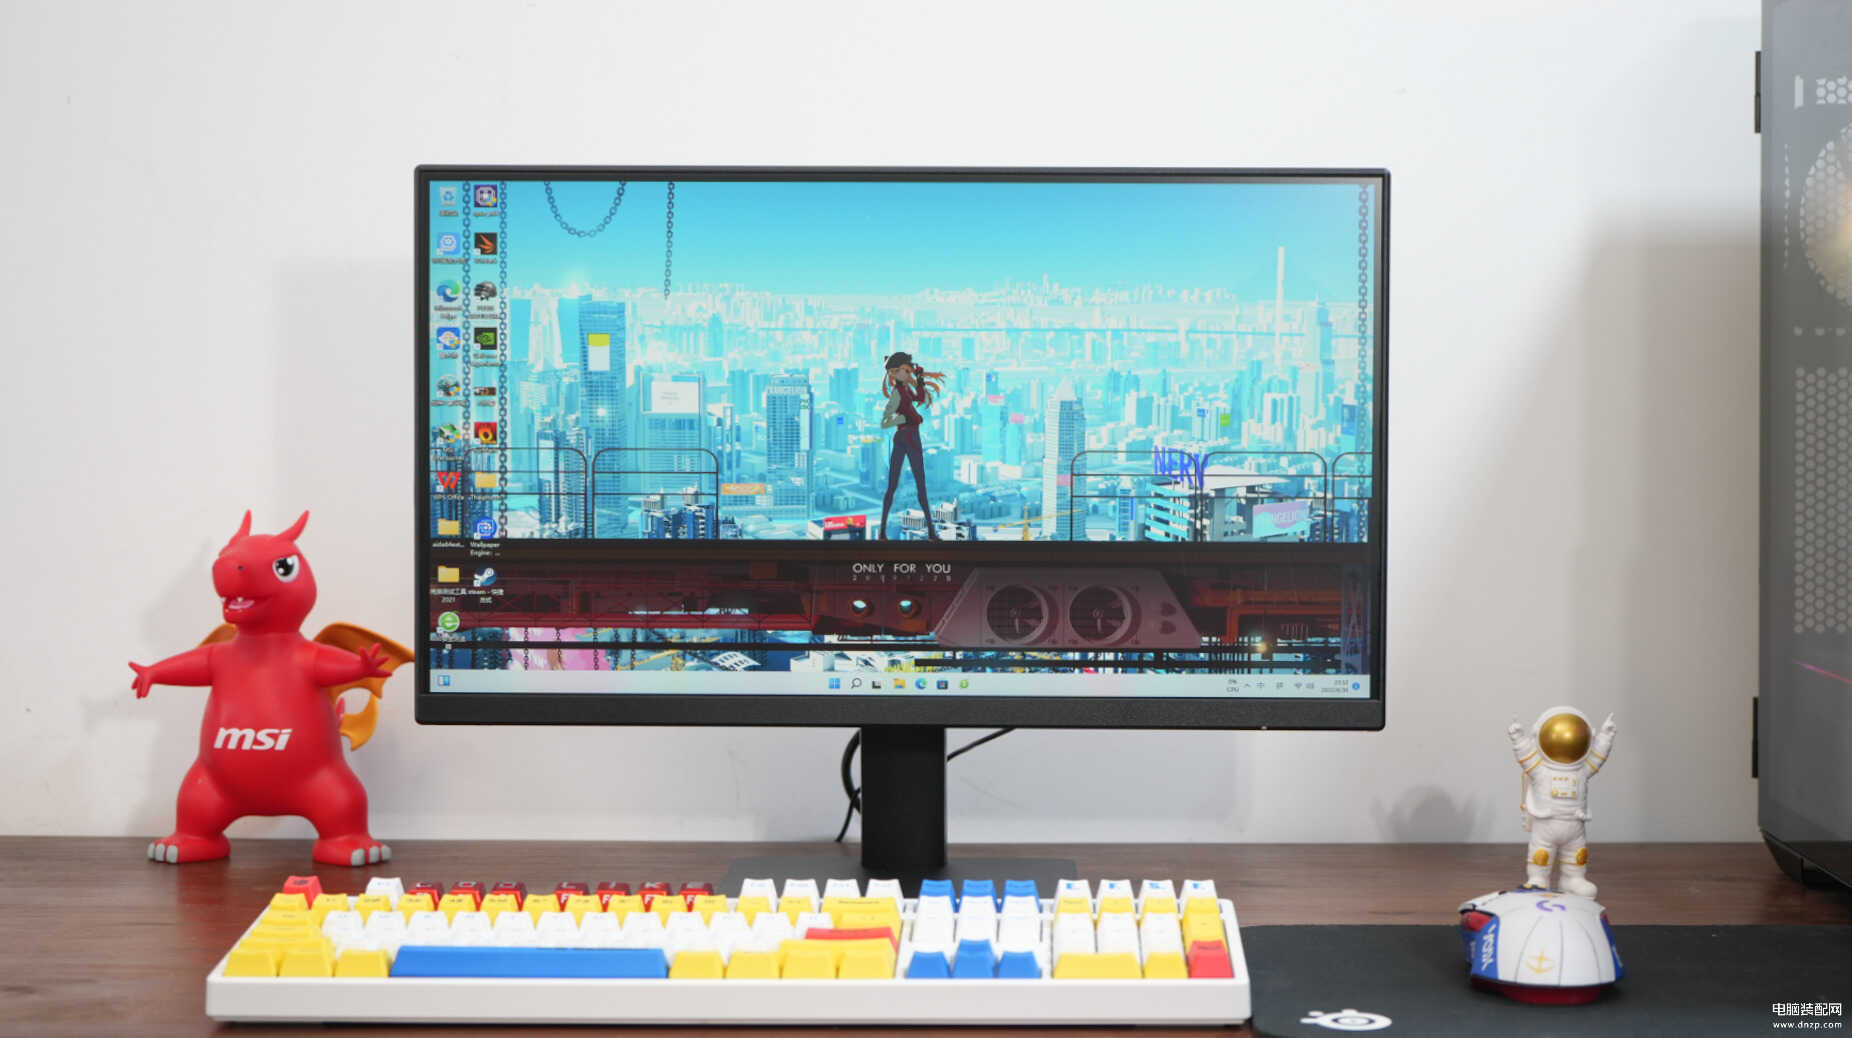
先说该显示器的屏幕规格,红米官方表示其搭载了一块21.45英寸的VA面板,分辨率为1080P,原生8Bit色深,具备300尼特高亮度,75Hz刷新率,同时全局DC调光技术,并获得德国莱茵TUV低蓝光认证。
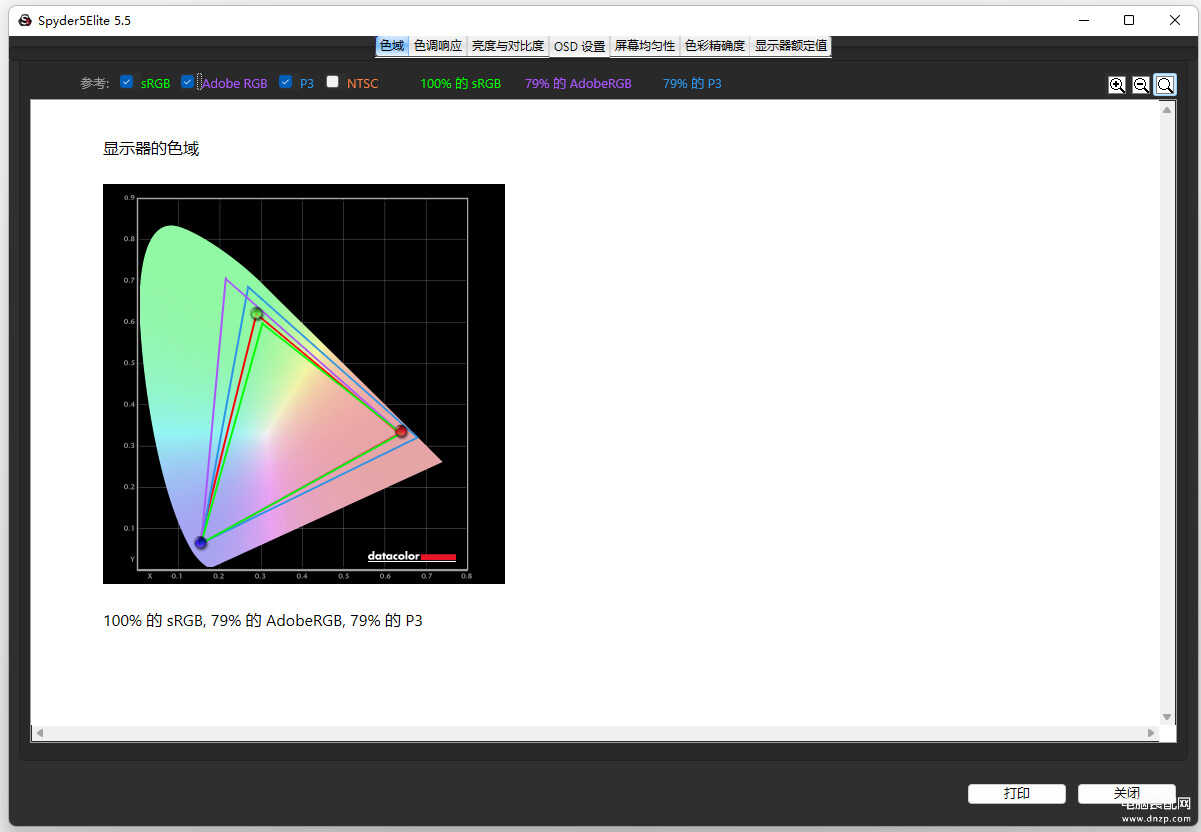
为了进一步了解该显示器屏幕的具体表现,我直接用了Spyder5 Elite对其进行了测量。
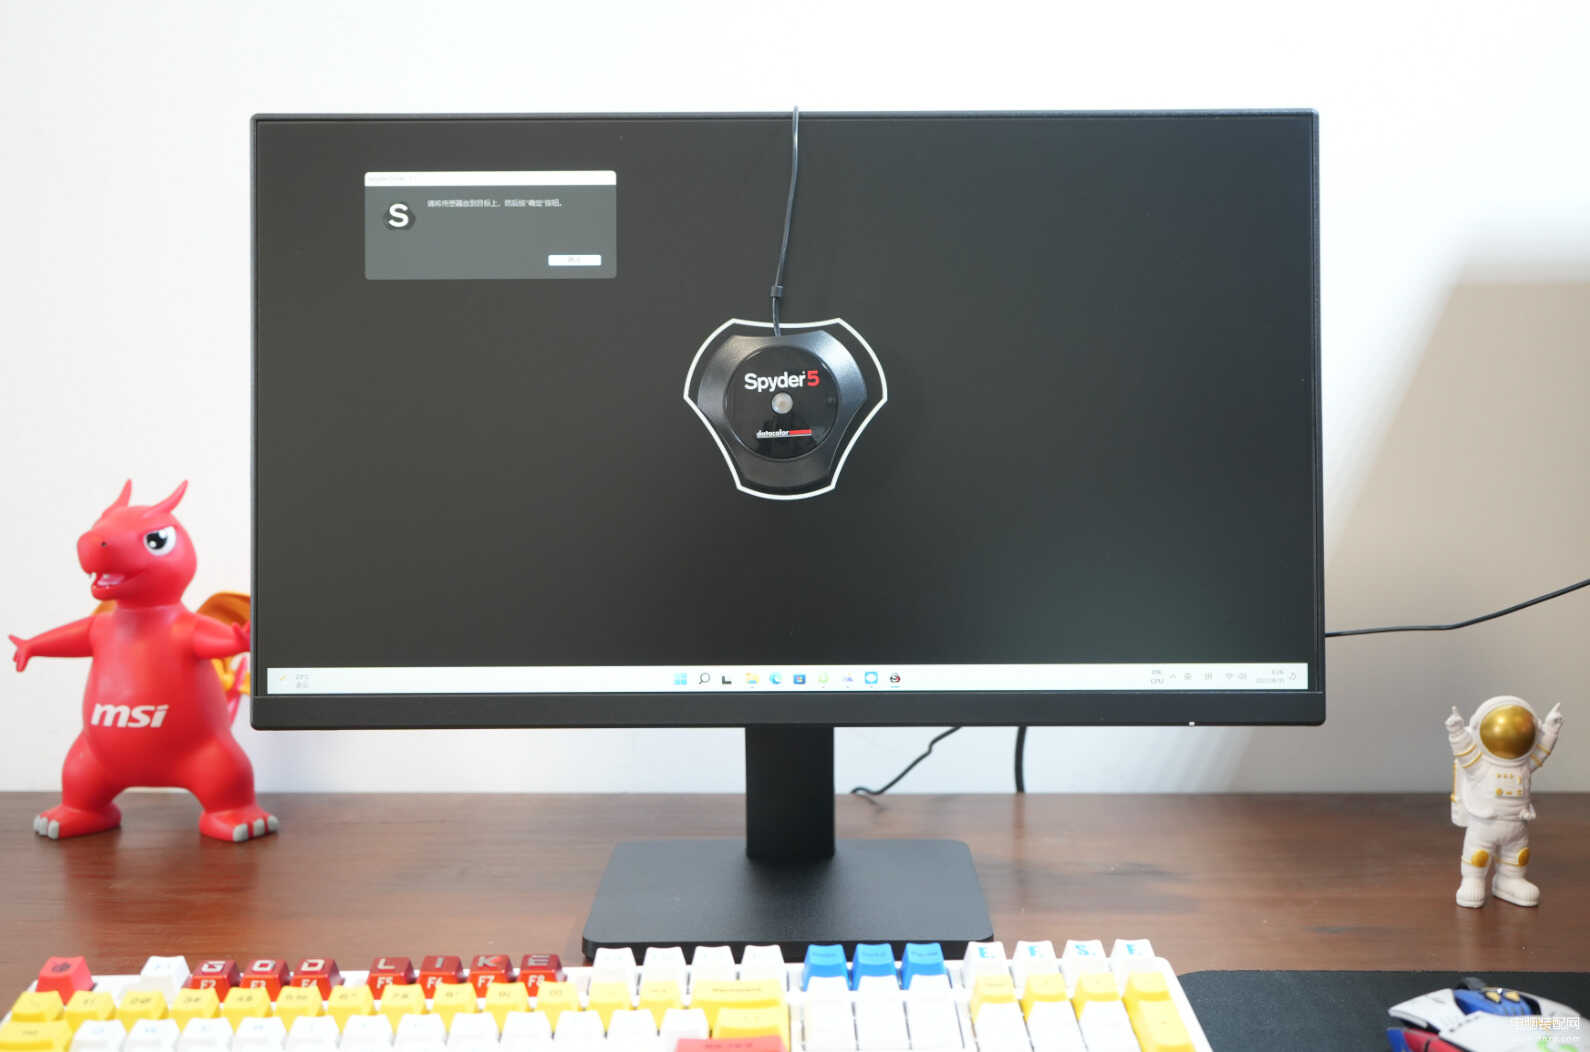
色域方面,该红米显示器有100%的sRGB、79%的AdobeRGB、79%的P3色域。
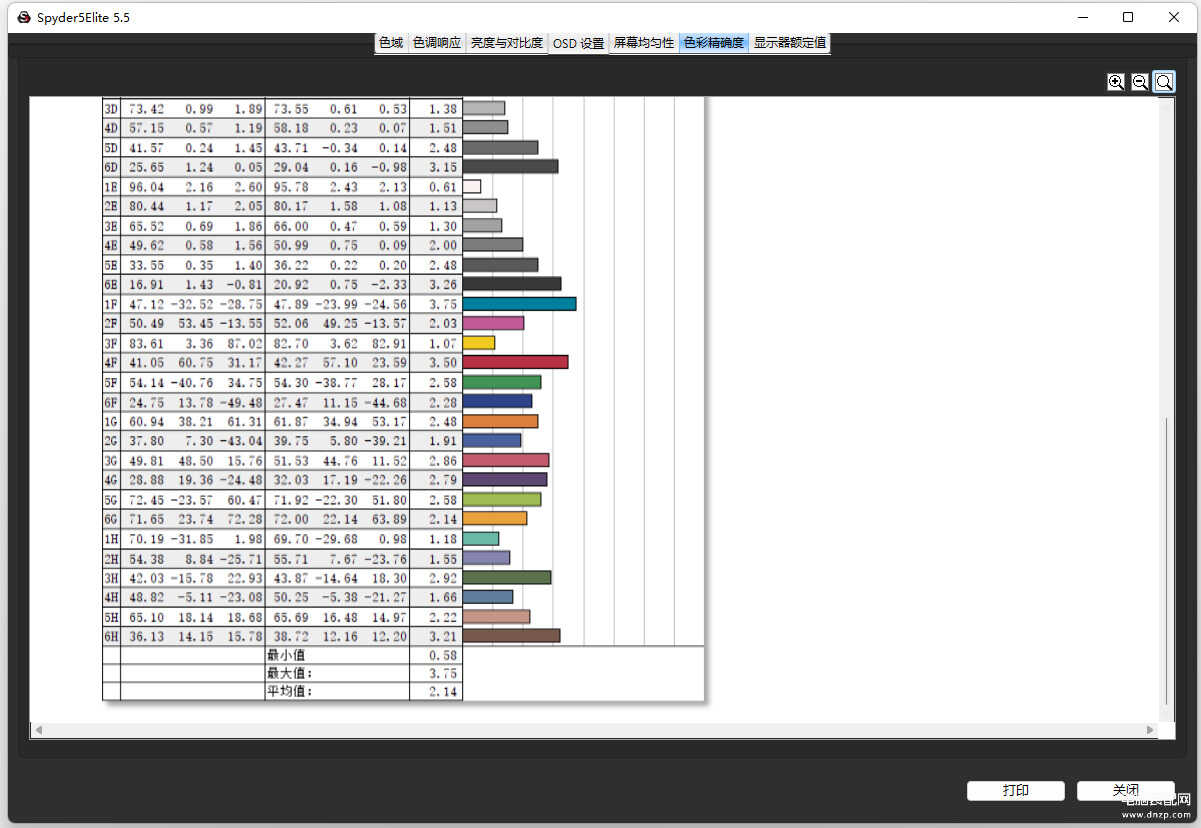
48色色彩准确度测试中,最小值仅为0.58,最大值是3.75,ΔE平均值为2.14,对于一款369元的显示器来说我觉得已经完全够用了。
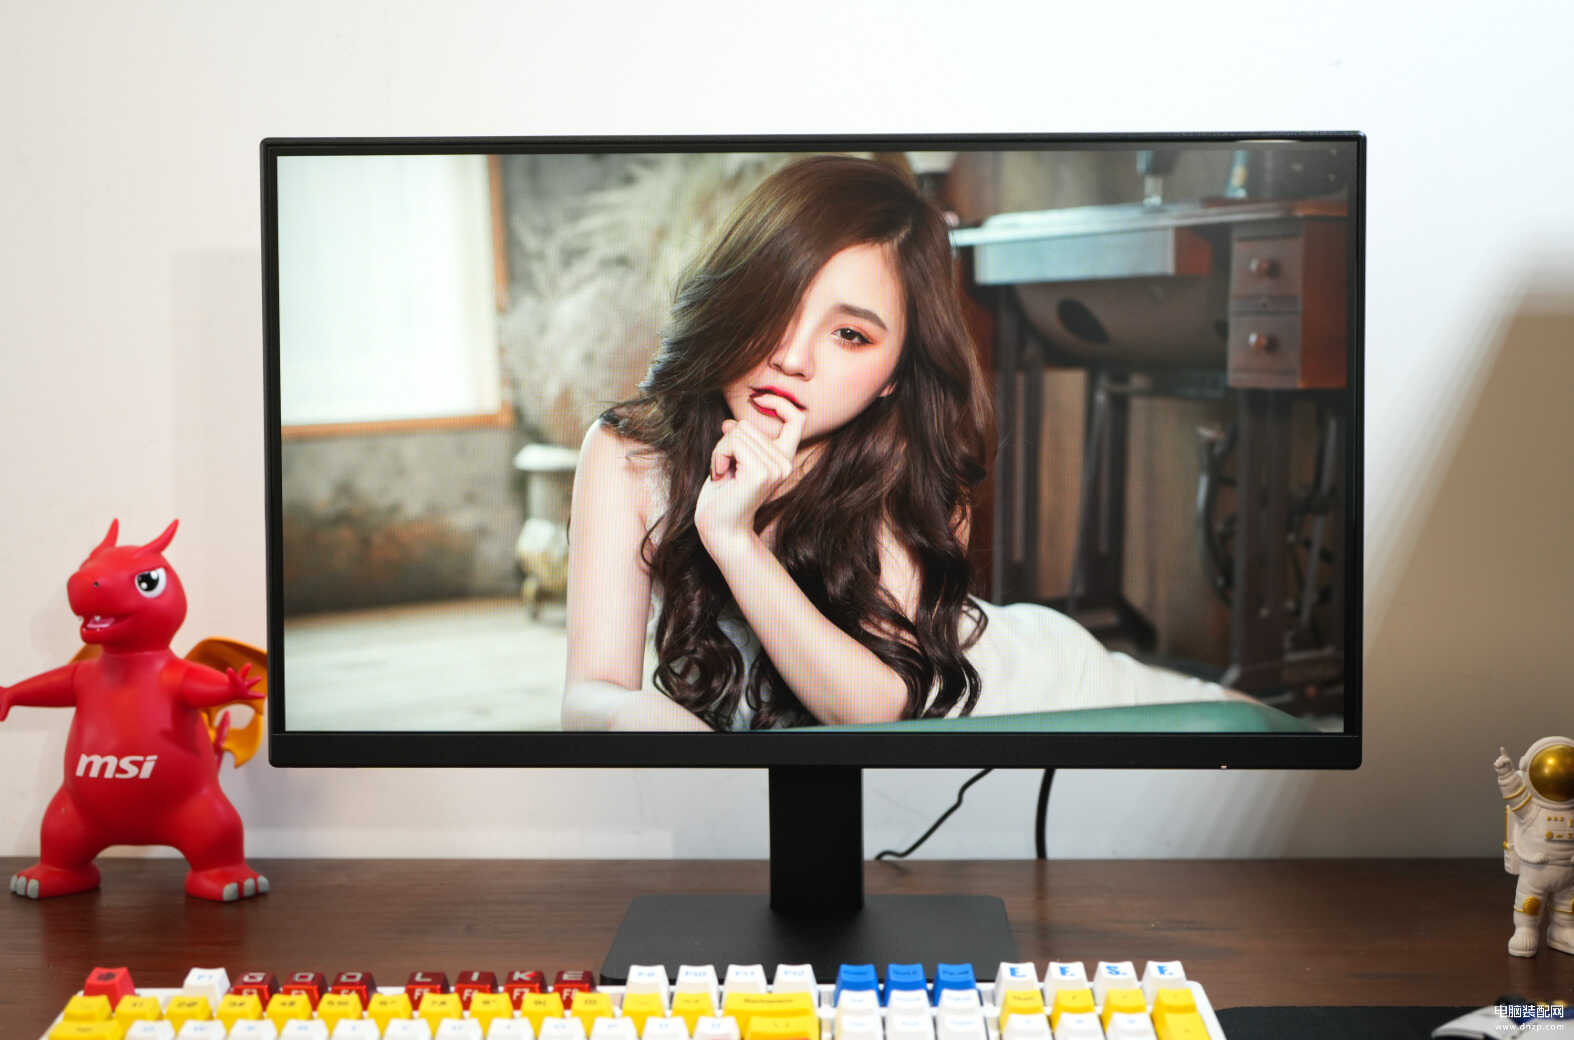
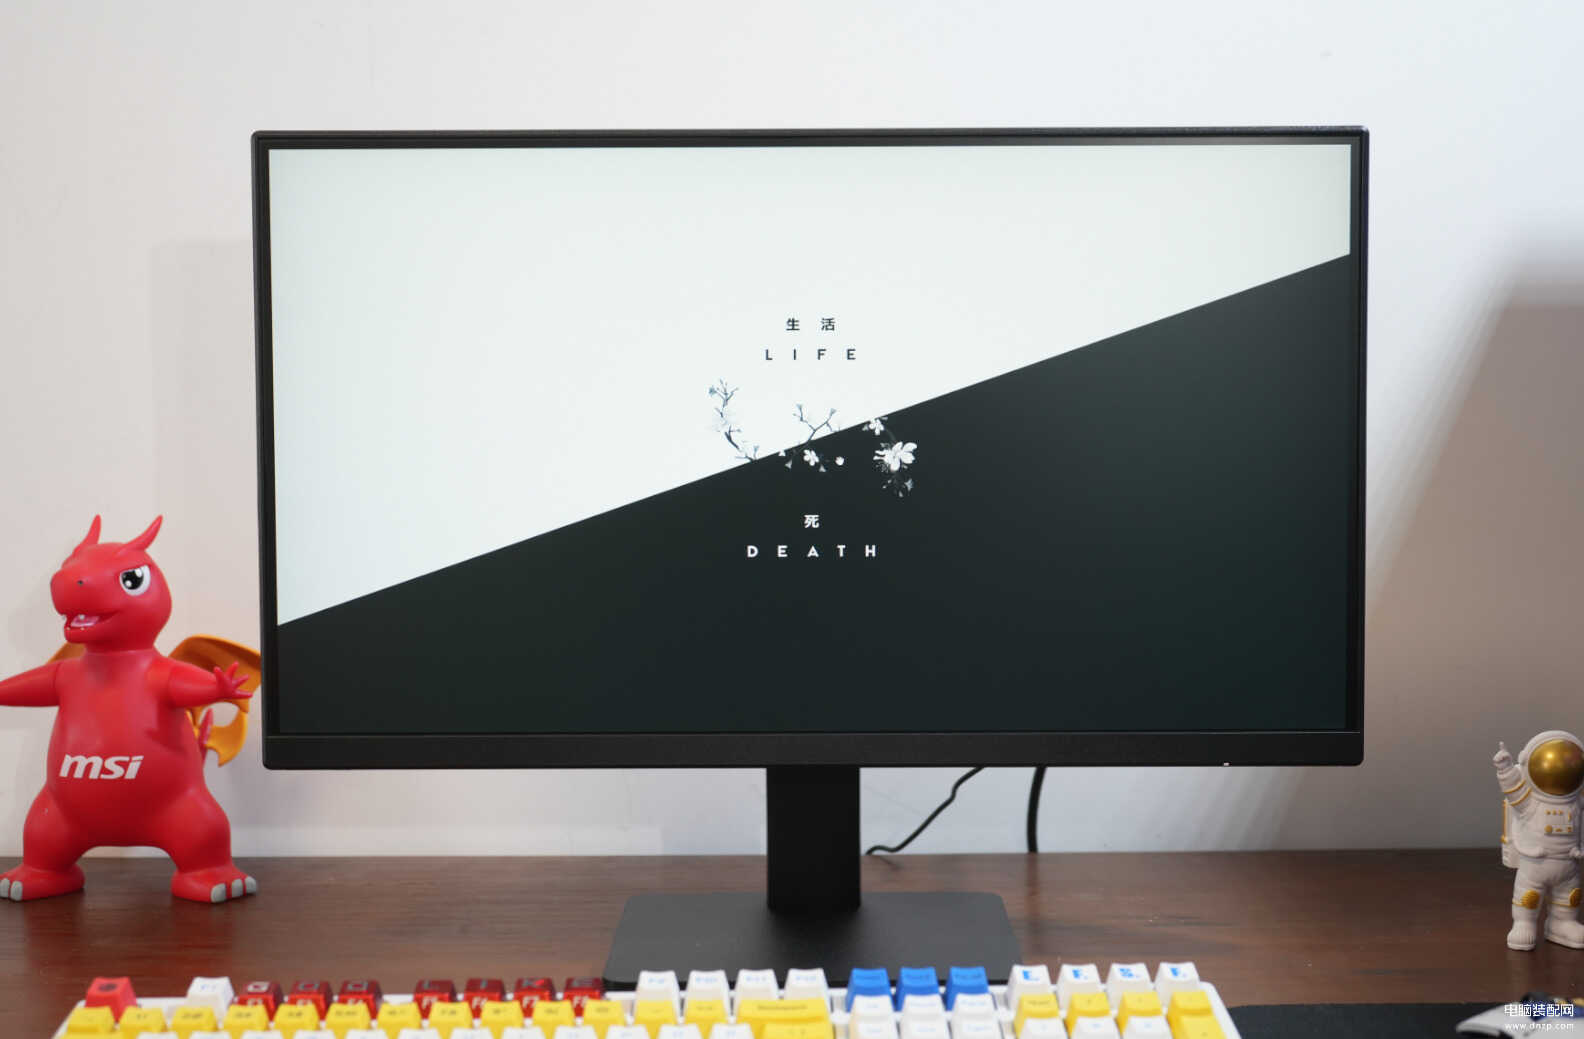
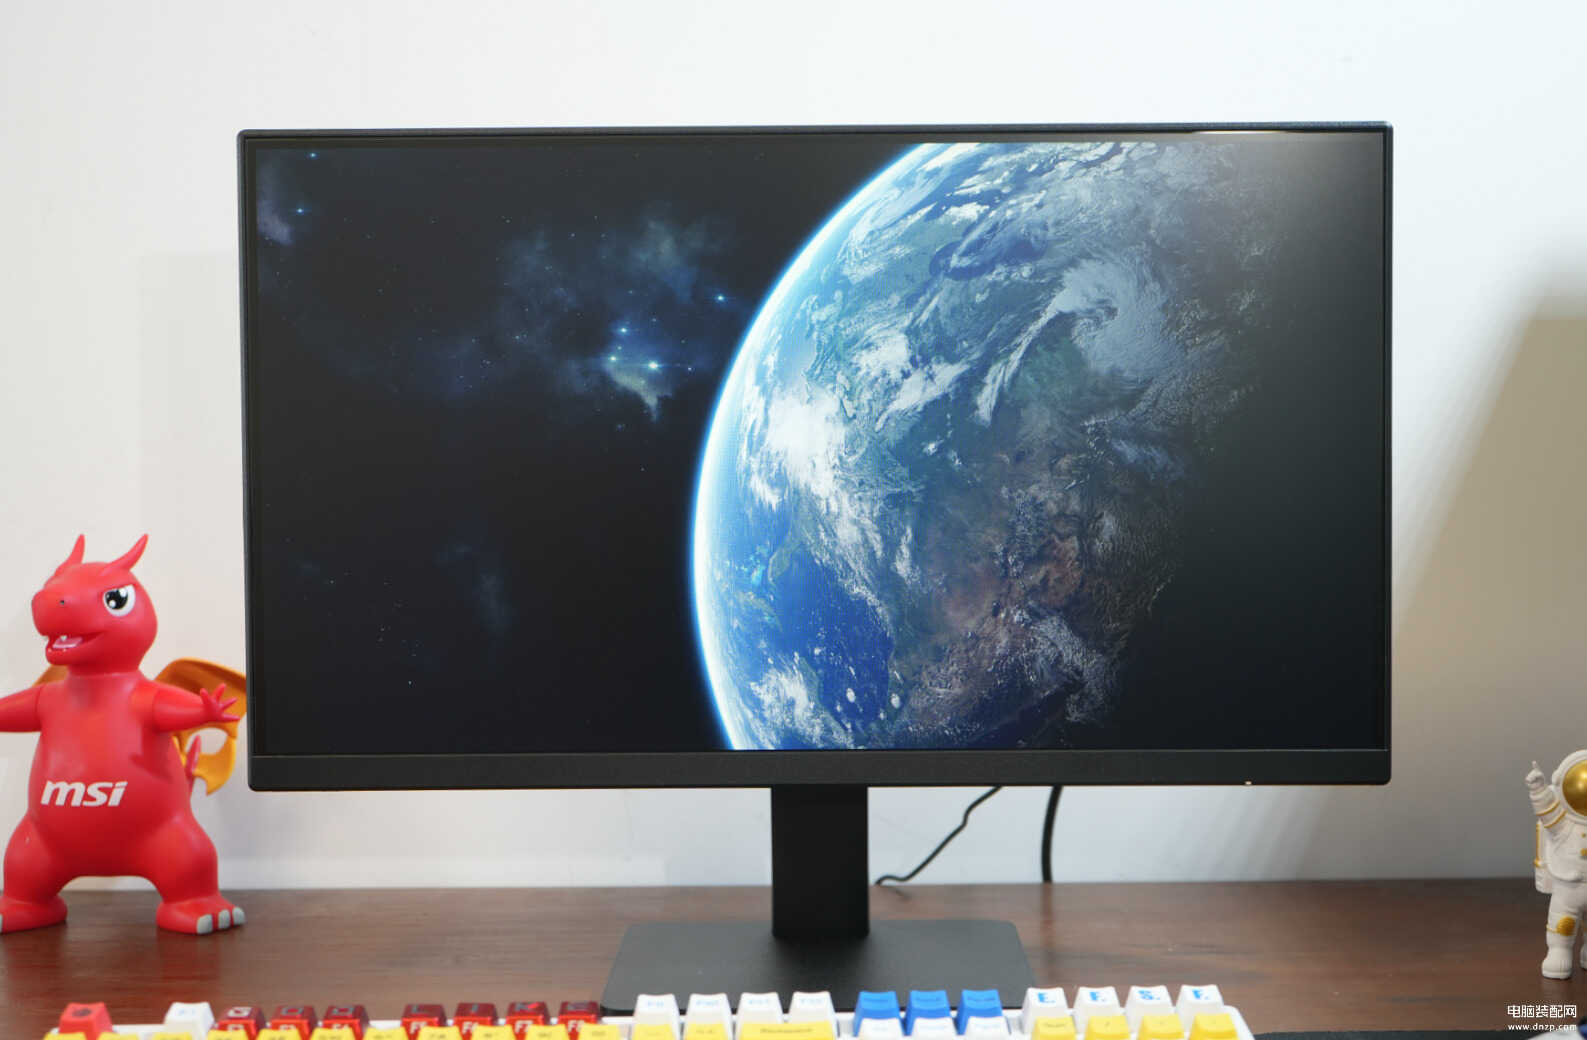
红米21.45英寸显示器的实拍展示图如下,个人觉得色彩和亮度都没有太大问题,别说当个监控显示器,日常商用、简单修图完全的绰绰有余。
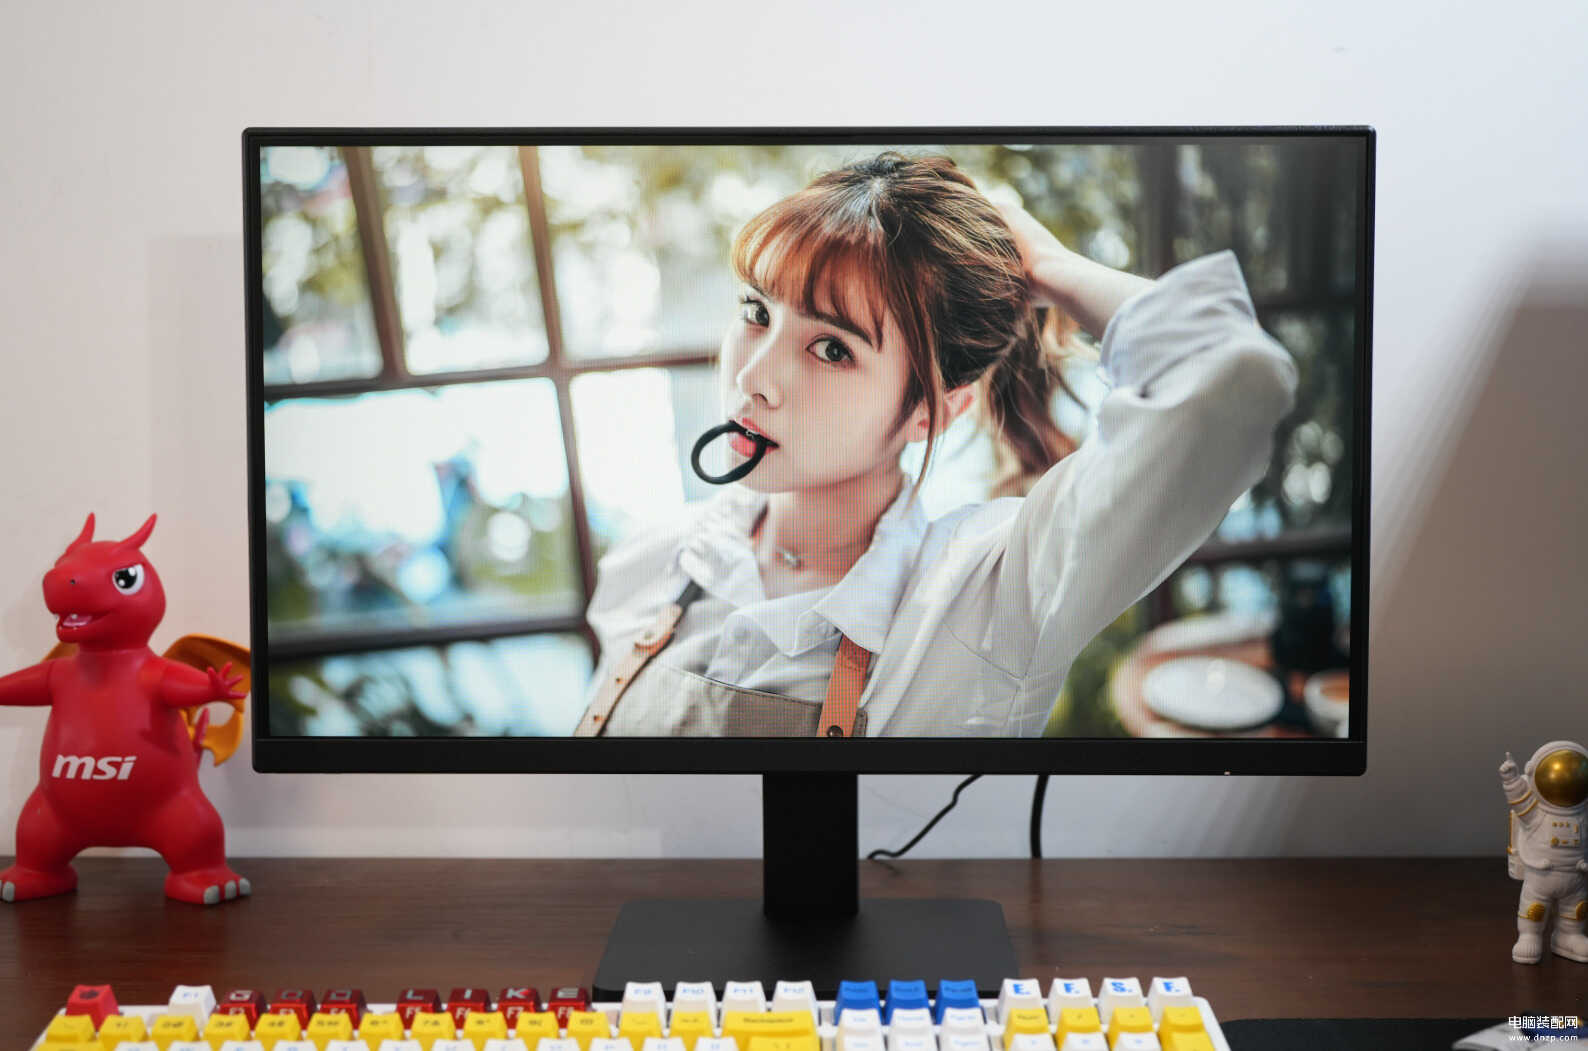
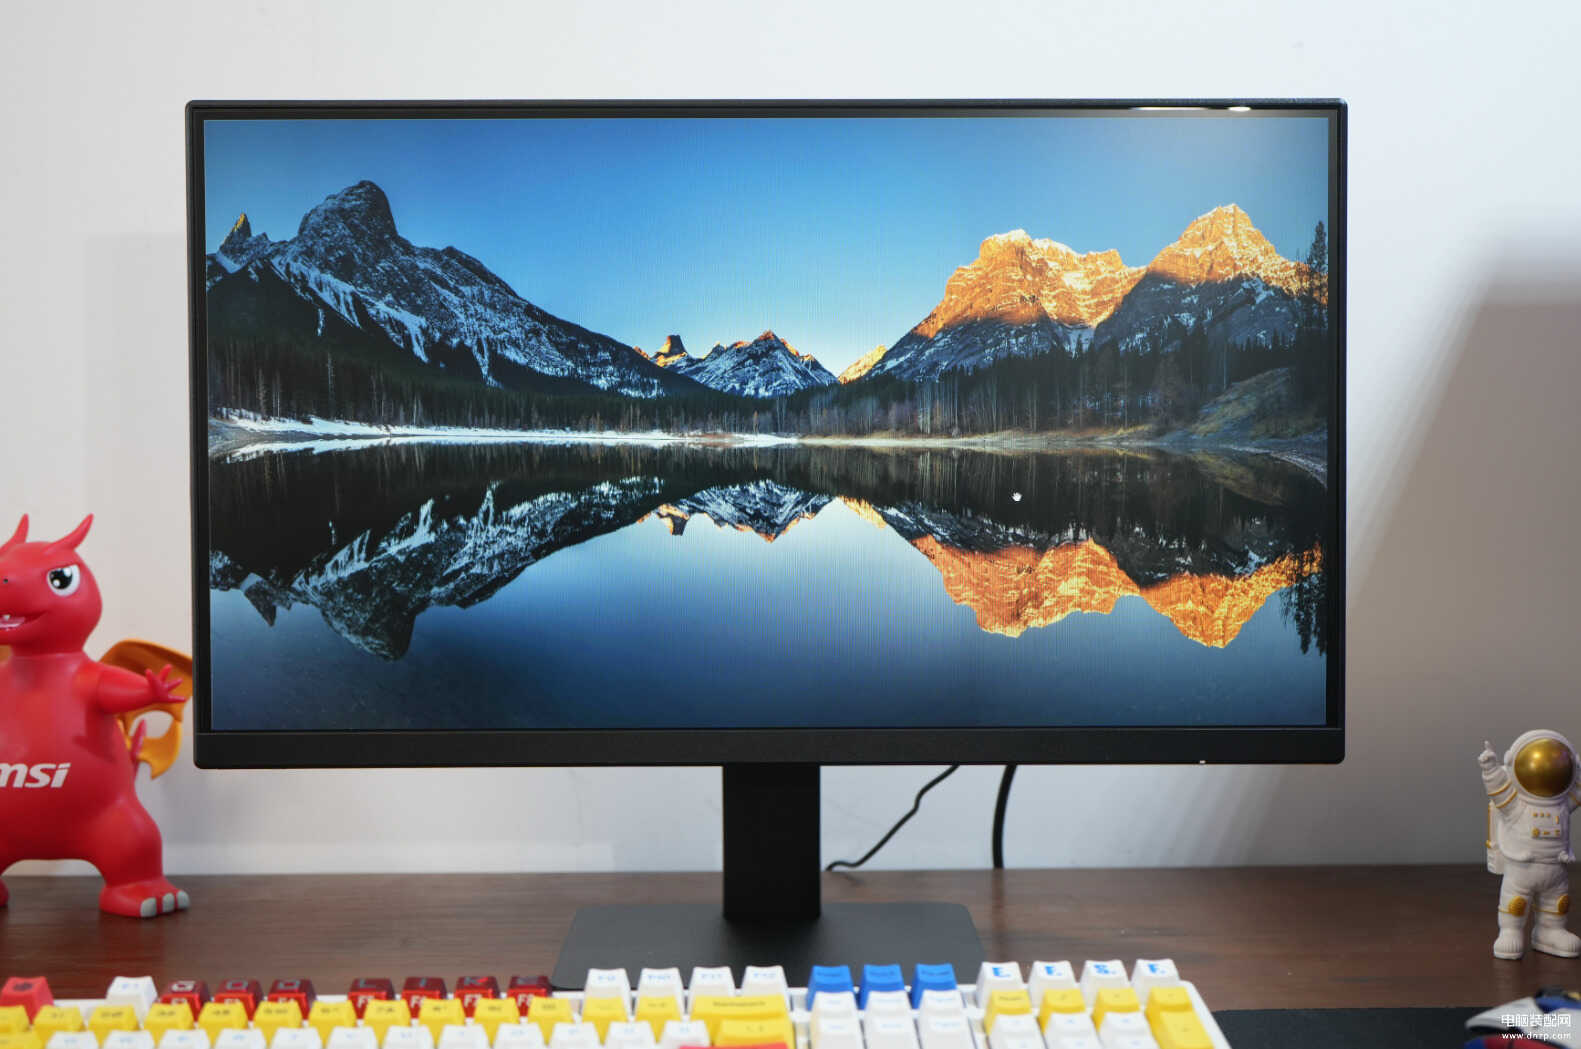
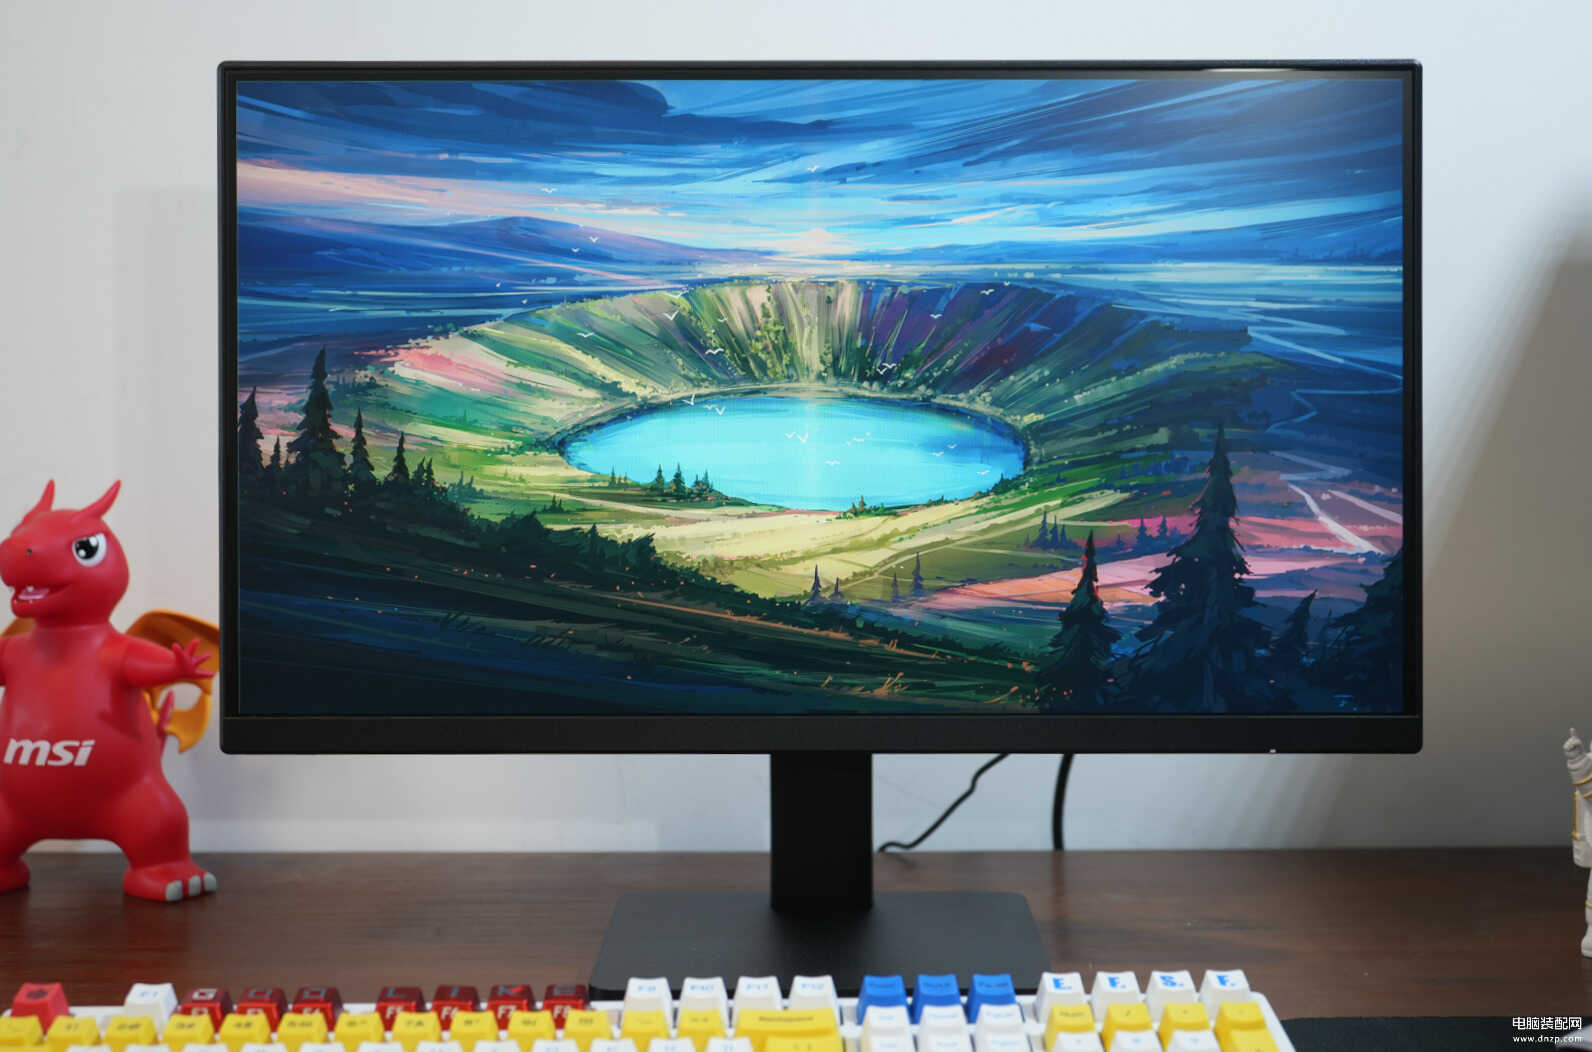
因为VA面板的特性,该显示器显示黑色画面非常纯净,且对比度很高,看起来非常舒服。
至于屏幕的颗粒感,近距离仔细看还是能看出像素点的痕迹。

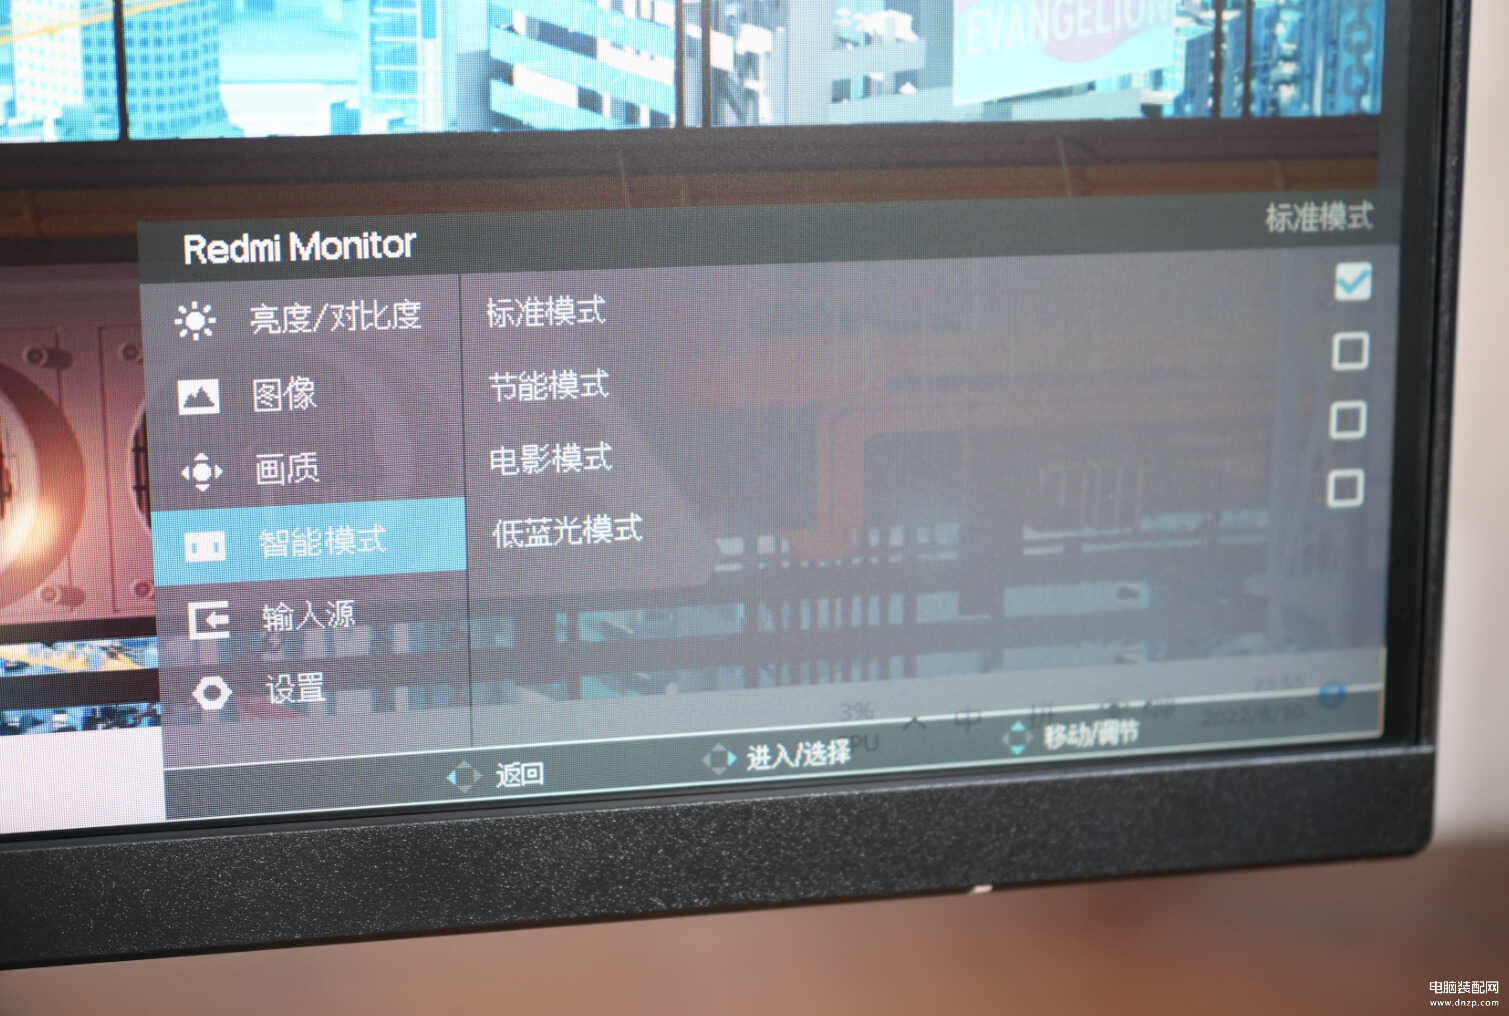
再来说说显示器的可调节部分。五维实体按键使用体验不错,上下右键分别都设有快捷键,可以快速地切换视频输入源、显示器模式等。
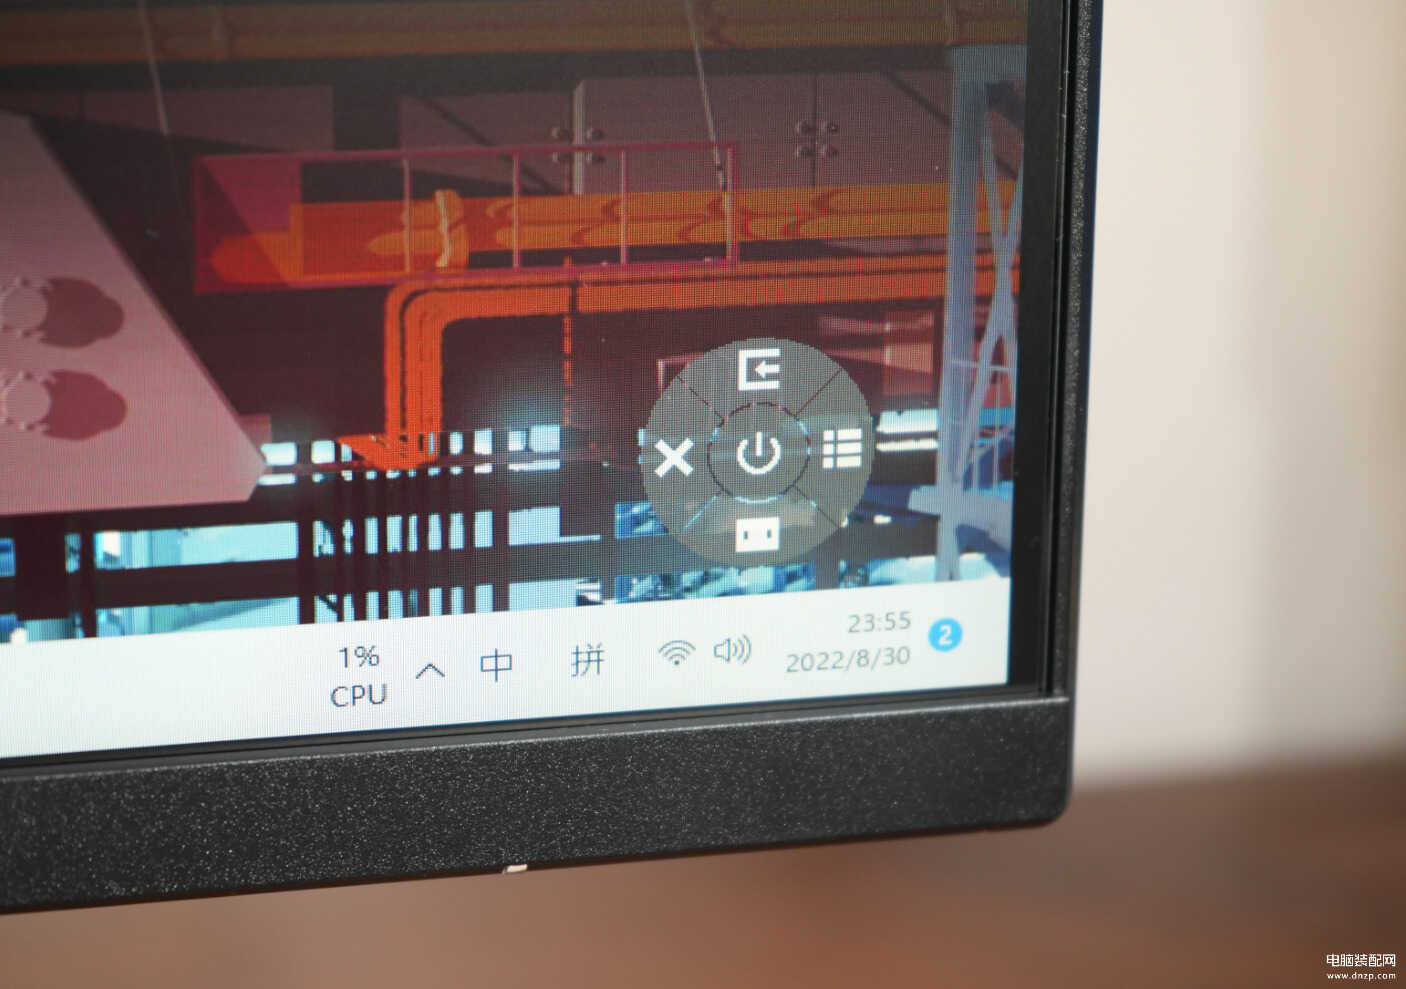
其中显示器模式分为4个:标准、节能、电源、以及低蓝光模式。
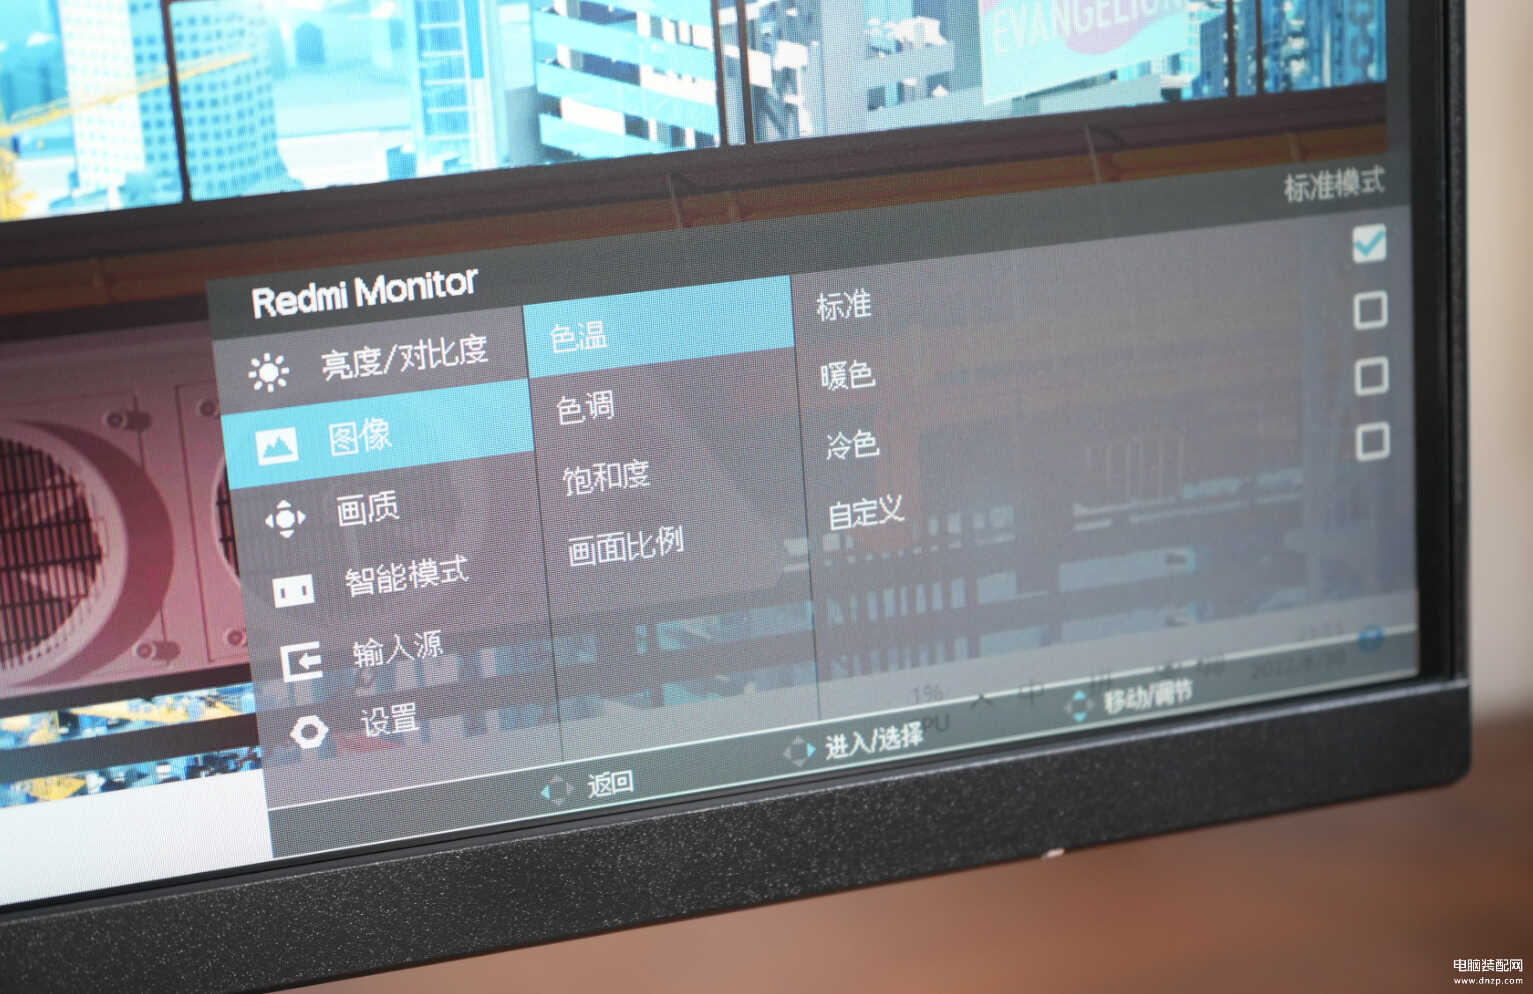
显示器图像的亮度、对比度、锐度、色温、色调、饱和度等等都支持自定义调节。
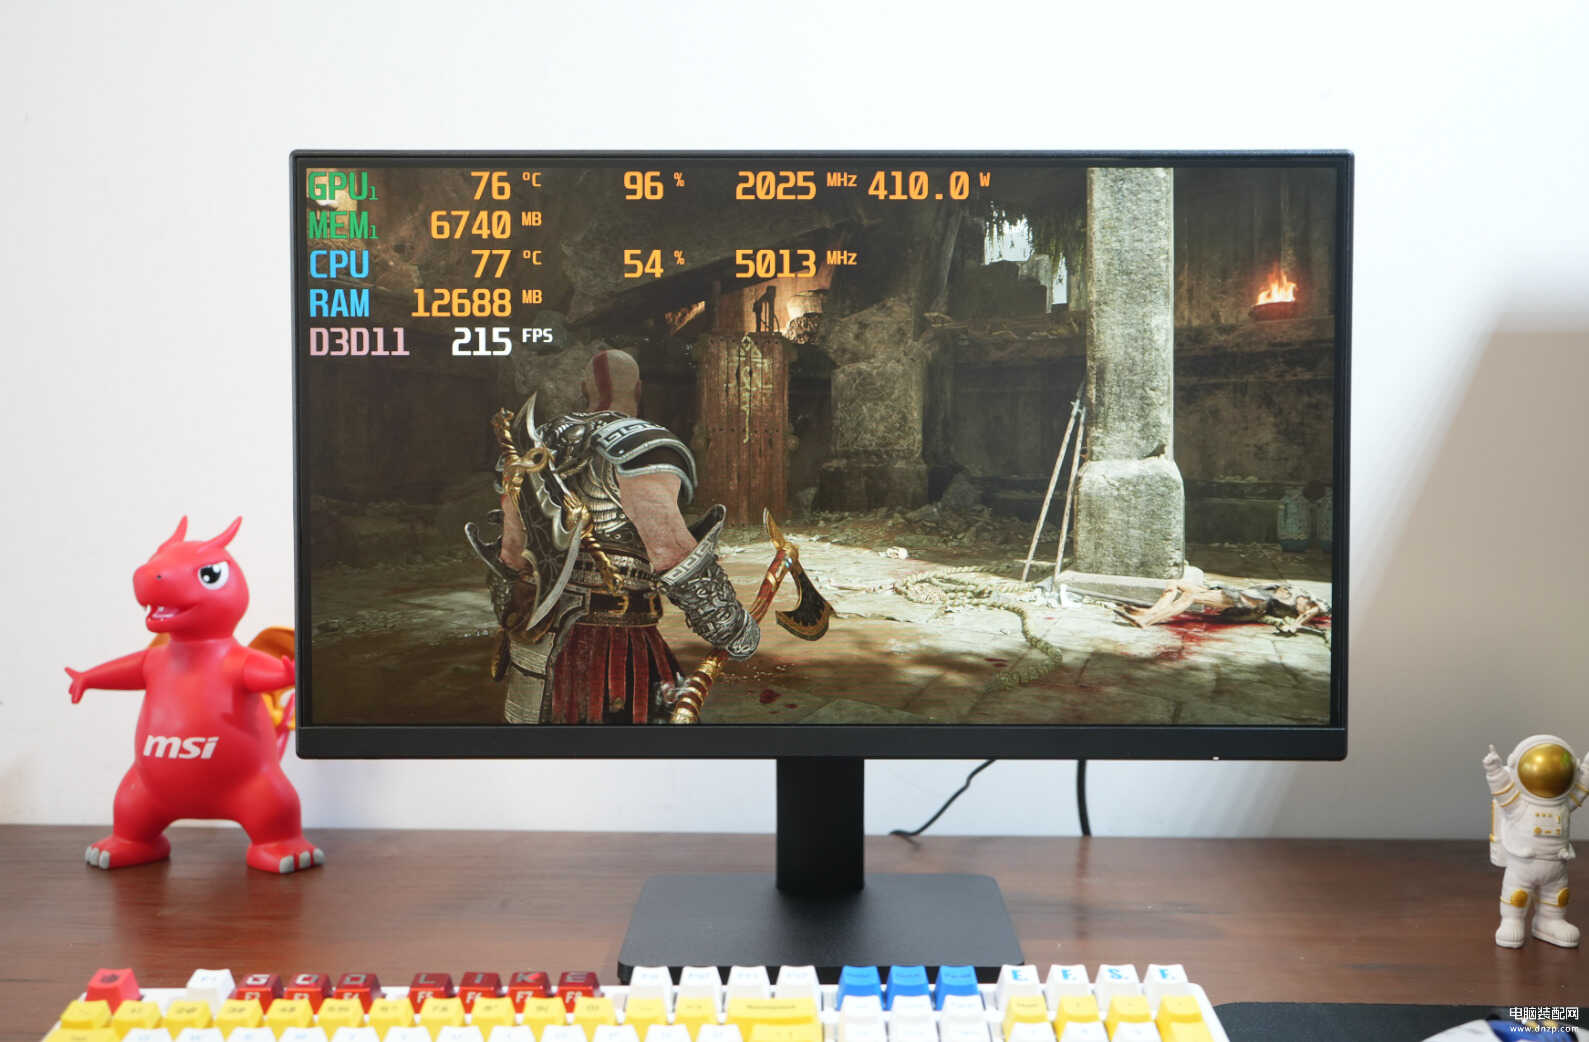
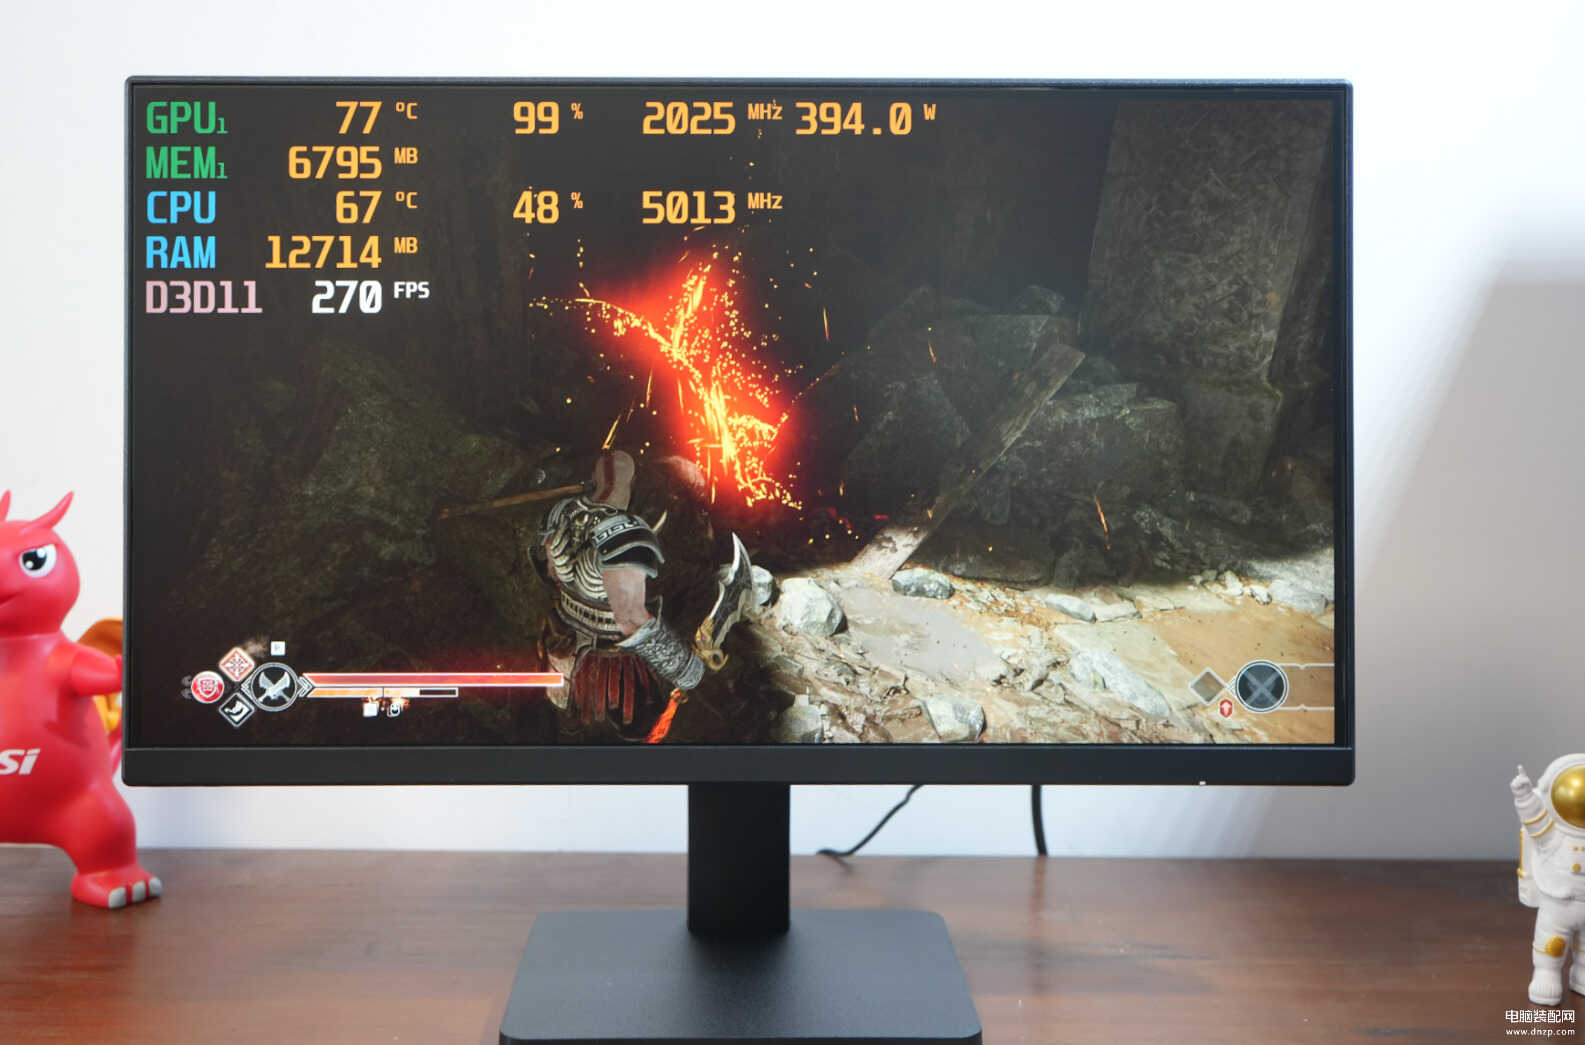
当然,我也测试了下游戏体验,使用的游戏为《战神》,话说该电脑跑1080P的分辨率全特效,游戏帧数轻松达到了200FPS以上,整体游戏体验很不错。
总结:
作为一款369元的显示器,红米21.45显示器的表现的确有些出乎我的意料。虽然安装繁琐了一些,但没有使用满大街的公版模具,且整体的画面表现很是惊喜,无论是亮度还是色彩表现都可以比肩一些千元显示器。三面窄边框的设计组个双屏、三联屏也没有什么压力,个人觉得还是非常值得推荐。
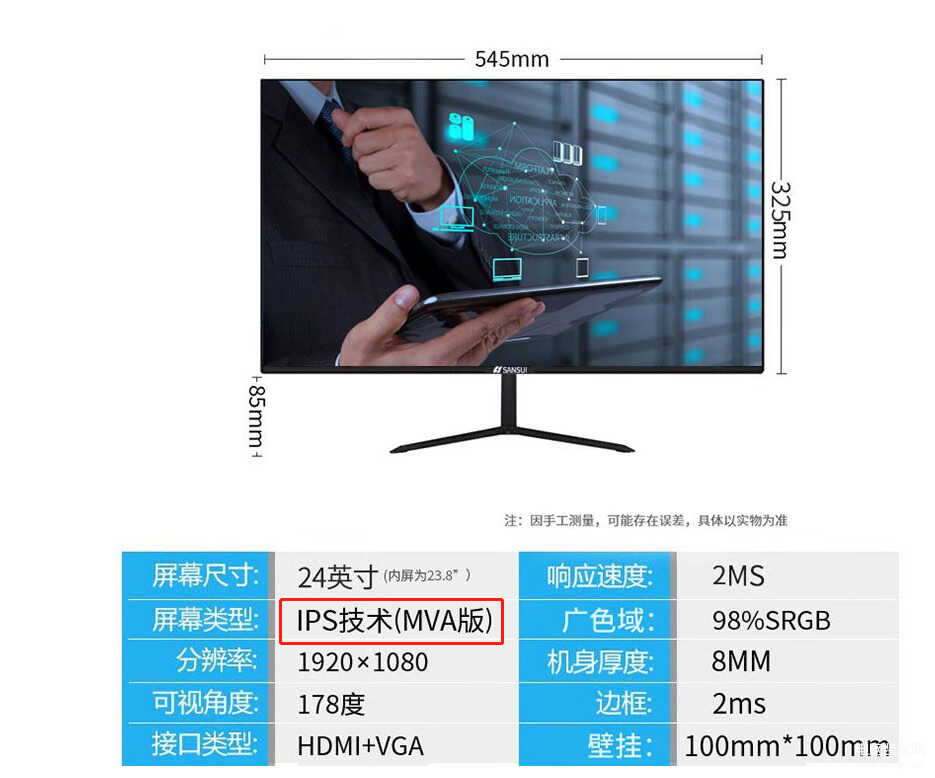
就当我把显示器交给小伙伴时,小伙伴突然说为什么不买这款三水显示器?我一看是该显示器不但更大,采用了24英寸的屏幕、IPS面板、75Hz的刷新率,最关键的是价格只需要319,言下之意就是我这台小米显示器买贵了?
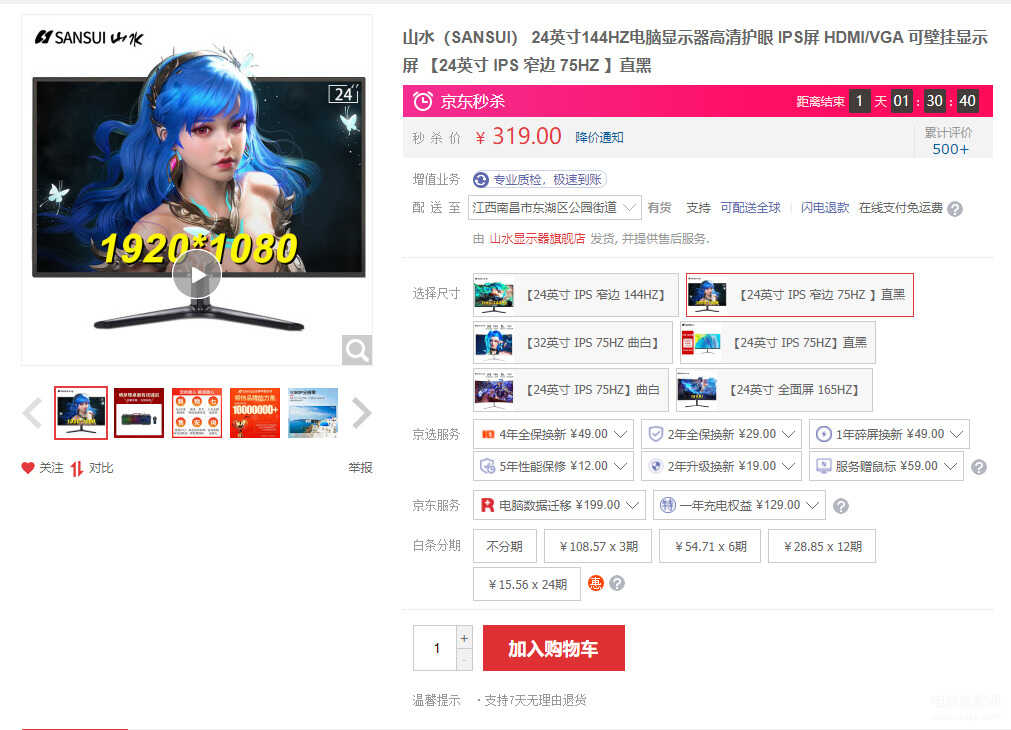
但我查看该显示器的详情界面,觉得有些奇怪啊,有没有小伙伴给我科普下什么叫IPS技术MVA面板?