


为了解决电脑室网络的稳定,小编拿到了一个磊科的小路由器。

将外网线接到WAN口,用一根网线通过其LAN口与电脑室里面的交换机相连,重置路由器,在浏览器中输入其管理网址:leike.cc,这里要注意的不是192.168.1.1。连通后就会出现欢迎界面,如下图。

单击“快速向导”,选择WAN数量,如下图:
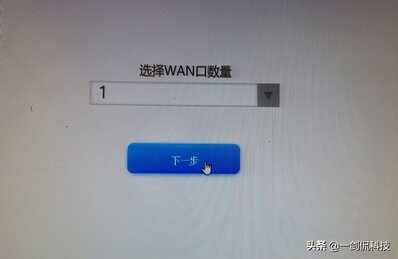
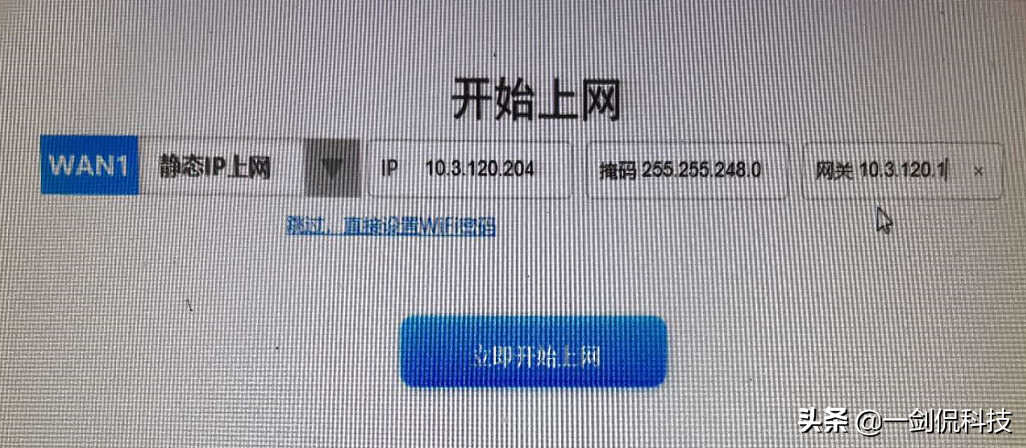
这里选择1个WAN口,单击下一步,进入WAN1的设置状态,这里选择“静态上网”,输入IP地址、掩码和网关,单击“立即开始上网”。
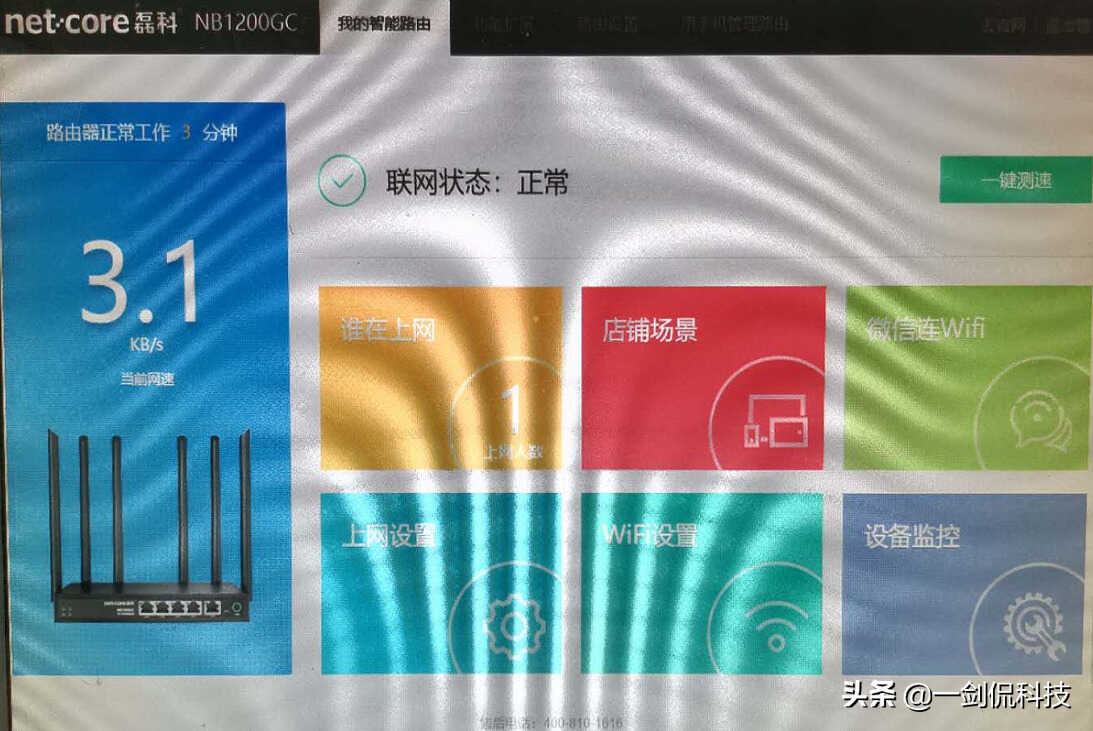
稍等片刻就可以进入到管理页面了。
设置无线上网
单击“WiFi设置”,进入到无线设置页面。
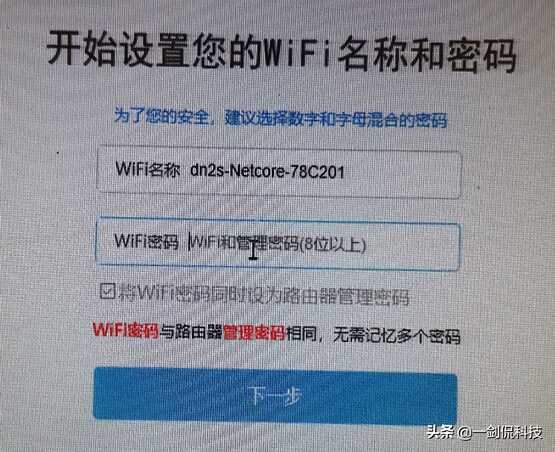
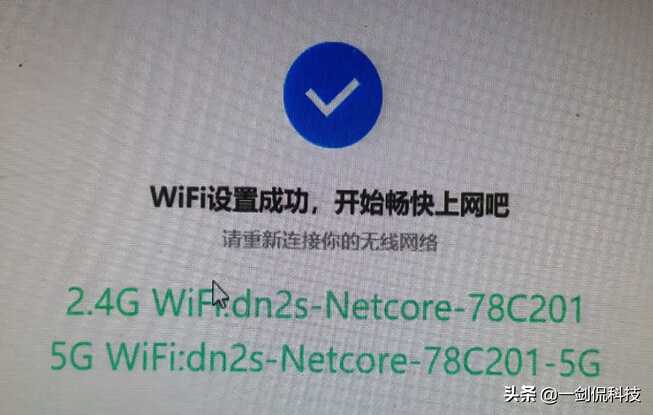
输入WiFi的名称与密码,单击“下一步”,会显示无线WiFi设置成功的页面。
重新登录,就可以上网了。

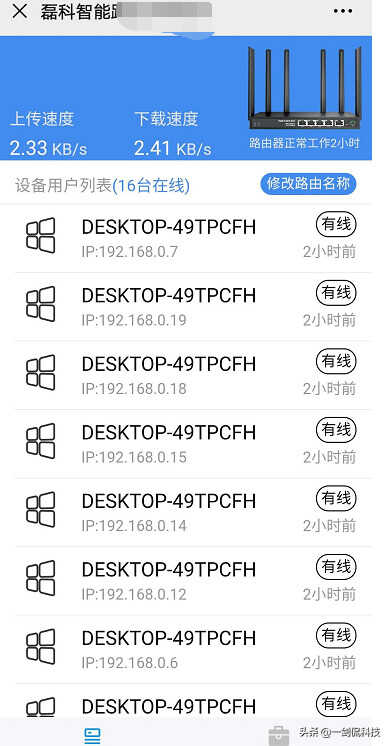
磊科路由器还可以通过公众号来管理。

下面是其主页面。

单击“我的路由器”,扫描其二维码,输入登录密码,就可以找到对应的路由器了,再单击“管理列表”,跟本路由器相连的设备就出来了。
这是磊科路由器的设置过程,是不是很简单?只是小编在捣来捣去花了两个多小时,所以还是总结一下,免得大家再走弯路。