工作任务2 图形模式安装linux
一、图形模式安装linux
1.使用VMware 建立虚拟机后,按照任务要求准备实验环境,加载系统光盘镜像,选择安装方式:图形化安装
界面说明:
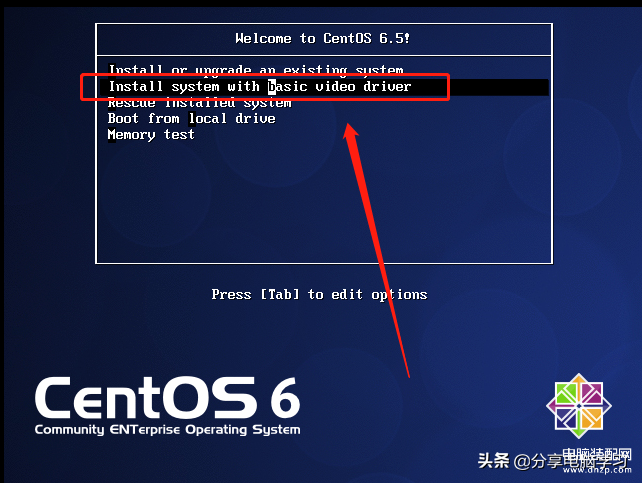
Install or upgrade an existing system //安装或升级现有的系统
Install system with basic video driver //安装过程中采用基本显卡驱动(图形化界面)
Rescue installed system //进入系统修复模式
Boot from local drive //退出安装从硬盘启动
Memory test //内存检测
进入安装过程
2.安装前Linux系统会对光盘进行完整性的检查,防止光盘损坏,导致安装途中出现错误,验证系统的安装文件中的数字签名是否合原版一致,以防被人植入木马病毒,检测光盘需要很长时间,所以如果你确定光盘没有问题,可以直接选择"skip"跳过这个检测
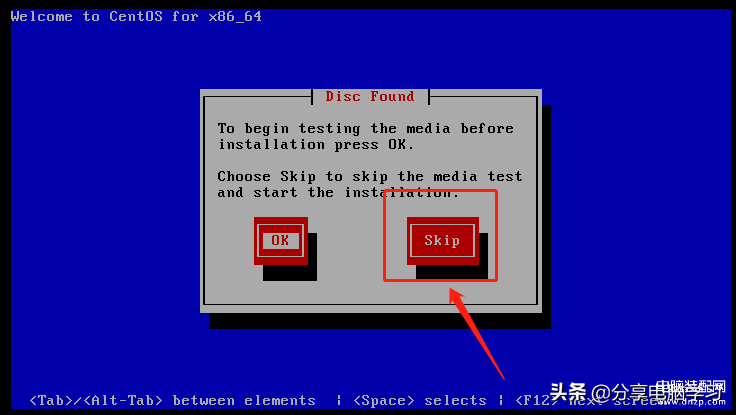
直接选择OK

3.这时出现了欢迎界面,选择下一步"Next"。如果看不到直接回车就可以了
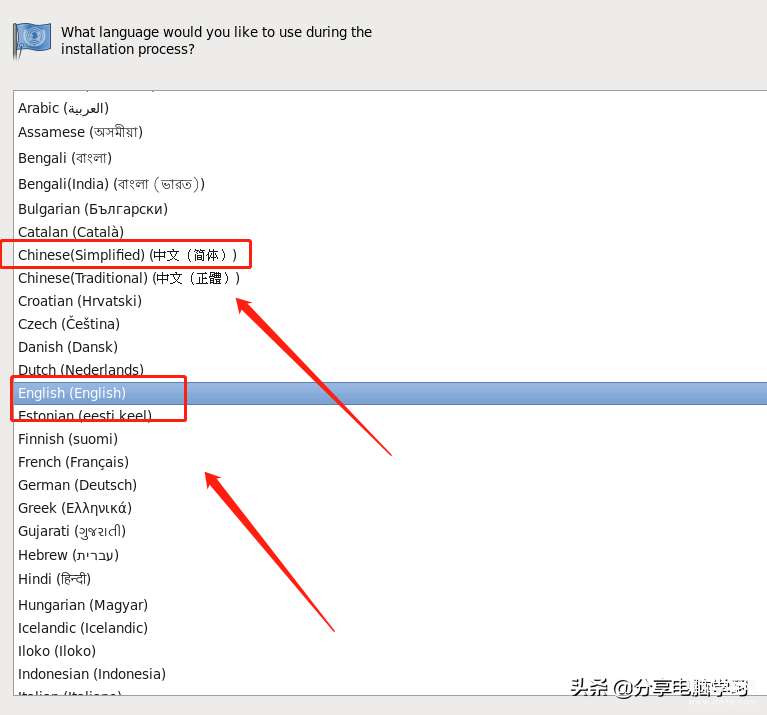
4.选择安装系统时屏幕显示的语言,默认的显示语言是英文,我们国内的用户应该选择"简体中文",然后点击"NEXT"下一步,我选择的是英文,可以根据自己需要选择。
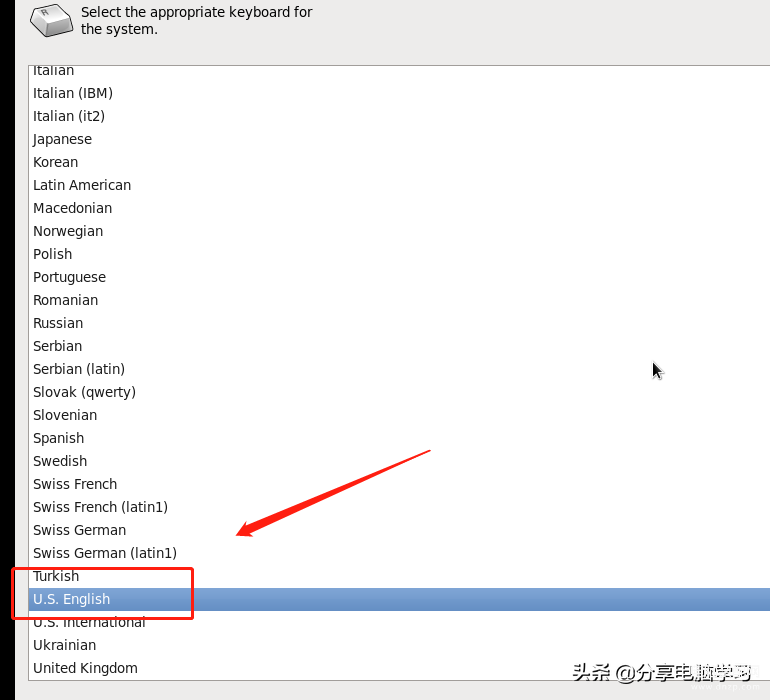
5.下面开始选择键盘的类型,我们使用的键盘一般是"美国英语式" 选择后点击下一步
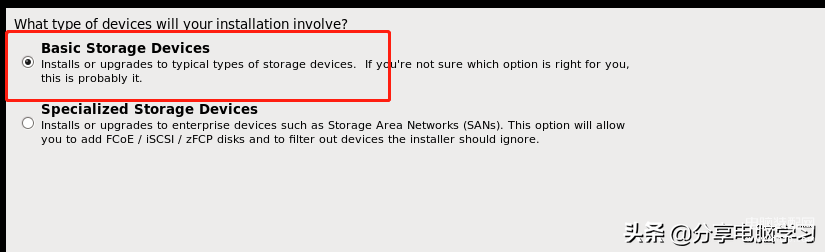
6.选择"基本存储设备"后点击下一步
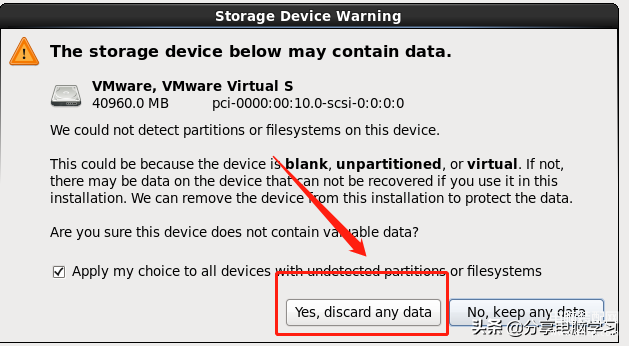
7.初始化硬盘,如果是一块新硬盘,就会出现以下提示,警告你要进行格式化硬盘操作,选择"是,忽略所有数据"后点击下一步
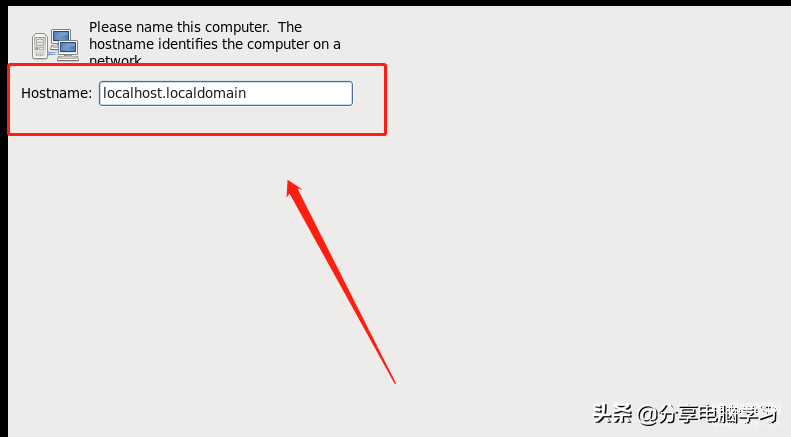
8. 设置主机名对话框,我们默认就可以,选择下一步
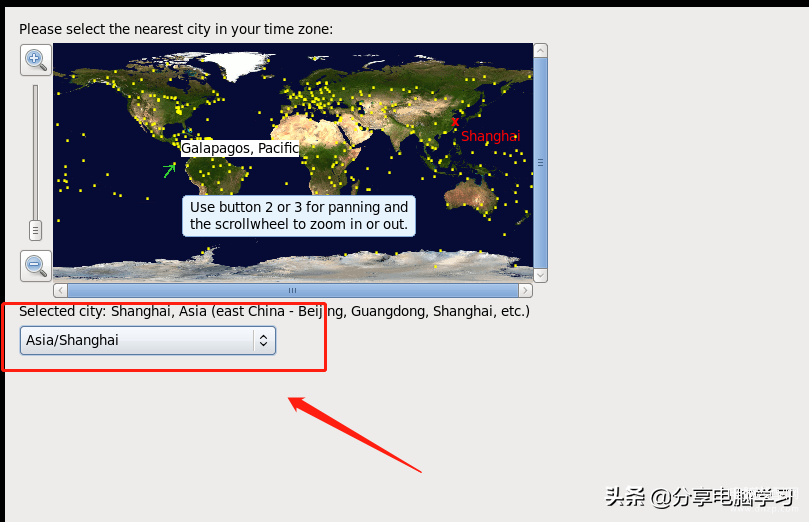
9.设置linux系统使用的时区 "亚洲/上海" 时区一定要选对,因为现在的服务器或者PC的时间都是和时间服务器同步的,设置错了时区,同步时间时就会出错,比如美国就和北京时间相差13个小时。
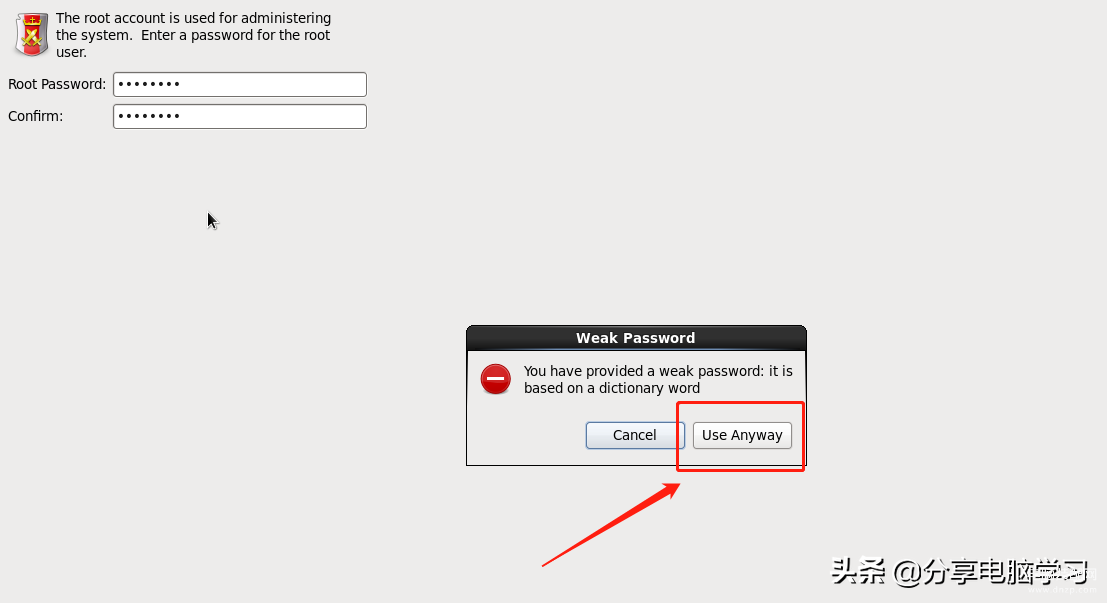
10.设置系统管理员的口令,为保证系统的安全,系统会要求输入一个多于六位的密码,我们为了便于记忆,统一设置成 "linux123"

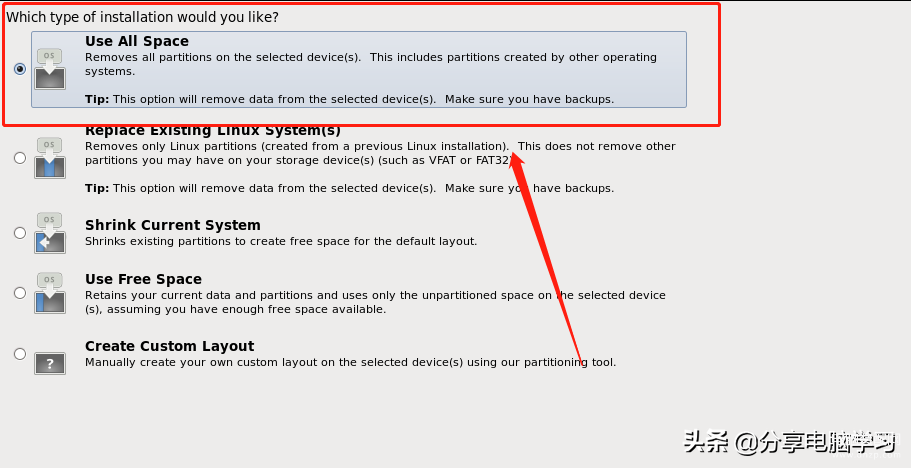
11.配置安装系统的方式,选择"使用所有空间"后点击下一步
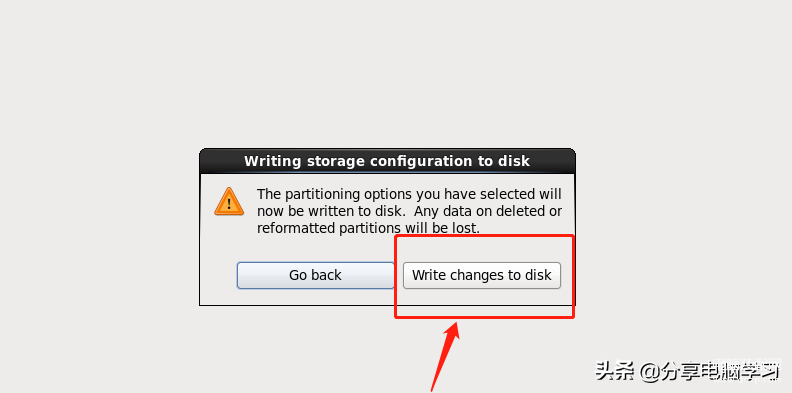
12.出现确认对话框,选择"将修改写入磁盘"
13.在这一步选择需要要安装的软件包,我们现在只是单纯的安装系统,所以选择Desktop(桌面),再选择"稍后定制" ,点击下一步
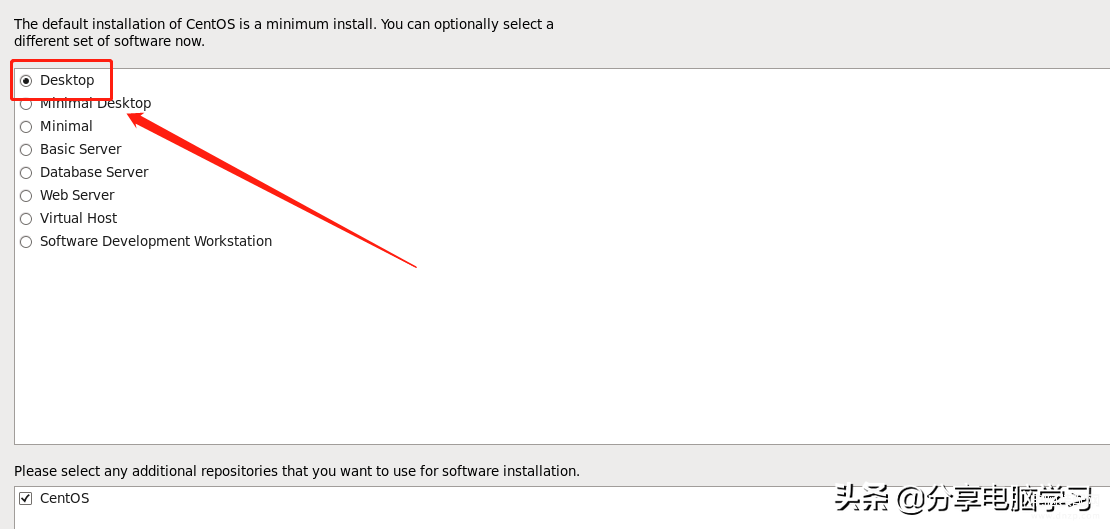
下面为上面对应的安装名称
桌面系统的安装
最小化桌面系统的安装
最小化安装
基本服务器的安装
数据库服务器的安装
WEB网页服务器的安装
虚拟主机的安装
软件开发工作站的安装
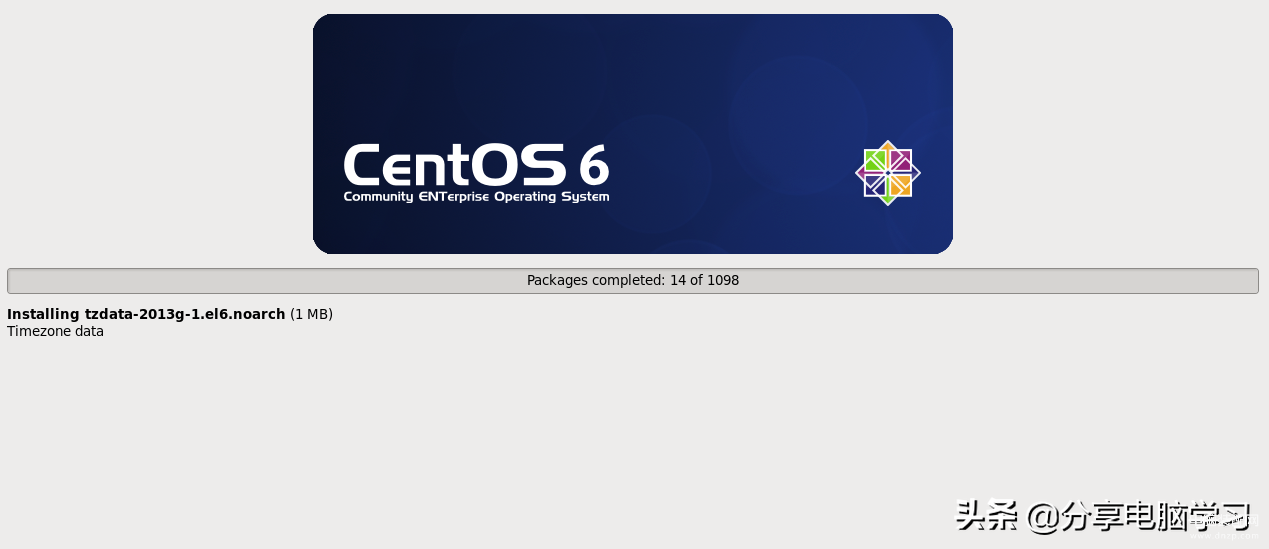
14.确认上述的所有配置都正确以后,就可以开始进行安装了,如果配置有错误,可以选择"上一步"回退到有问题的地方。安装过程中,有相应信息的显示,整个过程根据机器配置的高低大约需要10 至 30分钟左右